
はじめに
Spring Bootを使うと、最小限の設定でWebアプリケーションを素早く開発できます。
今回はその中でも、学習用として最もシンプルな構成である 「Spring Boot + H2データベース + Thymeleaf」 を使って、
ランチ情報を管理するCRUDアプリ(登録・一覧・更新・削除)を作成してみましょう。
このチュートリアルを通して、以下のポイントを学ぶことができます。
- Spring BootによるWebアプリの基本構成
- H2データベースを使ったデータ永続化(組み込みDBの利用)
- ThymeleafによるHTMLテンプレートとの連携
- コントローラ、リポジトリ、エンティティの役割と関係
環境構築からCRUDの実装までを通して、Spring Bootアプリ開発の流れを一通り体験できます!
プロジェクトの作成
- エクリプスにて新規 > Spring Starter project(名前はLunchApp)
- Build ToolにMaven
- 以下の項目にチェックを入れてプロジェクト立ち上げる
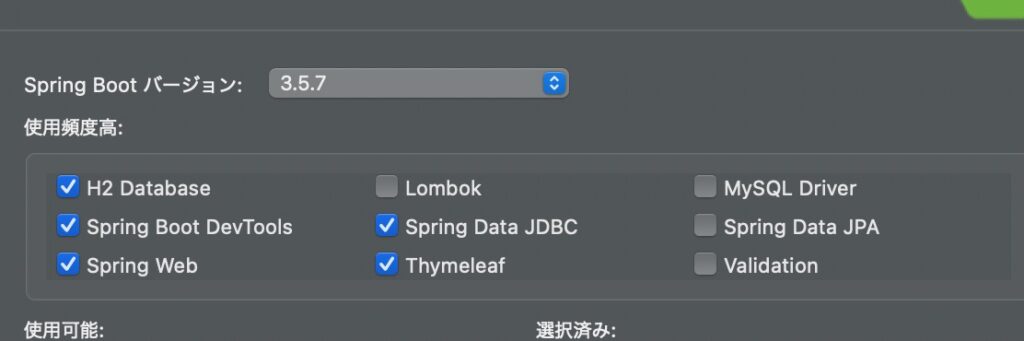
- 各項目の詳細は以下
| チェック項目 | 実際のスターター名 | 役割 |
|---|---|---|
| H2 Database | com.h2database:h2 | 組み込みDB |
| Spring Boot DevTools | spring-boot-devtools | 自動リロードなどの開発支援 |
| Spring Web | spring-boot-starter-web | MVC構築(Tomcat含む) |
| Spring Data JDBC | spring-boot-starter-data-jdbc | JDBCによるデータアクセス |
| Thymeleaf | spring-boot-starter-thymeleaf | HTMLテンプレートエンジン |
テーブルの作成
今回は学習用アプリのため、DBはメモリ上に作成しデータの永続化は行わない。(再起動を行うたびに初期データ3件の状態で始まる)
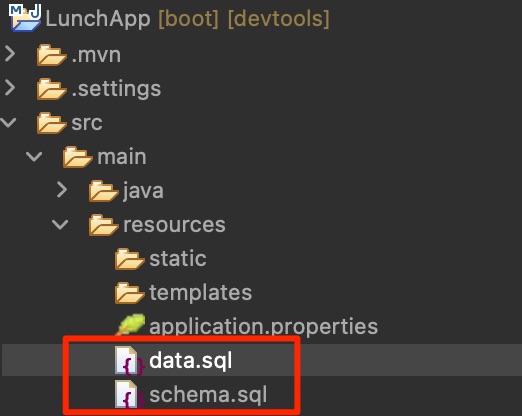
resourcesフォルダの直下に以下の2枚のファイルを作成する
- schema.sql
CREATE TABLE lunch (
  id INT PRIMARY KEY AUTO_INCREMENT,
  shop VARCHAR(30),
  menu VARCHAR(30)
);- data.sql
INSERT INTO lunch (shop, menu) VALUES
('subway', 'チリチキン'),
('はなまる', 'かけうどん(小)'),
('吉野家', '牛丼(並)');
Entityクラスの作成
先ほど作成したテーブル lunches に対応するエンティティクラスを作成する。
demoフォルダを右クリック新規クラス > Lunchクラスを作成する
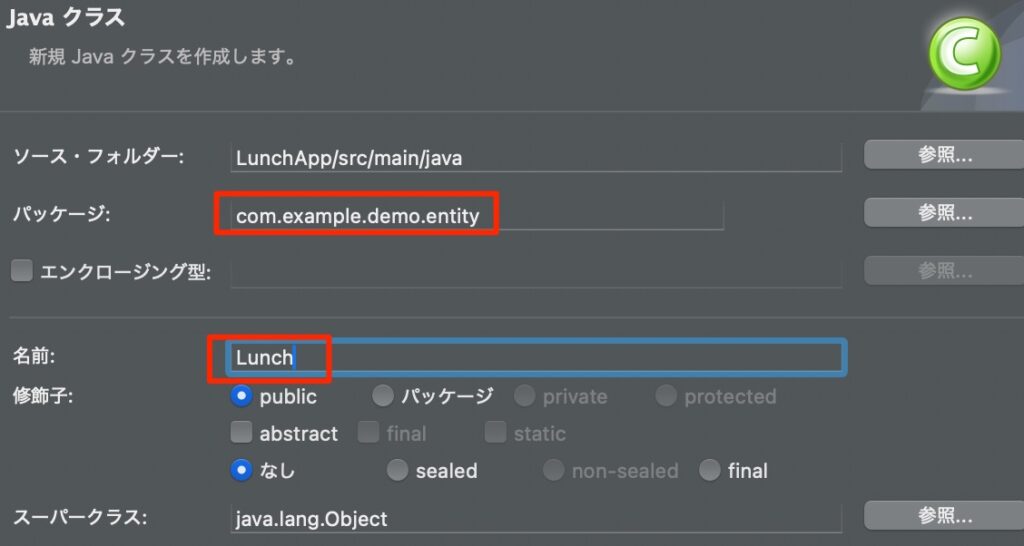
Lunch.javaの内容は以下
package com.example.demo.entity;

import org.springframework.data.annotation.Id;

public class Lunch {
	@Id
    private int id;
    private String shop;
    private String menu;

    public int getId() {
        return id;
    }
    public void setId(int id) {
        this.id = id;
    }
    public String getShop() {
        return shop;
    }
    public void setShop(String shop) {
        this.shop = shop;
    }
    public String getMenu() {
        return menu;
    }
    public void setMenu(String menu) {
        this.menu = menu;
    }
}
Spring Data JDBCでは、テーブル名とクラス名、カラム名とフィールド名が自動的に対応するため、
特別なアノテーション指定(@Table, @Columnなど)は不要である。
Repositoryの作成
com.example.demo.repository.LunchRepositoryインターフェイスを作成する
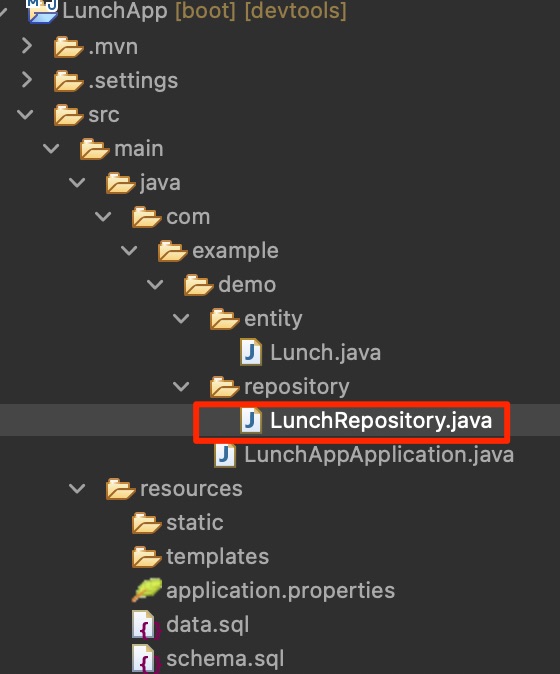
内容は以下
package com.example.demo.repository;

import org.springframework.data.repository.CrudRepository;

import com.example.demo.entity.Lunch;

public interface LunchRepository extends CrudRepository<Lunch,Integer>{

}
Controllerの作成
- com.example.demo.controller.LunchController.javaを作成
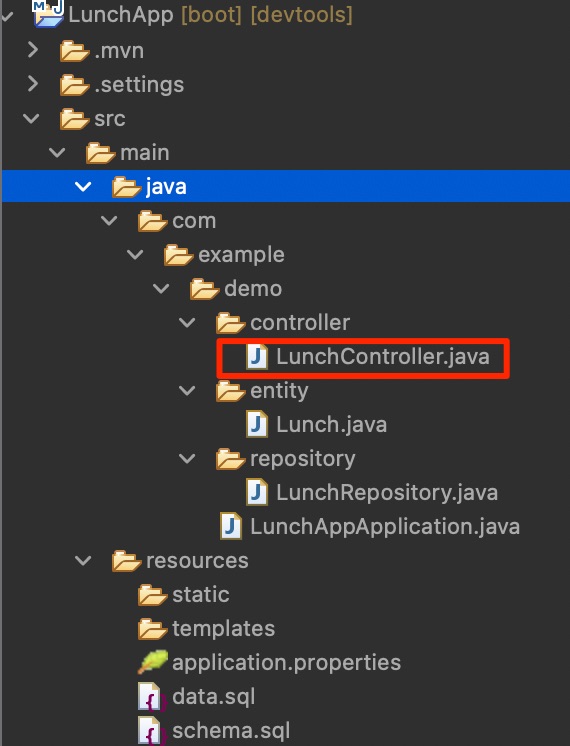
- 内容は以下
package com.example.demo.controller;

import org.springframework.stereotype.Controller;
import org.springframework.ui.Model;
import org.springframework.web.bind.annotation.GetMapping;

import com.example.demo.repository.LunchRepository;

@Controller
public class LunchController {
	private final LunchRepository lunchRepository;

	public LunchController(LunchRepository lunchRepository) {
		this.lunchRepository=lunchRepository;
	}
	//一覧
	@GetMapping("/lunches")
	public String list(Model model) {
		model.addAttribute("lunches",lunchRepository.findAll());
		return "lunch/list";
	}

}
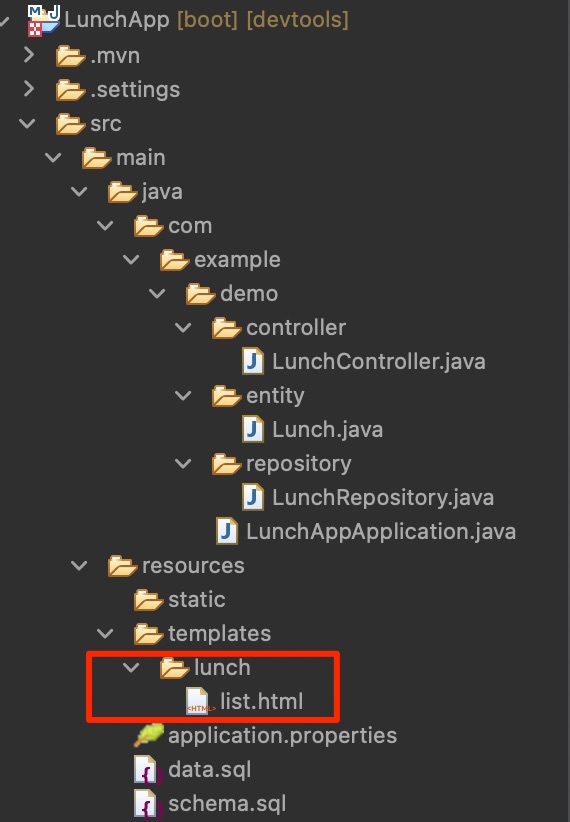
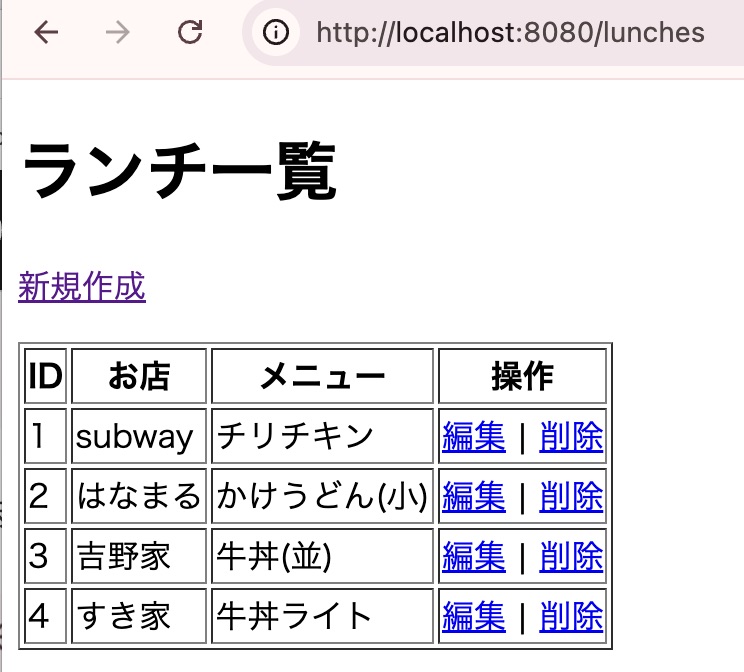
View(list.html)の作成
- src/main/resources/templates/lunch/list.htmlを作成
- 内容は以下
<!DOCTYPE html>
<html xmlns:th="http://www.thymeleaf.org">
<head>
    <meta charset="UTF-8">
    <title>ランチ一覧</title>
</head>
<body>
    <h1>ランチ一覧</h1>

    <p>
        <a th:href="@{'/lunches/new'}">新規作成</a>
    </p>

    <table border="1">
        <tr>
            <th>ID</th>
            <th>お店</th>
            <th>メニュー</th>
            <th>操作</th>
        </tr>
        <tr th:each="lunch : ${lunches}">
            <td th:text="${lunch.id}"></td>
            <td th:text="${lunch.shop}"></td>
            <td th:text="${lunch.menu}"></td>
            <td>
                <a th:href="@{'/lunches/edit/' + ${lunch.id}}">編集</a> |
                <a th:href="@{'/lunches/delete/' + ${lunch.id}}"
                   onclick="return confirm('削除してよろしいですか?');">
                   削除
                </a>
            </td>
        </tr>
    </table>
</body>
</html>
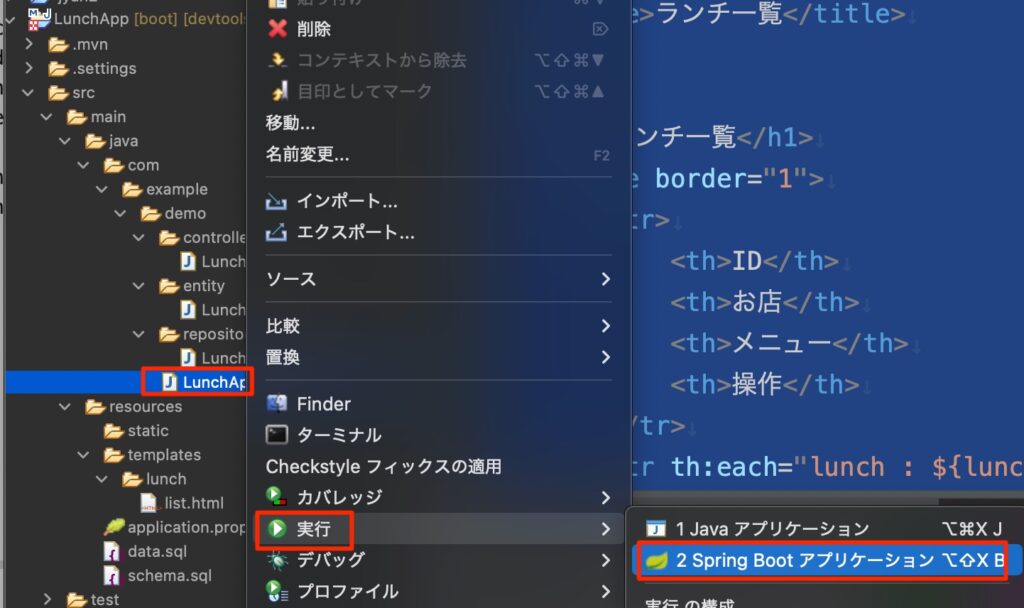
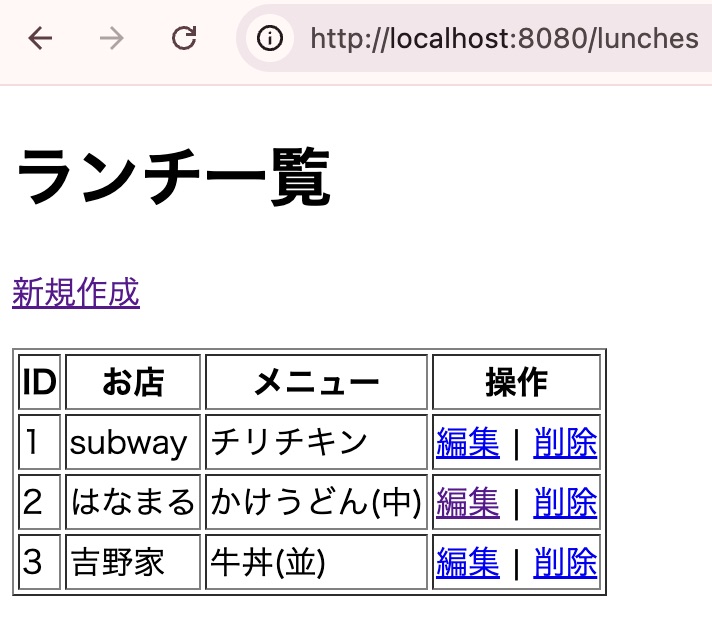
アプリの実行
いよいよ実行してみよう。
あらかじめ作成されている、LunchAppApplication.javaを右クリック>実行>Srping Bootアプリケーション
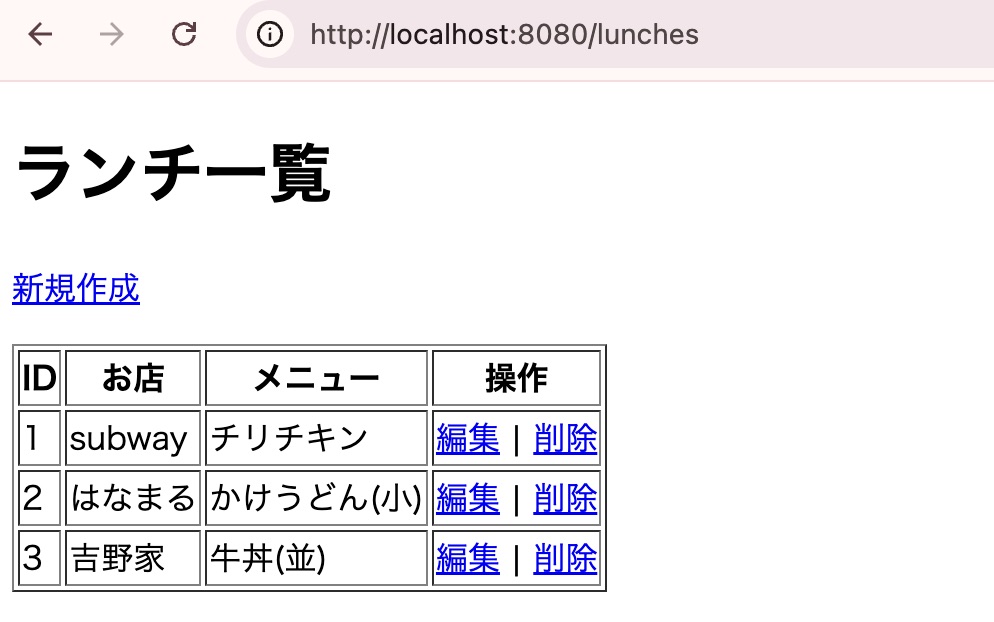
無事に起動したらブラウザから以下のURLを入力
localhost:8080/lunches
以下のように表示されたら成功だ!
新規作成処理
データを新規に挿入する処理を作成する。
LunchControllerに以下を追記する
package com.example.demo.controller;

import org.springframework.stereotype.Controller;
import org.springframework.ui.Model;
import org.springframework.web.bind.annotation.GetMapping;
import org.springframework.web.bind.annotation.ModelAttribute;
import org.springframework.web.bind.annotation.PostMapping;

import com.example.demo.entity.Lunch;
import com.example.demo.repository.LunchRepository;

@Controller
public class LunchController {
    private final LunchRepository lunchRepository;

    public LunchController(LunchRepository lunchRepository) {
        this.lunchRepository = lunchRepository;
    }

    // 一覧
    @GetMapping("/lunches")
    public String list(Model model) {
        model.addAttribute("lunches", lunchRepository.findAll());
        return "lunch/list";
    }

    // 新規作成フォーム
    @GetMapping("/lunches/new")
    public String newLunch(Model model) {
        model.addAttribute("lunch", new Lunch());
        return "lunch/new";
    }

    // 登録処理
    @PostMapping("/lunches")
    public String create(@ModelAttribute Lunch lunch) {
        lunchRepository.save(lunch);
        return "redirect:/lunches";
    }
}
new.htmlの作成
- src/main/resources/templates/lunch/new.htmlを作成
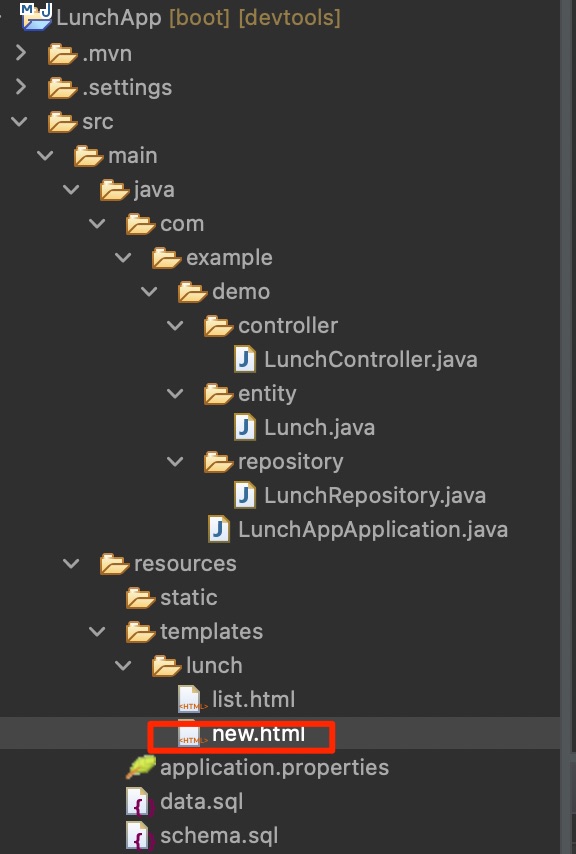
- 内容は以下
<!DOCTYPE html>
<html xmlns:th="http://www.thymeleaf.org">
<head>
    <meta charset="UTF-8">
    <title>新規ランチ作成</title>
</head>
<body>
    <h1>新規ランチ作成</h1>

    <form th:action="@{/lunches}" th:object="${lunch}" method="post">
        <p>お店:<input type="text" th:field="*{shop}"></p>
        <p>メニュー:<input type="text" th:field="*{menu}"></p>
        <p><button type="submit">登録</button></p>
    </form>

    <p><a th:href="@{/lunches}">戻る</a></p>
</body>
</html>
新規作成ボタンを押して、データを入力して登録ボタンを押そう
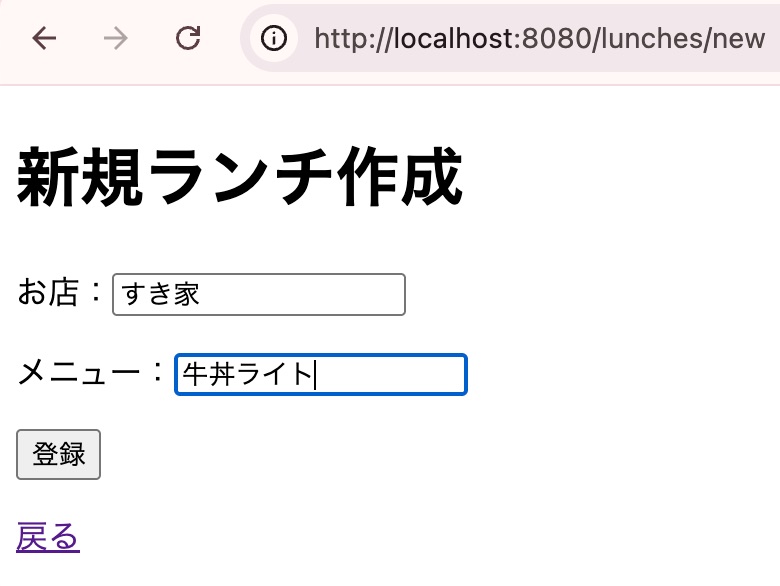
データが追加されれば成功だ
更新処理
LunchControllerに以下を追記する
package com.example.demo.controller;

import org.springframework.stereotype.Controller;
import org.springframework.ui.Model;
import org.springframework.web.bind.annotation.GetMapping;
import org.springframework.web.bind.annotation.ModelAttribute;
import org.springframework.web.bind.annotation.PathVariable;
import org.springframework.web.bind.annotation.PostMapping;

import com.example.demo.entity.Lunch;
import com.example.demo.repository.LunchRepository;

@Controller
public class LunchController {
    private final LunchRepository lunchRepository;

    public LunchController(LunchRepository lunchRepository) {
        this.lunchRepository = lunchRepository;
    }

    // 一覧
    @GetMapping("/lunches")
    public String list(Model model) {
        model.addAttribute("lunches", lunchRepository.findAll());
        return "lunch/list";
    }

    // 新規作成フォーム
    @GetMapping("/lunches/new")
    public String newLunch(Model model) {
        model.addAttribute("lunch", new Lunch());
        return "lunch/new";
    }

    // 登録処理
    @PostMapping("/lunches")
    public String create(@ModelAttribute Lunch lunch) {
        lunchRepository.save(lunch);
        return "redirect:/lunches";
    }

    // 編集フォーム表示
    @GetMapping("/lunches/edit/{id}")
    public String edit(@PathVariable Integer id, Model model) {
        Lunch lunch = lunchRepository.findById(id).orElseThrow();
        model.addAttribute("lunch", lunch);
        return "lunch/edit";
    }

    // 更新処理
    @PostMapping("/lunches/update")
    public String update(@ModelAttribute Lunch lunch) {
        lunchRepository.save(lunch); // idが存在すればUPDATE
        return "redirect:/lunches";
    }

}
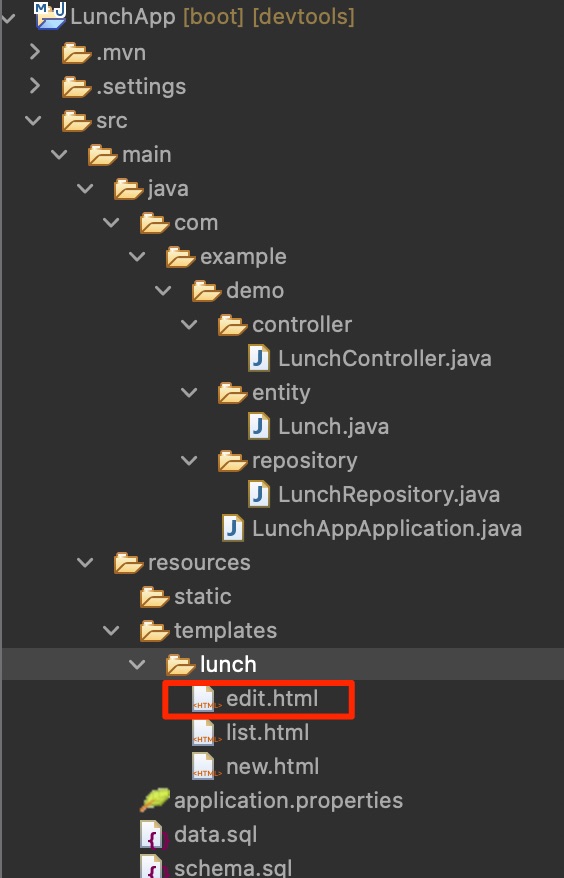
edit.htmlの作成
src/main/resources/templates/lunch/edit.htmlを作成
<!DOCTYPE html>
<html xmlns:th="http://www.thymeleaf.org">
<head>
  <meta charset="UTF-8">
  <title>ランチ編集</title>
</head>
<body>
  <h1>ランチ編集</h1>

  <form th:action="@{/lunches/update}" th:object="${lunch}" method="post">
      <!-- 重要:idをhiddenで送信 -->
      <input type="hidden" th:field="*{id}">

      <p>お店:<input type="text" th:field="*{shop}"></p>
      <p>メニュー:<input type="text" th:field="*{menu}"></p>

      <p><button type="submit">更新</button></p>
  </form>

  <p><a th:href="@{/lunches}">戻る</a></p>
</body>
</html>
- 編集ボタンを押してみよう
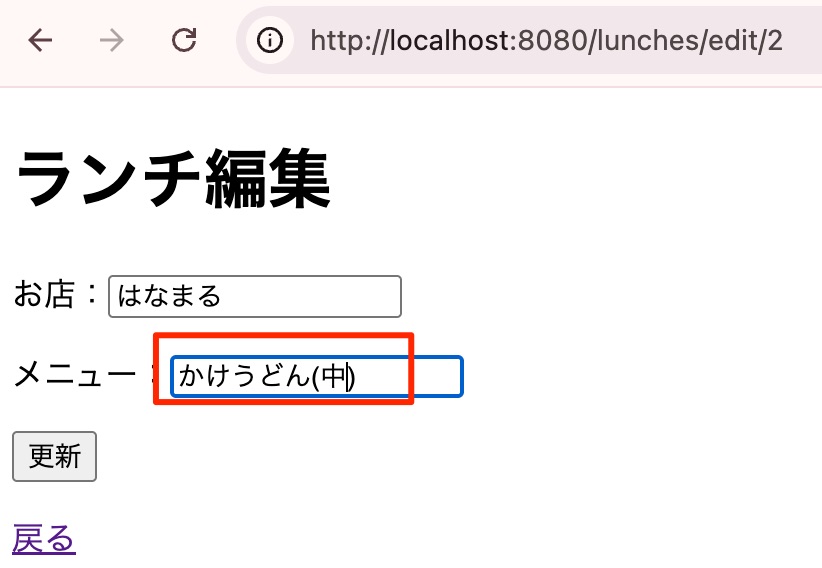
- 復元されるので編集をして更新ボタンを押す。データが更新されれば成功だ
削除処理
LunchControllerに以下を追記する。
package com.example.demo.controller;

import org.springframework.stereotype.Controller;
import org.springframework.ui.Model;
import org.springframework.web.bind.annotation.GetMapping;
import org.springframework.web.bind.annotation.ModelAttribute;
import org.springframework.web.bind.annotation.PathVariable;
import org.springframework.web.bind.annotation.PostMapping;

import com.example.demo.entity.Lunch;
import com.example.demo.repository.LunchRepository;

@Controller
public class LunchController {
    private final LunchRepository lunchRepository;

    public LunchController(LunchRepository lunchRepository) {
        this.lunchRepository = lunchRepository;
    }

    // 一覧
    @GetMapping("/lunches")
    public String list(Model model) {
        model.addAttribute("lunches", lunchRepository.findAll());
        return "lunch/list";
    }

    // 新規作成フォーム
    @GetMapping("/lunches/new")
    public String newLunch(Model model) {
        model.addAttribute("lunch", new Lunch());
        return "lunch/new";
    }

    // 登録処理
    @PostMapping("/lunches")
    public String create(@ModelAttribute Lunch lunch) {
        lunchRepository.save(lunch);
        return "redirect:/lunches";
    }

    // 編集フォーム表示
    @GetMapping("/lunches/edit/{id}")
    public String edit(@PathVariable Integer id, Model model) {
        Lunch lunch = lunchRepository.findById(id).orElseThrow();
        model.addAttribute("lunch", lunch);
        return "lunch/edit";
    }

    // 更新処理
    @PostMapping("/lunches/update")
    public String update(@ModelAttribute Lunch lunch) {
        lunchRepository.save(lunch); // idが存在すればUPDATE
        return "redirect:/lunches";
    }

    // 削除処理
    @GetMapping("/lunches/delete/{id}")
    public String delete(@PathVariable Integer id) {
        lunchRepository.deleteById(id);
        return "redirect:/lunches";
    }

}
削除してみよう。データが削除されるはずだ。
完成!
これで Spring Boot + H2データベース + Thymeleaf を使った基本的なCRUDアプリが完成しました。
本チュートリアルを通して、Spring Bootの基本的な構成とWebアプリ開発の流れを理解できたと思います。
次のステップとしては、以下のような拡張もおすすめです。
- MySQLやPostgreSQLなどの外部DBに接続してみる
- バリデーション(入力チェック)を追加してみる
- Bootstrapで画面デザインを整える
今回の内容が、Spring Bootを使ったWebアプリ開発の第一歩になれば幸いです!
コメント