
SQLiteを使ってデータの保存をしてみよう。
プロジェクトの作成
1.新規プロジェクトとしてPrefAppを作成する。
Assetsフォルダの作成
2.新しいプロジェクトを作成したらまずassetsフォルダを作ろう。
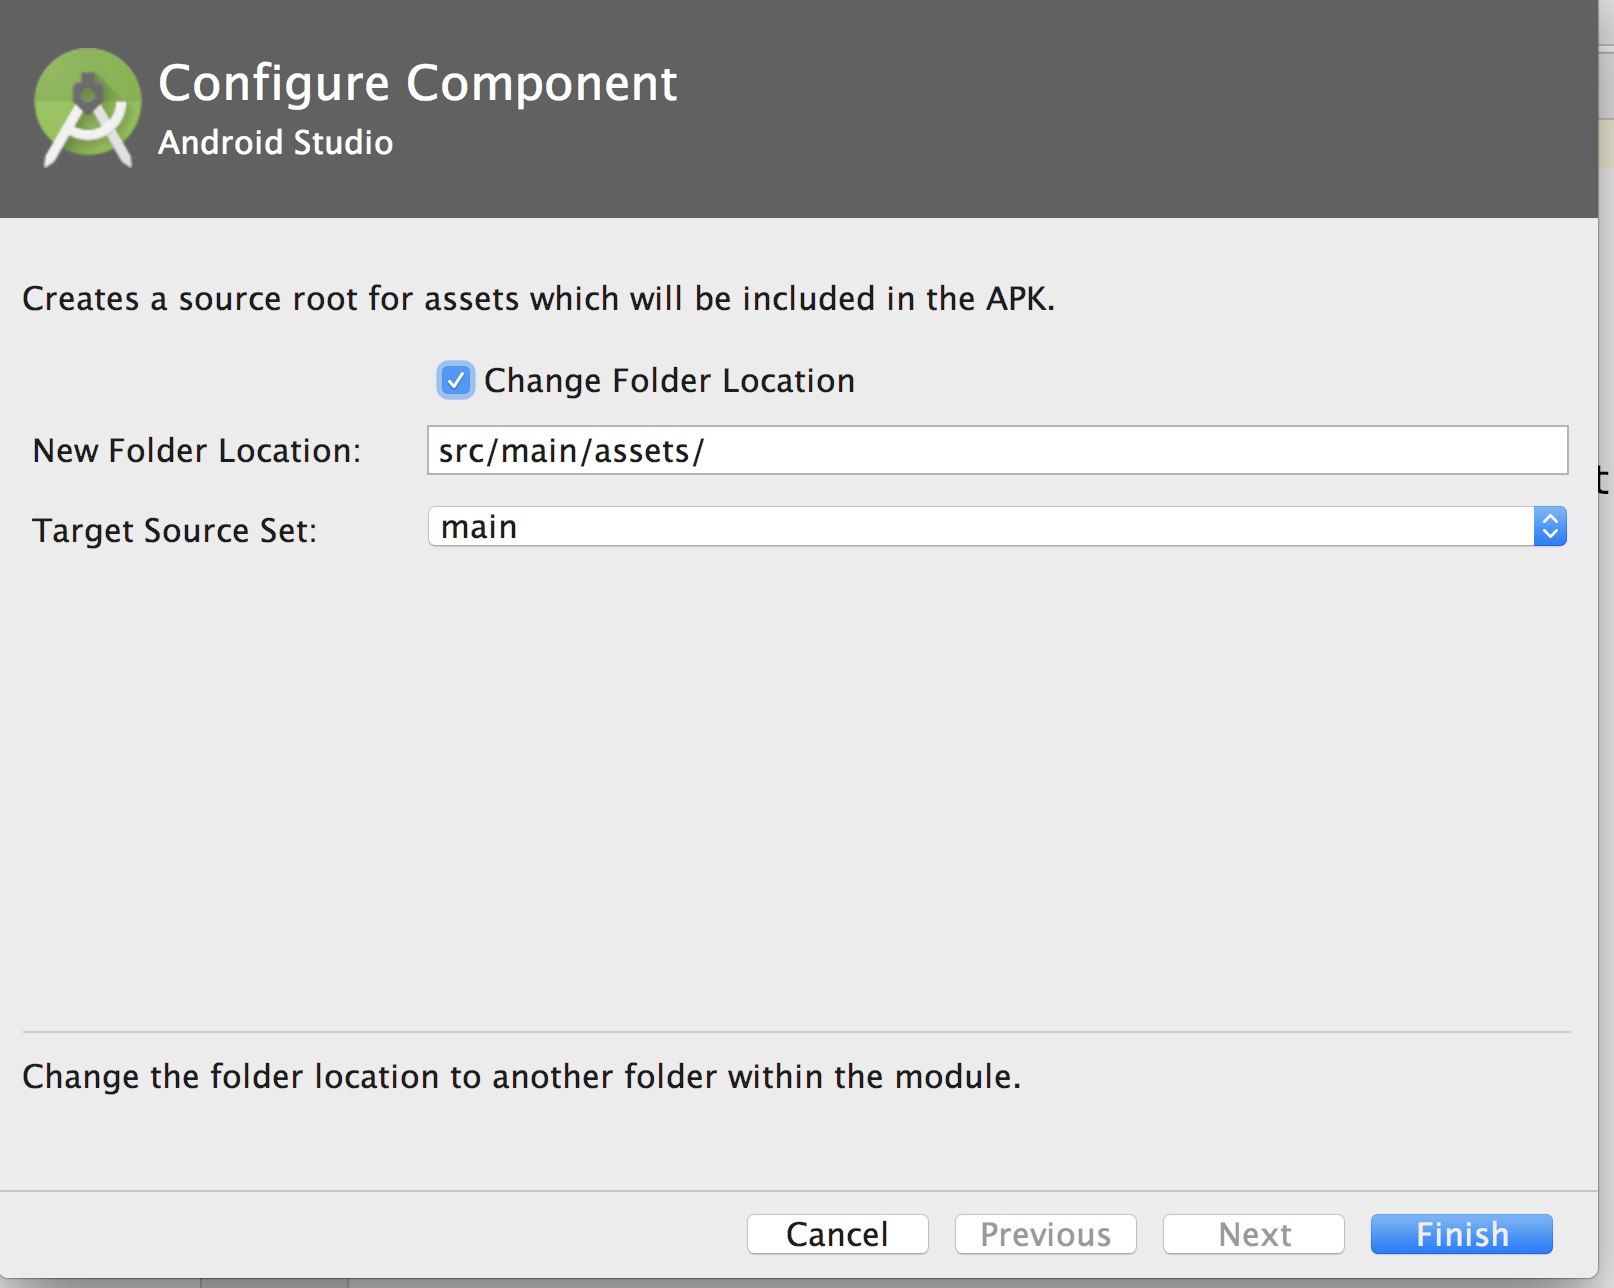
appをオプションクリックしてNew->Folder->AssetsFolderを選択する。

3.Assetsフォルダはsrc/main/の直下に配置されなければならない。そこに置くか?というダイアログがでるのでチェックしてfinish
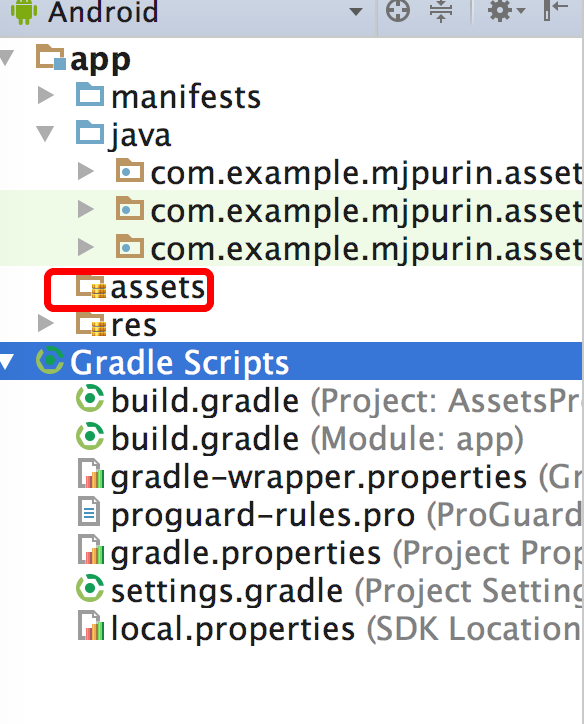
4.フォルダが配置されたことを確認
5.今回はcsvファイルを元にデータベースを作成する。以下のファイルをダウンロードしAssetsフォルダに配置する。
レイアウトの作成
6.activity_main.xmlを以下のように編集する。
<RelativeLayout xmlns:android="http://schemas.android.com/apk/res/android"
    xmlns:tools="http://schemas.android.com/tools"
    android:layout_width="match_parent"
    android:layout_height="match_parent"

    tools:context=".MainActivity" >

    <LinearLayout
        android:id="@+id/linearLayout1"
        android:layout_width="match_parent"
        android:layout_height="wrap_content"
        android:background="@android:drawable/btn_default"
        android:orientation="vertical" >

        <LinearLayout
            android:layout_width="match_parent"
            android:layout_height="wrap_content" >

            <TextView
                android:id="@+id/textView1"
                android:layout_width="wrap_content"
                android:layout_height="match_parent"
                android:background="@android:drawable/btn_default"
                android:gravity="center"
                android:text="県番号"
                android:textAppearance="?android:attr/textAppearanceLarge" />

            <LinearLayout
                android:layout_width="match_parent"
                android:layout_height="match_parent"
                android:orientation="vertical" >

                <ImageButton
                    android:id="@+id/imageButton1"
                    android:layout_width="match_parent"
                    android:layout_height="wrap_content"
                    android:background="@android:drawable/btn_default"
                    android:onClick="btUp"
                    android:src="@android:drawable/arrow_up_float" />

                <TextView
                    android:id="@+id/tvId"
                    android:layout_width="match_parent"
                    android:layout_height="wrap_content"
                    android:background="@android:drawable/edit_text"
                    android:gravity="center"
                    android:text="1"
                    android:textSize="32sp" />

                <ImageButton
                    android:id="@+id/imageButton2"
                    android:layout_width="match_parent"
                    android:layout_height="wrap_content"
                    android:background="@android:drawable/btn_default"
                    android:onClick="btDown"
                    android:src="@android:drawable/arrow_down_float" />
            </LinearLayout>
        </LinearLayout>

        <Button
            android:id="@+id/button1"
            android:layout_width="match_parent"
            android:layout_height="wrap_content"
            android:background="@android:drawable/btn_default"
            android:onClick="btSearch"
            android:text="GO" />
    </LinearLayout>

    <TextView
        android:id="@+id/tvResult"
        android:layout_width="match_parent"
        android:layout_height="match_parent"
        android:layout_alignLeft="@+id/linearLayout1"
        android:layout_below="@+id/linearLayout1"
        android:background="@android:drawable/alert_dark_frame"
        android:gravity="center"
        android:text=""
        android:textColor="@android:color/white"
        android:textSize="20sp" />

</RelativeLayout>
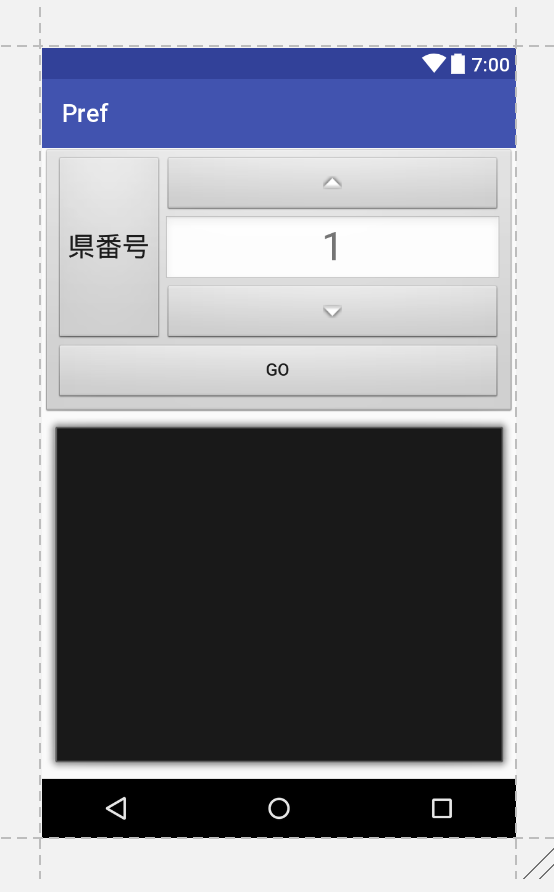
7.以下のようになればOKだ。
クラスの作成
8.Pref.javaを以下のように作成する。(パッケージを環境に合わせて付与すること)
package com.example.xxxxxx;
public class Pref {
    public int id;
    public String name;
    public String cap;

    public Pref(int id,String name,String cap){
        this.id=id;
        this.name=name;
        this.cap=cap;
    }

    public String toString(){
        return String.format("県名:%s\n県庁所在地%s", name,cap);
    }
}
DAOの作成
9.PrefDAO.javaを以下のように作成
import android.database.Cursor;
import android.database.sqlite.SQLiteDatabase;
import android.database.sqlite.SQLiteException;
import android.database.sqlite.SQLiteStatement;

import java.util.List;

public class PrefDAO {
    private SQLiteDatabase db;

    public void setDb(SQLiteDatabase db) {
        this.db = db;
    }
    //prefsテーブル作成
    public void createTable() {
        String sql = "CREATE TABLE prefs( " +
                "id INTEGER, " +
                "name TEXT," +
                "cap TEXT );";
        db.execSQL(sql);
    }
    //リストを元にDB挿入
    public void createData(List<Pref> list) {
        try {
            SQLiteStatement stt =
                    this.db.compileStatement("INSERT INTO prefs VALUES(?,?,?)");
            //トランザクション開始
            this.db.beginTransaction();
            for (Pref p : list) {
                stt.bindLong(1, p.id);
                stt.bindString(2, p.name);
                stt.bindString(3, p.cap);
                stt.executeInsert();
            }
            //ここまでくれば成功なので成功フラグを立てる
            this.db.setTransactionSuccessful();
        }catch(SQLiteException e){
            e.printStackTrace();
        }finally{
            //成功フラグが立っていればここでコミット(確定)させる。
            db.endTransaction();
        }

    }
    //idからPrefインスタンスを一つ返却
    public Pref findOne(int id){
        String sql="SELECT * FROM prefs WHERE id=?";
        String[] param={String.valueOf(id)};
        Cursor cursor=this.db.rawQuery(sql,param);
        //moveToFirst()は1件目のレコードに移動。0件ならばfalse;
        if(cursor.moveToFirst()){
            String name=cursor.getString(cursor.getColumnIndex("name"));
            String cap=cursor.getString(cursor.getColumnIndex("cap"));
           return new Pref(id,name,cap);
        }else{
            return null;
        }

    }
    //テーブル削除
    public void dropTable(){
        String sql = "DROP TABLE IF EXISTS prefs";
        db.execSQL(sql);
    }
}
SQLiteOpenHelperの作成
10.SQLiteOpenHelperクラスを継承したOpenHelper.javaを以下のように作成する。
import android.content.Context;
import android.content.res.AssetManager;
import android.database.sqlite.SQLiteDatabase;
import android.database.sqlite.SQLiteOpenHelper;

import java.io.BufferedReader;
import java.io.IOException;
import java.io.InputStream;
import java.io.InputStreamReader;
import java.util.ArrayList;
import java.util.List;


public class OpenHelper extends SQLiteOpenHelper {
    //csvファイル名
    private String csv="prefecture.csv";
    //assetsにアクセスするのに必要(コンスラクタで受け取る)
    private Context context;
    //DAO
    private PrefDAO dao;
    //コンストラクタ
    public OpenHelper(Context context, String name, SQLiteDatabase.CursorFactory factory, int version) {
        super(context, name, factory, version);
        this.context=context;
        //DAOをnew
        dao=new PrefDAO();
    }
    //コンストラクタで指定されたDBがなかった時に通る。
    @Override
    public void onCreate(SQLiteDatabase db) {
        //DAOにdbをセット
        dao.setDb(db);
        //テーブル作成
        dao.createTable();
        //csvを渡してリストを得る
        List<Pref> list=getListFromCSV(csv);
        //テーブルにデータ挿入
        dao.createData(list);

    }
    //dbのバージョンが上がった時に通る。
    @Override
    public void onUpgrade(SQLiteDatabase db, int oldVersion, int newVersion) {
        dao.setDb(db);
        //一度破棄する。
        dao.dropTable();
        this.onCreate(db);
    }
    //Assetsにあるcsvファイルからリストを返却するメソッド
    private List<Pref> getListFromCSV(String csv){
        List<Pref> list=new ArrayList<>();
        //AssetManager取得
        AssetManager am=context.getAssets();
        try {
            InputStream is=am.open(csv);
            InputStreamReader isr=new InputStreamReader(is);
            BufferedReader br=new BufferedReader(isr);
            String line;
            while((line=br.readLine()) !=null){
                String[] data=line.split(",");
                Pref pref=new Pref(Integer.parseInt(data[0]),data[1],data[2]);
                list.add(pref);
            }
            br.close();
        } catch (IOException e) {
            e.printStackTrace();
        }
        return list;

    }
}
MainActivity
11.MainActivity.javaを以下のように作成する。
import android.database.sqlite.SQLiteDatabase;
import android.os.Bundle;
import android.support.v7.app.AppCompatActivity;
import android.view.View;
import android.widget.TextView;

public class MainActivity extends AppCompatActivity {
    static final int MIN=1,MAX=47;
    TextView tvId,tvResult;
    PrefDAO dao;
    int id=1;
    @Override
    protected void onCreate(Bundle savedInstanceState) {
        super.onCreate(savedInstanceState);
        setContentView(R.layout.activity_main);
        tvId=(TextView)findViewById(R.id.tvId);
        tvResult=(TextView)findViewById(R.id.tvResult);
        OpenHelper helper=new OpenHelper(this,"pref.db",null,1);
        SQLiteDatabase db=helper.getWritableDatabase();
        dao=new PrefDAO();
        dao.setDb(db);
    }
    public void btUp(View v){
        id=id==MAX? MIN:++id;
        tvId.setText(String.valueOf(id));
    }
    public void btDown(View v){
        id=id==MIN? MAX:--id;
        tvId.setText(String.valueOf(id));
    }
    public void btSearch(View v){
        tvResult.setText(dao.findOne(id).toString());
    }
}
実行
12.実行してみよう。県番号を選んでGOボタンを押して、県庁所在地が表示されれば成功だ。
コメント