
準備
1.以下のファイルをダウンロードし、好きな場所に解凍する。
2.先ほどダウロードしたフォルダはjQueryを用いたWebサイト開発に最適な構成である。これを複製していくことによって新しいプロジェクトを作成する。Templateフォルダを複製しフォルダ名をLesson02としよう。
透明度による画像の操作
3.下の画像をダウンロードしimagesフォルダの中に置く。
3.Lesson02にあるindex.htmlを以下のように編集する。
<!DOCTYPE html>
<html>
    <head>
        <meta charset="utf-8">
        <title>タイトル</title>
        <meta name="viewport" content="width=device-width, initial-scale=1">
        <link rel="stylesheet" href="css/normalize.css">
        <link rel="stylesheet" href="css/main.css">
    </head>
    <body>
      <!-- ここにコンテンツ -->
      <div id="container">

        <p class="image"><img src="images/cat.jpg"><strong>猫ちゃん</strong></p>

      </div>
      <script src="js/vendor/jquery-1.12.4.min.js"></script>
      <script src="js/vendor/jquery-ui-1.12.1.min.js"></script>
      <script src="js/vendor/jquery.easing.1.3.js"></script>
      <script src="js/main.js"></script>
    </body>
</html>
4.main.cssを以下のように編集する。
#container{
  width:650px;
  margin:0 auto;
}
.image{
  overflow: hidden;
  position: relative;
}
.image strong{
  position:absolute;
  display: block;
  z-index:1;
  bottom:2px;
  width:630px;
  height:30px;
  background:rgba(0,0,0,0.5);
  text-align:left;
  padding:10px ;
  line-height:30px;
  opacity: 0;
  color:white;
}
5.保存したらブラウザで見てみよう。cssでキャプション要素(strong)の透明度(opacity)を0にしているのでキャプションが非表示になっている。
6.main.jsを以下のように変更する。
$(function(){
  $('.image').on('mouseover',function(){
    $(this).find('strong').stop(true).animate({opacity:1},400);
  })
  .on('mouseout',function(){
    $(this).find('strong').stop(true).animate({opacity:0},400);
  });
});
7.実行してみよう。画像にマウスをのせるとキャプションが表示され、画像からマウスを外すとキャプションが非表示になる。
[解説]
find()
findは子孫要素から指定の要素を取得する。
stop(true)
animateの前でこれを指定することによってAnimationのキャンセルができるようになる。今回の場合はマウスを乗せてすぐ離した時に、直前のアニメーションがすぐキャンセルされる。
移動による要素の操作
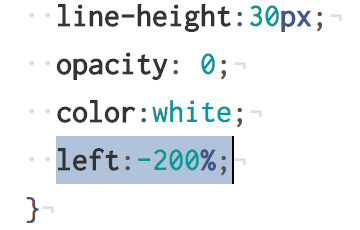
7.main.cssを以下のように変更する。「left:-200%;」を一行追加する。
#container{
  width:650px;
  margin:0 auto;
}
.image{
  overflow: hidden;
  position: relative;
}
.image strong{
  position:absolute;
  display: block;
  z-index:1;
  bottom:2px;
  width:630px;
  height:30px;
  background:rgba(0,0,0,0.5);
  text-align:left;
  padding:10px ;
  line-height:30px;
  opacity: 0;
  color:white;
  left:-200%;
}
8.main.jsを以下のように変更する。
$(function(){
  $('.image').on('mouseover',function(){
    $(this).find('strong').stop(true).animate({opacity:1,left:'0%'},400);
  }).on('mouseout',function(){
    $(this).find('strong').stop(true).animate({opacity:0,left:'-200%'},400);
  });
});
9.実行してみよう。画像にマウスをのせるとキャプションがスライドインするようになった。cssでpositionをabsoluteにしてleft要素によって開始位置を操作している。スライダーをはじめjQueryではとてもよく使うテクニックなので覚えておこう。
each
10.要素の下にメニューを作ろう。index.htmlを以下のように編集する。
<!DOCTYPE html>
<html>
    <head>
        <meta charset="utf-8">
        <title>タイトル</title>
        <meta name="viewport" content="width=device-width, initial-scale=1">
        <link rel="stylesheet" href="css/normalize.css">
        <link rel="stylesheet" href="css/main.css">
    </head>
    <body>
        <!-- ここにコンテンツ -->
        <div id="container">

        <p class="image"><img src="images/cat.jpg"><strong>猫ちゃん</strong></p>
        <!--ここを追記-->
        <ul id="menus">
          <li>Menu1</li>
          <li>Menu2</li>
          <li>Menu3</li>
          <li>Menu4</li>
        </ul>
        <!-------------->

      </div>
      <script src="js/vendor/jquery-1.12.4.min.js"></script>
      <script src="js/vendor/jquery-ui-1.12.1.min.js"></script>
      <script src="js/vendor/jquery.easing.1.3.js"></script>
      <script src="js/main.js"></script>
    </body>
</html>
11.main.cssを以下のように編集
#container{
  width:650px;
  margin:0 auto;
}
.image{
  overflow: hidden;
  position: relative;
}
.image strong{
  position:absolute;
  display: block;
  z-index:1;
  bottom:2px;
  width:630px;
  height:30px;
  background:rgba(0,0,0,0.5);
  text-align:left;
  padding:10px ;
  line-height:30px;
  opacity: 0;
  color:white;
  left:-200%;
}
/*ここから下を追記*/
#menus{

  position:relative;
  list-style-type:none;
}

#menus li{
  position:absolute;
  width:100px;
  height:100px;
  border-radius:50%;
  background:#3999dd;
  color:white;
  line-height: 100px;
  font-size:20px;
  text-align: center;
}
12.main.jsを以下のように編集
$(function(){
  $('.image').on('mouseover',function(){
    $(this).find('strong').stop(true).animate({opacity:1,left:'0%'},400);
  }).on('mouseout',function(){
    $(this).find('strong').stop(true).animate({opacity:0,left:'-200%'},400);
  });
//以下を追記
  $('#menus li').each(function(i){
    $(this).css({top:(i%2==0? -5 :5)+"px",left:i*110+"px"})
    .on('mouseover',function(){
      $(this).animate({width:'110px',height:'110px',lineHeight:'110px'},200);
    })
    .on('mouseout',function(){
        $(this).animate({width:'100px',height:'100px',lineHeight:'100px'},200);
    });
  });
});
13.実行してみよう。ジグザグにボタンが配置され、ホバーするとボタンが大きくなることがわかる。
[解説]
each(function(i){})
今回$(‘#menus li’)で取得する要素は4つある。そのそれぞれの要素に処理を加えたい場合はeachが便利だ。引数にiを用いることでfunction内でiを用いた処理ができる。iは配列と同じく0から始まる。
コメント