データの変更
index.htmlの変更
まずは以下のようにindex.htmlに追記する
<!DOCTYPE html>
<html lang="ja">
<head>
  <meta charset="UTF-8">
  <meta name="viewport" content="width=device-width, initial-scale=1.0">
  <title>単語帳アプリ</title>
  <link rel="stylesheet" href="css/main.css">
  <script src="js/main.js" defer></script>
</head>
<body>
  <h1>単語帳</h1>
  <div id="form">
    <input type="text" id="word" placeholder="単語">
    <input type="text" id="meaning" placeholder="意味">
    <button id="addBtn">登録</button>
  </div>
  <p id="total">全0件</p>
  <table id="table">
    <thead>
      <tr>
        <th>単語</th>
        <th>意味</th>
        <th>操作</th>
      </tr>
    </thead>
    <tbody id="tbody">
      <!-- JavaScriptで動的に行を追加 -->
    </tbody>
  </table>

  <!-- 編集用ダイアログ -->
  <dialog id="editDialog">
    <form method="dialog">
      <h2>編集</h2>
      <label>
        単語:
        <input type="text" id="editWord">
      </label>
      <label>
        意味:
        <input type="text" id="editMeaning">
      </label>
      <div class="dialog-buttons">
        <button id="saveEditBtn">保存</button>
        <button value="cancel">キャンセル</button>
      </div>
    </form>
  </dialog>
</body>
</html>
実行してみよう。おや、要素を追加しているのに見た目が変わらない。。。
ポイント解説
編集用ダイアログの追加
(1)<dialog>タグの使用
<dialog id="editDialog">- HTML5で導入された新しい要素で、モーダルダイアログを実現するために使用します。
- この
<dialog>要素は、通常非表示状態になっており、JavaScriptで開閉を制御します。 id="editDialog"は、JavaScriptから特定のダイアログを操作するための識別子です。
(2)フォームの構造
<form method="dialog"><form>タグは、ユーザーが入力した内容を収集するために使用されています。method="dialog"は、ダイアログ内でフォームの送信を行う特殊な属性で、ダイアログを閉じる際の動作を簡単に制御できます。
(3)入力フィールドのラベルと入力欄
<label>
  単語:
  <input type="text" id="editWord">
</label>
<label>
  意味:
  <input type="text" id="editMeaning">
</label>
- 編集用の2つの入力フィールドを提供します。
- 単語を入力するための
<input>(id="editWord")。 - 意味を入力するための
<input>(id="editMeaning")。
- 単語を入力するための
<label>を使用して、入力欄に対応する説明文を明確にすることで、アクセシビリティが向上します。
(4)ボタンの配置
<div class="dialog-buttons">
  <button id="saveEditBtn">保存</button>
  <button value="cancel">キャンセル</button>
</div>
- 保存ボタン:
- ユーザーが編集した内容を保存するためのボタンです。
id="saveEditBtn"を指定しており、JavaScriptでこのボタンに処理を紐づけます。
- キャンセルボタン:
- ダイアログを閉じる役割を持っています。
value="cancel"とすることで、特にJavaScriptを追加せずとも、method="dialog"の仕組みでダイアログを閉じる動作が働きます。
main.jsの変更
以下のようにmain.jsを追記する
'use strict';

window.onload = () => {
  const wordInput = document.getElementById('word');
  const meaningInput = document.getElementById('meaning');
  const addBtn = document.getElementById('addBtn');
  const tbody = document.getElementById('tbody');
  const total = document.getElementById('total');

  let wordList = [];

  // 編集用ダイアログ関連
  const editDialog = document.getElementById('editDialog');
  const editWordInput = document.getElementById('editWord');
  const editMeaningInput = document.getElementById('editMeaning');
  const saveEditBtn = document.getElementById('saveEditBtn');
  let currentEditIndex = null;

  addBtn.addEventListener('click', () => {
    const word = wordInput.value.trim();
    const meaning = meaningInput.value.trim();

    if (word === '' || meaning === '') {
      alert('単語と意味を入力してください。');
      return;
    }

    wordList.push({ word, meaning });
    updateTable();

    wordInput.value = '';
    meaningInput.value = '';
  });


  const updateTable=()=>{
    tbody.innerHTML = ''; // tbody内の内容をリセット
    wordList.forEach((wordObj, index) => {
      const row = document.createElement('tr');
      row.innerHTML = `
        <td>${wordObj.word}</td>
        <td>${wordObj.meaning}</td>
        <td>
          <button data-index="${index}" class="editBtn">編集</button>
          <button data-index="${index}" class="deleteBtn">削除</button>
        </td>
      `;
      tbody.appendChild(row);
    });

    total.textContent = `全${wordList.length}件`;
  }

  table.addEventListener('click', (e) => {
    const target = e.target;
    const index = target.dataset.index;

    if (target.classList.contains('editBtn')) {
      currentEditIndex = index;
      editWordInput.value = wordList[index].word;
      editMeaningInput.value = wordList[index].meaning;
      editDialog.showModal();
    }
  });

  saveEditBtn.addEventListener('click', () => {
    const newWord = editWordInput.value.trim();
    const newMeaning = editMeaningInput.value.trim();

    if (newWord === '' || newMeaning === '') {
      alert('単語と意味を入力してください。');
      return;
    }

    wordList[currentEditIndex] = { word: newWord, meaning: newMeaning };
    updateTable();
    editDialog.close();
  });
};
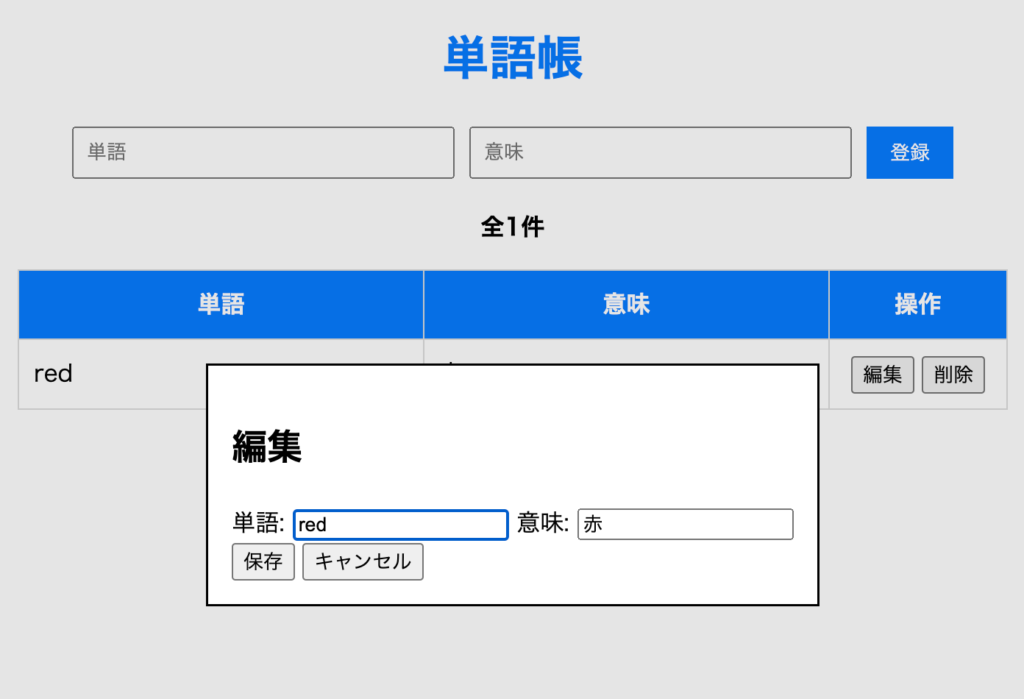
実行してみよう。編集を押すと以下のようにダイアログが開いて編集できるようになれば成功だ。
ポイント解説
(1)編集用ダイアログ要素の取得
const editDialog = document.getElementById('editDialog');
const editWordInput = document.getElementById('editWord');
const editMeaningInput = document.getElementById('editMeaning');
const saveEditBtn = document.getElementById('saveEditBtn');
let currentEditIndex = null;
currentEditIndex: 現在編集中のデータのインデックスを格納する変数。この変数を使うことで、編集対象のデータを特定します。
(2)編集ボタンをクリックしたときの処理
table.addEventListener('click', (e) => {
  const target = e.target;
  const index = target.dataset.index;

  if (target.classList.contains('editBtn')) {
    currentEditIndex = index;
    editWordInput.value = wordList[index].word;
    editMeaningInput.value = wordList[index].meaning;
    editDialog.showModal();
  }
});
table.addEventListener('click', ...):table内でクリックされた要素が編集ボタンか削除ボタンかを判定します。- まずは編集ボタンの動作を追加しています。(後ほど削除ボタンの機能を追記します)
if (target.classList.contains('editBtn')):- クリックされた要素が編集ボタン(
editBtnクラスを持つ)かどうかをチェックします。
- クリックされた要素が編集ボタン(
currentEditIndex:- 編集対象のインデックスを
currentEditIndexに記録します。これにより、どのデータが編集対象なのかを追跡します。
- 編集対象のインデックスを
editWordInput.value/editMeaningInput.value:- 編集対象の単語と意味をダイアログ内の入力フィールドに設定します。
editDialog.showModal():- 編集用ダイアログを画面上に表示します。
main.cssの追記
ダイアログの見た目がしょっぱいので、スタイルを追記していこう。
/* 共通スタイル */
body {
  padding: 20px;
  line-height: 1.6;
}

h1 {
  color: #007bff;
  text-align: center;
}

#form {
  display: flex;
  flex-wrap: wrap; /* フォームが狭い画面で折り返す */
  justify-content: center;
  gap: 10px; /* フォーム項目間の間隔 */
  margin-bottom: 20px;
}

#form input {
  padding: 8px;
  width: 240px;
}

#form button {
  padding: 8px 16px;
  background-color: #007bff;
  color: white;
  border: none;
  cursor: pointer;
}

#form button:hover {
  background-color: #0056b3;
}

#table {
  width: 100%;
  border-collapse: collapse;
}

#table th, #table td {
  border: 1px solid #ddd;
  padding: 10px;
  text-align: left; /* 左揃え */
}

#table th {
  background-color: #007bff;
  color: white;
  text-align: center; /* 見出しは中央揃え */
}

#table td:nth-child(3) {
  width: 100px;
  text-align: center; /*  操作列は中央揃え */
}

#table tr:nth-child(even) {
  background-color: #f9f9f9;
}

#table tr:hover {
  background-color: #e0e0ff;
}

#total {
  font-weight: bold;
  text-align: center;
  margin-top: 10px;
}

dialog {
  padding: 20px;
  border: 1px solid #ddd;
  border-radius: 5px;
  box-shadow: 0 2px 10px rgba(0, 0, 0, 0.1);
  width: 300px;
  max-width: 90%;
}

dialog input {
  box-sizing: border-box;
  width: 100%;
  margin-top: 10px;
  padding: 8px;
}

.dialog-buttons {
  display: flex;
  justify-content: space-between;
  margin-top: 20px;
}

.dialog-buttons button {
  padding: 8px 16px;
  background-color: #007bff;
  color: white;
  border: none;
  cursor: pointer;
}

/* メディアクエリでモバイル対応 */
@media (max-width: 600px) {
  #form {
    flex-direction: column;
    align-items: stretch; /* フォームを幅いっぱいに広げる */
  }

  #table td:nth-child(3) {
    width: 50px;
  }
}
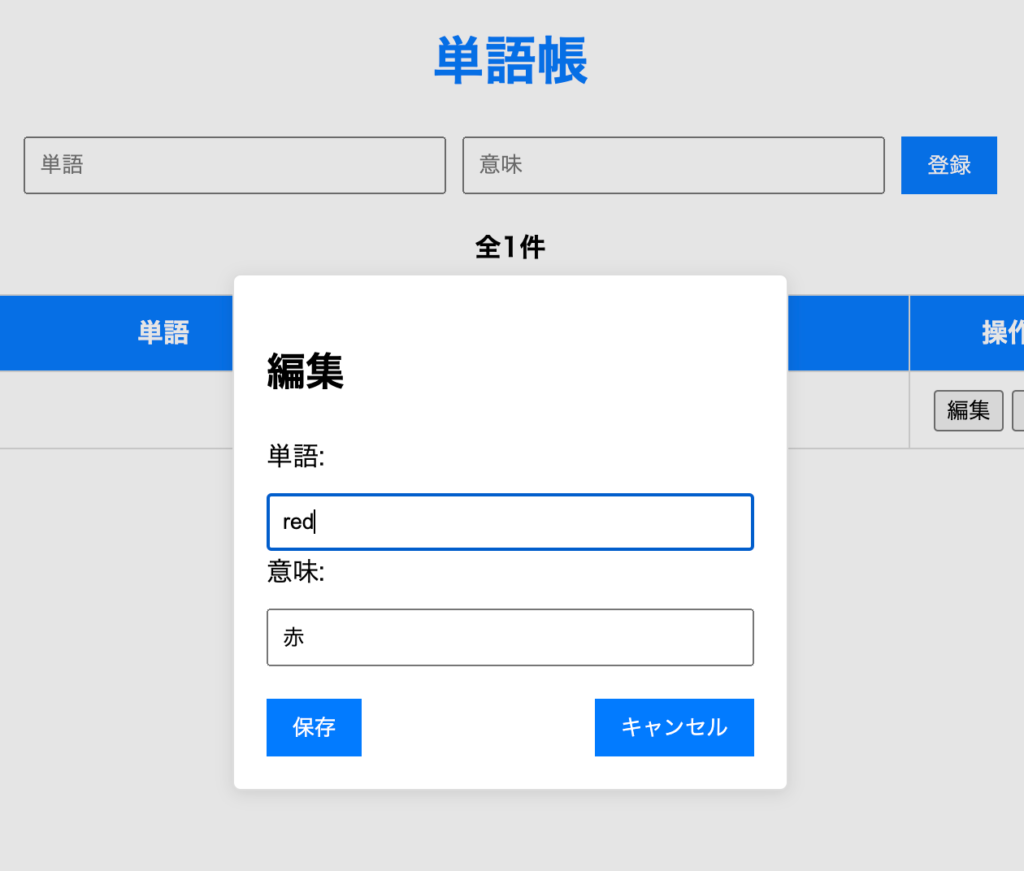
以下のように表示されれば成功だ。
ポイント解説
(1)ダイアログ全体のスタイリング
dialog {
  padding: 20px;
  border: 1px solid #ddd;
  border-radius: 5px;
  box-shadow: 0 2px 10px rgba(0, 0, 0, 0.1);
  width: 300px;
  max-width: 90%;
}
border: 1px solid #ddd;
ダイアログに薄い灰色の境界線を追加し、区切りをはっきりさせています。box-shadow: 0 2px 10px rgba(0, 0, 0, 0.1);
ダイアログに薄い影を付けることで浮き上がったような立体感を演出しています。max-width: 90%;
デバイスの画面サイズに応じて、幅を最大90%まで縮小できるようにしています。これにより、小さい画面でも内容が収まります。
box-shadowは、要素に影を付けるためのCSSプロパティで、以下のように4つまたは5つの値を指定して使います。
box-shadow: [水平位置] [垂直位置] [ぼかしの距離] [拡がりの距離] [色];
(2)ダイアログ内の入力フィールドのスタイリング
dialog input {
  box-sizing: border-box;
  width: 100%;
  margin-top: 10px;
  padding: 8px;
}
box-sizing: border-box;
入力フィールドの幅や高さを計算するときに、パディングやボーダーも含めて調整するようにしています。これにより、フィールドが親要素の幅に収まりやすくなります。
(3)ボタンを配置する部分のスタイリング
.dialog-buttons {
  display: flex;
  justify-content: space-between;
  margin-top: 20px;
}
display: flex;
ボタンを横並びに配置するため、Flexboxを使用しています。justify-content: space-between;
ボタン同士の間隔を均等に広げ、左右の端に配置しています。
データの削除
main.jsを以下のように追記する
'use strict';

window.onload = () => {
  const wordInput = document.getElementById('word');
  const meaningInput = document.getElementById('meaning');
  const addBtn = document.getElementById('addBtn');
  const tbody = document.getElementById('tbody');
  const total = document.getElementById('total');

  let wordList = [];

  // 編集用ダイアログ関連
  const editDialog = document.getElementById('editDialog');
  const editWordInput = document.getElementById('editWord');
  const editMeaningInput = document.getElementById('editMeaning');
  const saveEditBtn = document.getElementById('saveEditBtn');
  let currentEditIndex = null;

  addBtn.addEventListener('click', () => {
    const word = wordInput.value.trim();
    const meaning = meaningInput.value.trim();

    if (word === '' || meaning === '') {
      alert('単語と意味を入力してください。');
      return;
    }

    wordList.push({ word, meaning });
    updateTable();

    wordInput.value = '';
    meaningInput.value = '';
  });


  const updateTable=()=>{
    tbody.innerHTML = ''; // tbody内の内容をリセット
    wordList.forEach((wordObj, index) => {
      const row = document.createElement('tr');
      row.innerHTML = `
        <td>${wordObj.word}</td>
        <td>${wordObj.meaning}</td>
        <td>
          <button data-index="${index}" class="editBtn">編集</button>
          <button data-index="${index}" class="deleteBtn">削除</button>
        </td>
      `;
      tbody.appendChild(row);
    });

    total.textContent = `全${wordList.length}件`;
  }

  table.addEventListener('click', (e) => {
    const target = e.target;
    const index = target.dataset.index;

    if (target.classList.contains('editBtn')) {
      currentEditIndex = index;
      editWordInput.value = wordList[index].word;
      editMeaningInput.value = wordList[index].meaning;
      editDialog.showModal();
    } else if (target.classList.contains('deleteBtn')){
      wordList.splice(index, 1);
      updateTable();
    }
  });

  saveEditBtn.addEventListener('click', () => {
    const newWord = editWordInput.value.trim();
    const newMeaning = editMeaningInput.value.trim();

    if (newWord === '' || newMeaning === '') {
      alert('単語と意味を入力してください。');
      return;
    }

    wordList[currentEditIndex] = { word: newWord, meaning: newMeaning };
    updateTable();
    editDialog.close();
  });
};
削除を実行してみよう。データが消えれば成功だ。
ポイント解説
- wordList.splice(index, 1);
spliceという英単語は編集してつなぎ合わせるという意味を持ちます。JSでは配列.splice()で配列を編集することができます。spliceの引数に2つ渡した場合は(開始index,削除する要素数)になります。
今回は、選択されたindexから1つを削除しています。
ローカルストレージへの読み書き
それでは保存の処理を作成していこう、保存の処理にはファイルに書き込む、データベースに書き込むなどいろいろな方法があるが、今回はローカルストレージを使っていこう。ローカルストレージというのはブラウザにデータを保存する仕組みだ。以下のようにmain.jsを編集する。
'use strict';

window.onload = () => {
  const wordInput = document.getElementById('word');
  const meaningInput = document.getElementById('meaning');
  const addBtn = document.getElementById('addBtn');
  const tbody = document.getElementById('tbody');
  const total = document.getElementById('total');
  const storageKey = 'wordList';

  let wordList = JSON.parse(localStorage.getItem(storageKey)) || [];

  // 編集用ダイアログ関連
  const editDialog = document.getElementById('editDialog');
  const editWordInput = document.getElementById('editWord');
  const editMeaningInput = document.getElementById('editMeaning');
  const saveEditBtn = document.getElementById('saveEditBtn');
  let currentEditIndex = null;

  const saveToStorage=()=>{
    localStorage.setItem(storageKey, JSON.stringify(wordList));
  }

  addBtn.addEventListener('click', () => {
    const word = wordInput.value.trim();
    const meaning = meaningInput.value.trim();

    if (word === '' || meaning === '') {
      alert('単語と意味を入力してください。');
      return;
    }

    wordList.push({ word, meaning });
    updateTable();

    wordInput.value = '';
    meaningInput.value = '';
  });


  const updateTable=()=>{
    tbody.innerHTML = ''; // tbody内の内容をリセット
    wordList.forEach((wordObj, index) => {
      const row = document.createElement('tr');
      row.innerHTML = `
        <td>${wordObj.word}</td>
        <td>${wordObj.meaning}</td>
        <td>
          <button data-index="${index}" class="editBtn">編集</button>
          <button data-index="${index}" class="deleteBtn">削除</button>
        </td>
      `;
      tbody.appendChild(row);
    });

    total.textContent = `全${wordList.length}件`;
    saveToStorage();
  }

  table.addEventListener('click', (e) => {
    const target = e.target;
    const index = target.dataset.index;

    if (target.classList.contains('editBtn')) {
      currentEditIndex = index;
      editWordInput.value = wordList[index].word;
      editMeaningInput.value = wordList[index].meaning;
      editDialog.showModal();
    } else if (target.classList.contains('deleteBtn')){
      wordList.splice(index, 1);
      updateTable();
    }
  });

  saveEditBtn.addEventListener('click', () => {
    const newWord = editWordInput.value.trim();
    const newMeaning = editMeaningInput.value.trim();

    if (newWord === '' || newMeaning === '') {
      alert('単語と意味を入力してください。');
      return;
    }

    wordList[currentEditIndex] = { word: newWord, meaning: newMeaning };
    updateTable();
    editDialog.close();
  });
  updateTable();
};
実行してみよう、タブを閉じても、ブラウザを閉じても、PCの電源を切っても、再びアクセスするとデータが復元されることがわかる。
ポイント解説
(1)const storageKey = 'wordList';
- ローカルストレージ(
localStorage)で使用するキー名を定義しています。このキー名は、データを保存・取得する際に一意に識別するために使用されます。 - ここでは、
'wordList'という名前で単語帳データを保存します。定数として定義することで、プログラム内で誤って別の値に変更されることを防ぎます。
(2)let wordList = JSON.parse(localStorage.getItem(storageKey)) || [];
- ローカルストレージから保存済みの単語データ(
wordList)を取得します。 localStorage.getItem(storageKey)はキーに対応する文字列データを取得します。- データが存在する場合:
JSON.parseで文字列を配列に変換します。 - データが存在しない場合:
nullが返るため、|| []を使って空の配列を初期値として代入します。(JSにおける||は「左辺が真であればその値を返し、偽であれば右辺を返す」演算子)
- データが存在する場合:
(3)saveToStorage=()=>{ … }
- この関数は、現在の
wordListをローカルストレージに保存します。 localStorage.setItem(storageKey, JSON.stringify(wordList));によって以下を行います:- 配列
wordListをJSON文字列に変換(JSON.stringify)。 - キー名
storageKeyを使ってローカルストレージに保存。
- 配列
- ポイント
- データを変更するたびにこの関数を呼び出すことで、最新状態がローカルストレージに保存されます。
- ユーザーがページをリロードしてもデータが消えないため、単語帳の永続化が実現します。
関連記事
ローカルスト/レージとは
ローカルストレージはブラウザにデータを保存しておく仕組みだ。なので同じブラウザを使わなければならないという縛りがあるがJSでのハンドリングがとても楽なため今回のようなちょっとした用途だったら十分実用になる。さっそく基本からやっていこう。
名前表示アプリの作成
いったん、単語帳アプリを置いておいて一つ簡単な作例をローカルストレージを体験しよう。以下のようにlocal.htmlを作成する。
<!DOCTYPE html>
<html>
<head>
<meta charset="utf-8">
<title>ローカルストレージ</title>
</head>
<body>
<p id="msg">名前を入力</p>
<input type="text" id="name" placeholder="名前">
<button id="btn">保存</button>
<script>
const msg=document.getElementById('msg');
let userName=localStorage.getItem('userName');
if(userName !=null){
	msg.textContent=userName+"さん、いらっしゃい";
}
document.getElementById('btn').addEventListener('click',()=>{
	let userName=document.getElementById('name').value;
	localStorage.setItem('userName',userName);
	msg.textContent='登録しました!';
});
</script>
</body>
</html>
実行してみよう。
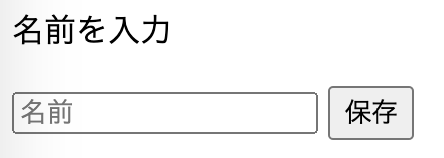
名前を入れ保存を押す
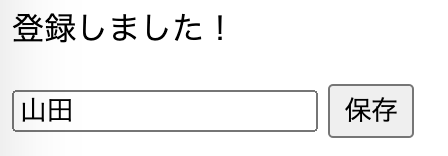
登録されました!と表示される。リロードしてみよう。
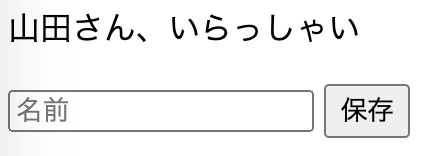
名前が表示された!
これは同じブラウザを使っている限り、半年後にやっても同じように表示してくれる。
localStorageのポイント
上の記述では色々書いてあるのでわかりにくくなっているがキモとなるのは以下の部分だ。
localStorage.setItem('キー',値); //で登録
let item=localStorage.getItem('キー');//取得(なければnullが返る)
おなじみと言っていいキー・バリューストアだ。
確認
どこに保存されているのか確認してみよう。Chromeの管理画面を開いてApplicationを開くとuserNameというキーで山田が登録されていることがわかる。

削除の方法
削除するのは簡単だ。スクリプトで行う場合は
localStorage.removeItem('キー')
で削除できる。もちろん、Chromeの管理画面からでも右クリックからclearすることができる。
単語帳アプリの完成
ローカルストレージの基本がわかったので単語帳アプリを完成させよう。以下のように修正する。
'use strict';
window.onload=()=>{
	class Word{
		constructor(en,ja){
			this.en=en;
			this.ja=ja;
		}
		showInfo(){
			return `<td>${this.en}</td><td>${this.ja}</td>`;
		}
	}
	const inputs=document.querySelectorAll('input');
	const btn=document.querySelector('#btn');
	const total=document.querySelector('#total');
	const table=document.querySelector('#table');
	let list=[];
	//localStorageからwordsというキーがついた項目を取得
	const loadData=localStorage.getItem('words');
	//データがあれば
	if(loadData !== null){
    //取得したJSON形式のデータをオブジェクトの配列に変換
    const words = JSON.parse(loadData);
    //配列から1件ずつwordとして取り出す
    words.forEach((word)=>{
    //listにWordインスタンスを追加
    list.push(new Word(word.en,word.ja));
    });
    updateTable();
	}
	btn.addEventListener('click',()=>{
    const enValue = inputs[0].value.trim();
    const jaValue = inputs[1].value.trim();
    if (enValue === '' || jaValue === '') {
      alert('単語と意味を両方入力してください。');
      return;
    }
		let word=new Word(enValue,jaValue);
		list.push(word);
		inputs.forEach((input)=>{
      input.value='';
		});
		updateTable();
		//配列の単語リストをJSON形式に変換し、localStorageに保存
		localStorage.setItem('words',JSON.stringify(list));
	});
	function updateTable(){
		table.innerHTML='<tr><th>単語</th><th>意味</th></tr>';
    list.forEach((word)=>{
			let tr=document.createElement('tr');
			tr.innerHTML=word.showInfo();
			table.appendChild(tr);
    });
    total.textContent=`全${list.length}件`;
	}
	updateTable();
};
実行したときにローカルストレージを読みにいってデータがあればそれを元にリストを作成している。またデータが増えた際もその都度書き込んでいる。
JSON!?
今回はデータの読み書きにJSONを使っている。JSONを使うと複雑なオブジェクトも簡単に表記することができる。JSを使っていれば変換は簡単。(JSONがわからない人はこちらから)
JSON.strigify(data) //dataをjson形式に変換
JSON.parse(json文字列) //json文字列からjsで使えるデータに変換
例えば今回だったらJSON.stringifyで生成されたjsonは以下だ。
[{en: "red", ja: "赤"}, {en: "green", ja: "緑"}, {en: "blue", ja: "青"}, {en: "brown", ja: "茶"}]
これをJSON.parseすればそのまま、プログラムで使えるようになるので今回だったらforEachで回して、一つ一つをオブジェクトとして取り出せば良いことがわかる。
完成!
以上で単語帳の完成だ。今回はローカルストレージを使ってデータを保存する方法を学んだ。


コメント