
英単語とその意味を効率よく保存・管理できるシンプルな単語帳アプリです。日々の学習や復習に役立つこのアプリでは、英単語とその意味を入力するだけで、簡単に追加・編集・削除が可能です。さらに、データはブラウザのローカルストレージに保存されるため、アプリを閉じても安心して再利用できます。
英語学習をサポートするために必要な機能をシンプルに実装しており、どなたでもすぐに使い始めることができます。効率的に単語帳を管理したい方におすすめのアプリです。
準備
素材ダウンロード
以下を任意の場所にダウンロードして解凍する。
フォルダ構成
wordbook/
├── index.html
├── css/
│   └── main.css
├── js/
    └── main.js
各ファイルの初期状態
<!DOCTYPE html>
<html lang="ja">
<head>
  <meta charset="UTF-8">
  <meta name="viewport" content="width=device-width, initial-scale=1.0">
  <title>単語帳アプリ</title>
  <link rel="stylesheet" href="css/main.css">
  <script src="js/main.js" defer></script>
</head>
<body>

</body>
</html>
/* 共通スタイル */
body {
padding: 20px;
line-height: 1.6;
}
'use strict';
window.onload = () => {
};作成
index.htmlの作成
index.htmlを以下のように追記する。
<!DOCTYPE html>
<html lang="ja">
<head>
<meta charset="UTF-8">
<meta name="viewport" content="width=device-width, initial-scale=1.0">
<title>単語帳アプリ</title>
<link rel="stylesheet" href="css/main.css">
<script src="js/main.js" defer></script>
</head>
<body>
<h1>単語帳</h1>
<div id="form">
<input type="text" id="word" placeholder="単語">
<input type="text" id="meaning" placeholder="意味">
<button id="addBtn">登録</button>
</div>
<p id="total">全0件</p>
<table id="table">
<thead>
<tr>
<th>単語</th>
<th>意味</th>
<th>操作</th>
</tr>
</thead>
<tbody id="tbody">
<!-- JavaScriptで動的に行を追加 -->
</tbody>
</table>
</body>
</html>
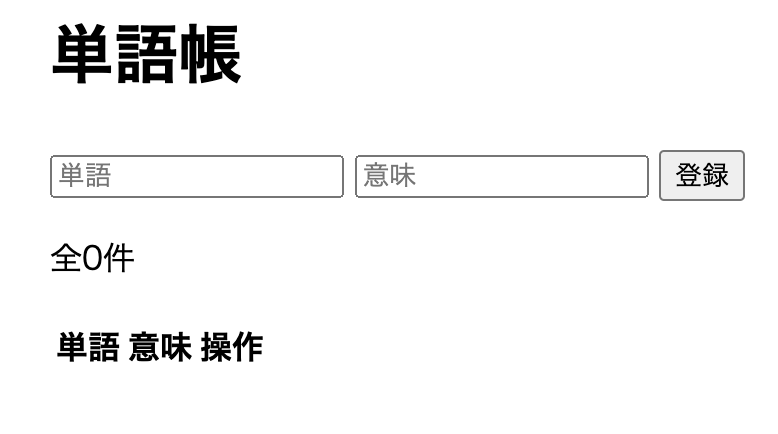
実行してみよう。以下のように表示されれば成功だ。
main.js作成
入力したデータを表に書き込んでいこう。main.jsを以下のように追記。
'use strict';
window.onload = () => {
const wordInput = document.getElementById('word');
const meaningInput = document.getElementById('meaning');
const addBtn = document.getElementById('addBtn');
const tbody = document.getElementById('tbody');
const total = document.getElementById('total');
let wordList = [];
addBtn.addEventListener('click', () => {
const word = wordInput.value.trim();
const meaning = meaningInput.value.trim();
if (word === '' || meaning === '') {
alert('単語と意味を入力してください。');
return;
}
wordList.push({ word, meaning });
updateTable();
wordInput.value = '';
meaningInput.value = '';
});
const updateTable=()=>{
tbody.innerHTML = ''; // tbody内の内容をリセット
wordList.forEach((wordObj, index) => {
const row = document.createElement('tr');
row.innerHTML = `
<td>${wordObj.word}</td>
<td>${wordObj.meaning}</td>
<td>
<button data-index="${index}" class="editBtn">編集</button>
<button data-index="${index}" class="deleteBtn">削除</button>
</td>
`;
tbody.appendChild(row);
});
total.textContent = `全${wordList.length}件`;
}
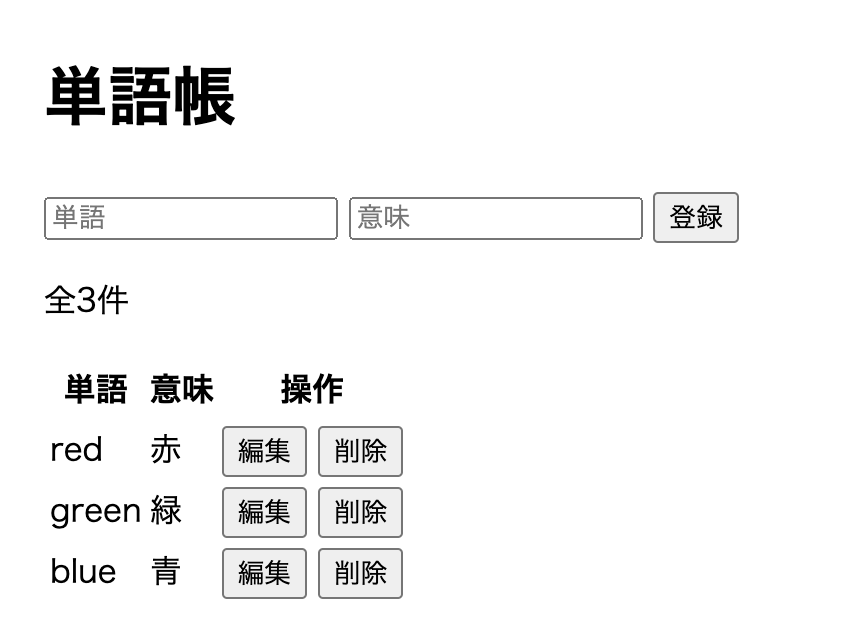
};実行して、いくつか単語を登録してみよう。以下のように入力した内容が下に表示されれば成功だ。
ポイント解説
登録ボタンのクリックイベント
(1) 入力値の取得
const word = wordInput.value.trim();
const meaning = meaningInput.value.trim();
wordInput.valueとmeaningInput.value: テキストボックスから単語と意味を取得します。.trim(): 文字列の前後の空白を取り除きます。
(2) バリデーション
if (word === '' || meaning === '') {
alert('単語と意味を入力してください。');
return;
}
- 入力欄が空の場合は、アラートを表示して処理を終了します。
(3) 配列への追加
wordList.push({ word, meaning });wordList配列にオブジェクト形式で単語と意味を追加します。
ここでは短縮記法(プロパティ値の省略)を使って記述を簡潔にしています。
// 通常の記法
const obj = { word: word, meaning: meaning };
// 短縮記法
const obj = { word, meaning };
例えば変数の内容が以下のような場合
const word = 'book';
const meaning = '本';
{ word: 'book', meaning: '本' }
というオブジェクトを作成します。結果としてこの処理は以下のような配列を作成していきます
wordList = [
{ word: 'apple', meaning: 'りんご' },
{ word: 'book', meaning: '本' } // 新しく追加
];
テーブルを更新するupdateTable関数
(1) テーブルのクリア
tbody.innerHTML = '';
- テーブル本体部分(
<tbody>)の内容をリセットします。
(2) 配列のデータを行として追加
wordList.forEach((wordObj, index) => {...});
- 配列
wordListの各要素を繰り返し処理します。 wordObj: 現在処理中の単語オブジェクト。index: 現在の要素のインデックス。
各要素について以下の処理を実行します。
const row = document.createElement('tr');
row.innerHTML = `
<td>${wordObj.word}</td>
<td>${wordObj.meaning}</td>
<td>
<button data-index="${index}" class="editBtn">編集</button>
<button data-index="${index}" class="deleteBtn">削除</button>
</td>
`;
tbody.appendChild(row);
row: 行(<tr>)を新規作成。innerHTML: 各セル(<td>)に単語、意味、操作ボタンを挿入。appendChild: 作成した行をテーブル本体に追加。
main.css
テーブルにスタイルを当てよう。cssフォルダの中にmain.cssを作成し以下のように追記する。
/* 共通スタイル */
body {
  padding: 20px;
  line-height: 1.6;
}
h1 {
color: #007bff;
text-align: center;
}
#form {
display: flex;
flex-wrap: wrap; /* フォームが狭い画面で折り返す */
justify-content: center;
gap: 10px; /* フォーム項目間の間隔 */
margin-bottom: 20px;
}
#form input {
padding: 8px;
width: 240px;
}
#form button {
padding: 8px 16px;
background-color: #007bff;
color: white;
border: none;
cursor: pointer;
}
#form button:hover {
background-color: #0056b3;
}
#table {
width: 100%;
border-collapse: collapse;
}
#table th, #table td {
border: 1px solid #ddd;
padding: 10px;
text-align: left; /* 左揃え */
}
#table th {
background-color: #007bff;
color: white;
text-align: center; /* 見出しは中央揃え */
}
#table td:nth-child(3) {
width: 100px;
text-align: center; /* 操作列は中央揃え */
}
#table tr:nth-child(even) {
background-color: #f9f9f9;
}
#table tr:hover {
background-color: #e0e0ff;
}
#total {
font-weight: bold;
text-align: center;
margin-top: 10px;
}
/* メディアクエリでモバイル対応 */
@media (max-width: 600px) {
#form {
flex-direction: column;
align-items: stretch; /* フォームを幅いっぱいに広げる */
}
#table td:nth-child(3) {
width: 50px;
}
}ポイント解説
フォーム部分のスタイリング
#formdisplay: flexとflex-wrap: wrapを設定し、フォーム項目が横並びになります。また、画面が狭い場合は自動的に折り返します。gap: 10pxにより、各フォーム要素間に10pxの間隔を設けています。
- #
form button:hover- ホバー時に背景色を濃い青色(#0056b3)に変えることで、操作感を強調しています。
テーブルのスタイリング
#table- 幅を100%に設定し、表全体がコンテンツ幅にフィットするようにしています。
border-collapse: collapseにより、セルの境界線が重ならないスッキリしたデザインになっています。
- #
table td:nth-child(3)- 3列目(操作列)の幅を100pxに固定し、内容を中央揃えにすることで視覚的に安定感を持たせています。
- #
table tr:nth-child(even)- 偶数行に薄い灰色の背景色を設定することで、行の区別が付きやすくなっています。
#table tr:hover- 行にホバーした際に青色の背景が表示され、選択中の行を視覚的にわかりやすくしています。
レスポンシブ対応(モバイル対応)
@media (max-width: 600px)- 画面幅が600px以下の端末に適用されるスタイルを定義。
#form- flex-direction: column
- align-items: stretch で、フォーム項目が画面幅いっぱいに広がります。
- flex-direction: column
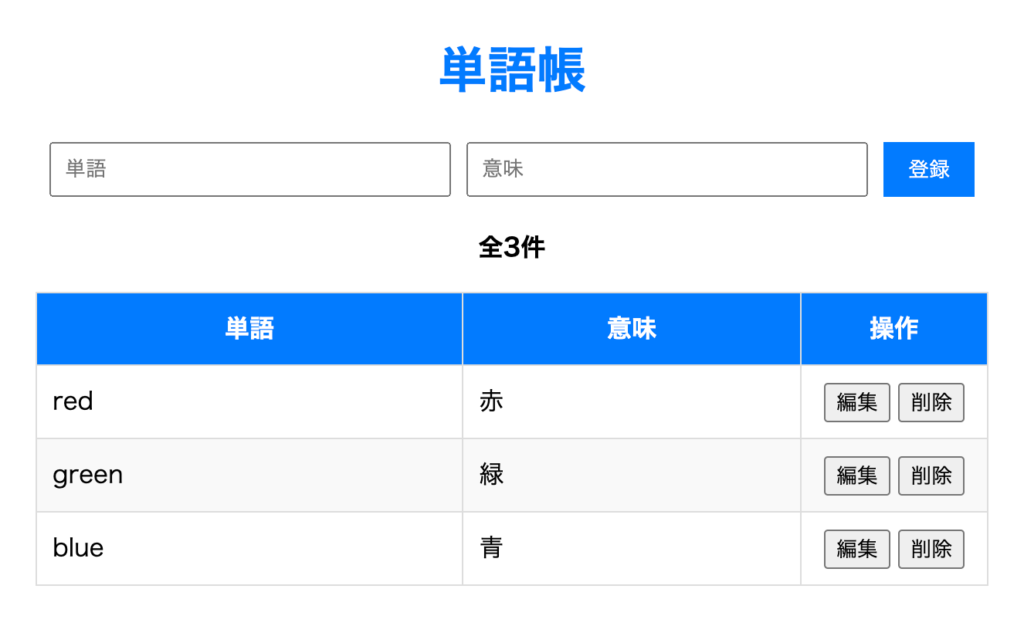
実行
では実行してみよう。スタイルがつくことによっていい感じになった!
前編終了
前編はここまでだ。ボタンを押すことで動的に要素を作成できるようになったがリロードすると全て消えてしまう。後編では編集機能、削除機能、データ保存機能を作成していく

コメント