
疑似要素とは要素にちょっとした装飾を施すときに便利な技術だ。
さっそくやってみよう。
html & css
以下のようにマークアップする。
<!DOCTYPE html>
  <html>
  <head>
    <meta charset="UTF-8">
    <title>Document</title>
    <style>
      p::before{
        content:"★";
        color:red;
      }
    </style>
  </head>
  <body>
  <p>Hello</p>
  </body>
  </html>
実行

解説
今回はP要素に擬似要素で★を付与している。
::before
でその要素の前にコンテンツを挿入することができる。
今回は★を挿入して色を赤にしている。
p::before{
        content:"★";
        color:red;
      }
開発者画面を見てみよう。P要素の先頭に::beforeという擬似的な要素が挿入されているのがわかる。
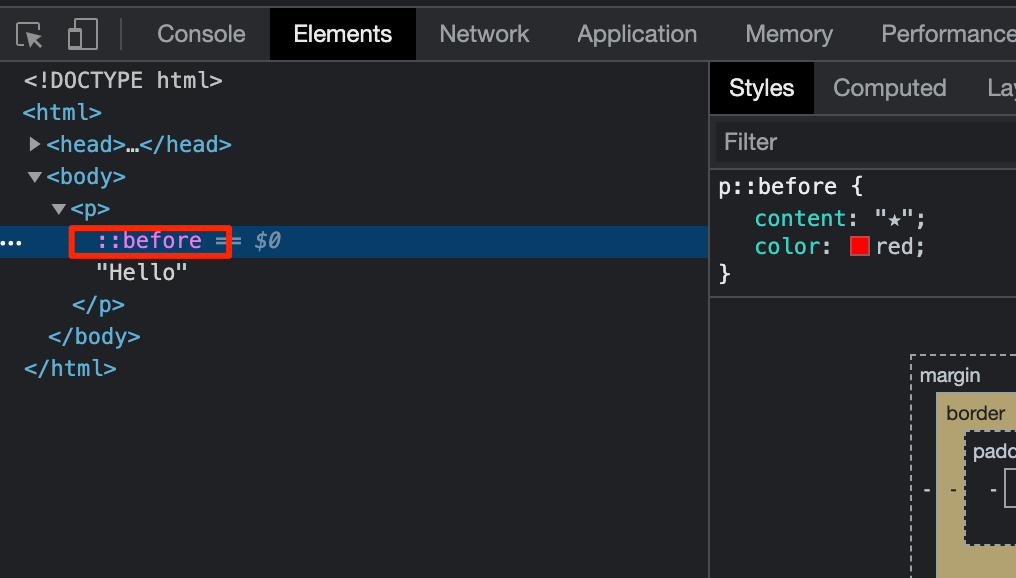
疑似要素はマウスによって選択することができない要素になることもポイントだ。

::after
beforeがあればafterもある。以下のように
p::after
を追記してみよう。
p::before,
p::after{
        content:"★";
        color:red;
      }
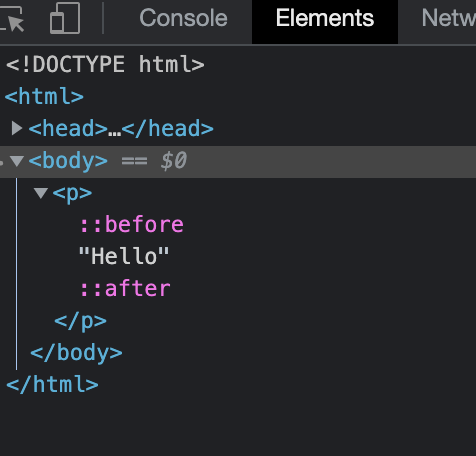
以下は開発者画面。Helloの後ろに挿入されているのがわかる
実用サンプル
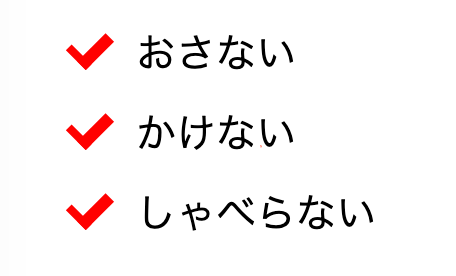
チェックマーク
コード
<!DOCTYPE html>
<html>
<head>
<meta charset="UTF-8">
<title>Document</title>
<style>
li{
font-size:20px;
position:relative;
list-style-type: none;
padding-left:1.5em;
margin-bottom:10px;
}
li::before{
content: '';
position:absolute;
width:0.4em;
height:0.8em;
border-width:0 0.3em 0.2em 0;
border-style:solid;
border-color:red;
top:0.1em;
left:0;
transform:rotate(45deg);
}
</style>
</head>
<body>
<ul>
<li>おさない</li>
<li>かけない</li>
<li>しゃべらない</li>
</body>
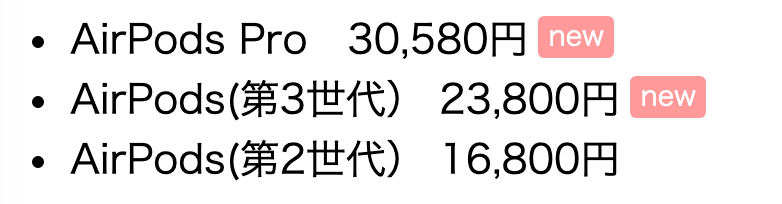
</html>newバッチ
<!DOCTYPE html>
  <html>
  <head>
    <meta charset="UTF-8">
    <title>Document</title>
    <style>
      li.new::after{
        content:"new";
        position:relative;
        top:-4px;
        font-size:0.7em;
        background:#f99;
        color:white;
        padding:3px 5px 4px;
        margin-left:5px;
        border-radius:3px;
      }
    </style>
  </head>
  <body>
    <ul>
      <li class="new">AirPods Pro 30,580円</li>
      <li class="new">AirPods(第3世代) 23,800円</li>
      <li>AirPods(第2世代) 16,800円</li>
  </body>
  </html>
画像ラベル
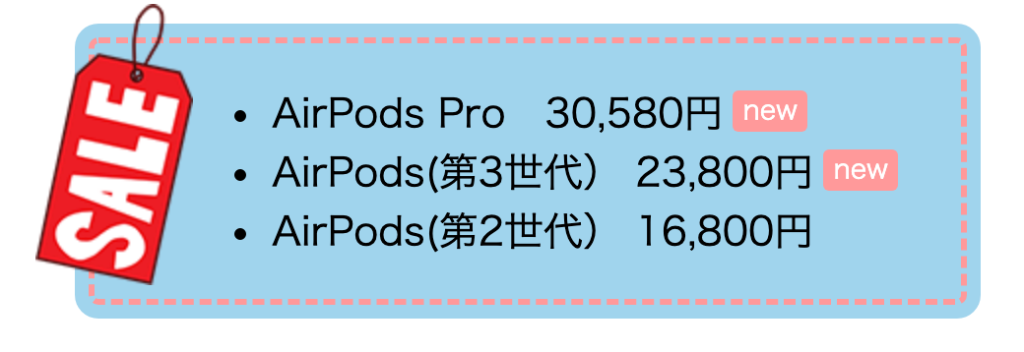
以下をダウンロードし、htmlファイルと同じ階層に置く
<!DOCTYPE html>
  <html>
  <head>
    <meta charset="UTF-8">
    <title>Document</title>
    <style>
      ul{
        width:330px;
        margin-left:100px;
        padding:20px 20px 20px 90px;
        background:#a1d4ed;
        border:3px dashed #f99;
        box-shadow:0 0 0 7px #a1d4ed;
        border-radius:5px;
        position:relative;

      }
      ul::before{
        content:url(sale.png);
        position:absolute;
        top:-20px;
        left:-30px;
      }

      li.new::after{
        content:"new";
        position:relative;
        top:-4px;
        font-size:0.7em;
        background:#f99;
        color:white;
        padding:3px 5px 4px;
        margin-left:5px;
        border-radius:3px;
      }
    </style>
  </head>
  <body>
    <ul>
      <li class="new">AirPods Pro 30,580円</li>
      <li class="new">AirPods(第3世代) 23,800円</li>
      <li>AirPods(第2世代) 16,800円</li>
  </body>
  </html>
画像にビネット効果

以下をダウンロードし、htmlファイルと同じ階層に置く
  <!DOCTYPE html>
  <html>
  <head>
    <meta charset="UTF-8">
    <title>Document</title>
    <style>
      img{
        display:block;
      }
      .vignette{
        position:absolute;
      }
      .vignette::after{
        content:"";
        position:absolute;
        top:0;
        left:0;
        width:100%;
        height:100%;
        box-shadow:inset 0 0 50px 20px #333;
      }
    </style>
  </head>
  <body>
    <div><img src="woman.jpg"></div>
    <hr>
    <div class="vignette"><img src="woman.jpg"></div>
  </body>
  </html>

コメント