今回はスプライトアニメーションを作成していく。
Enemyのアニメーション
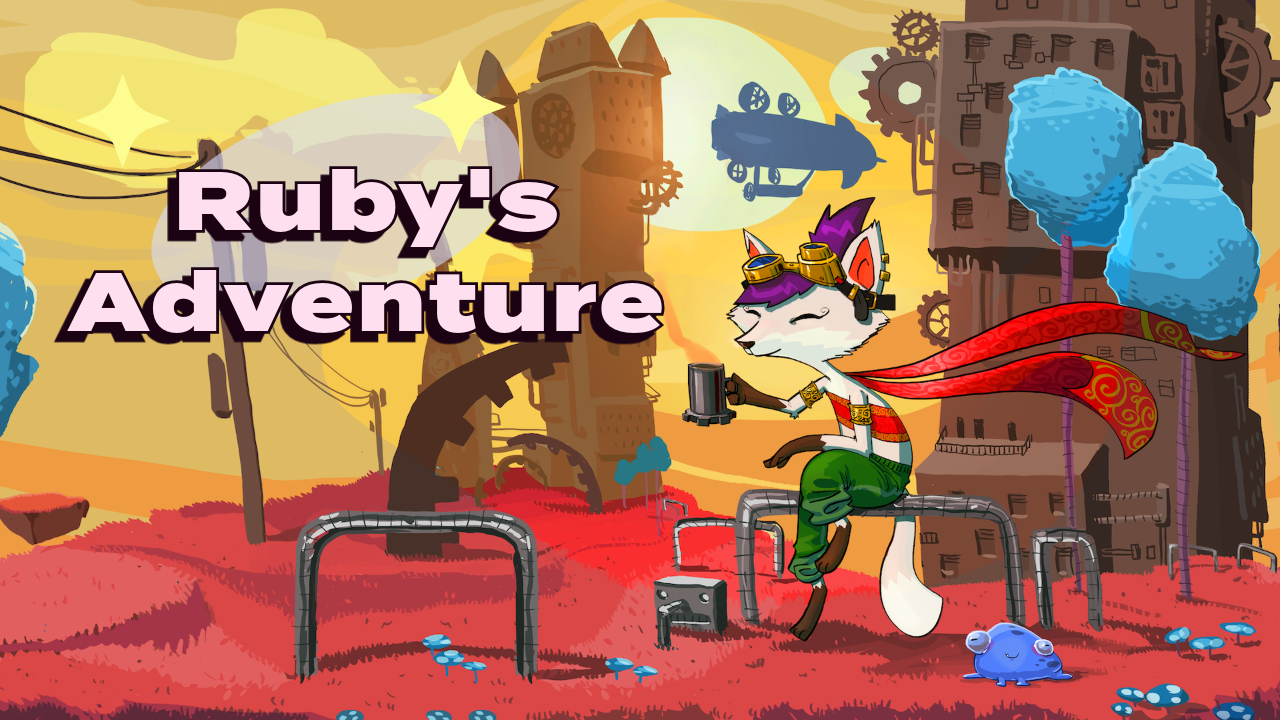
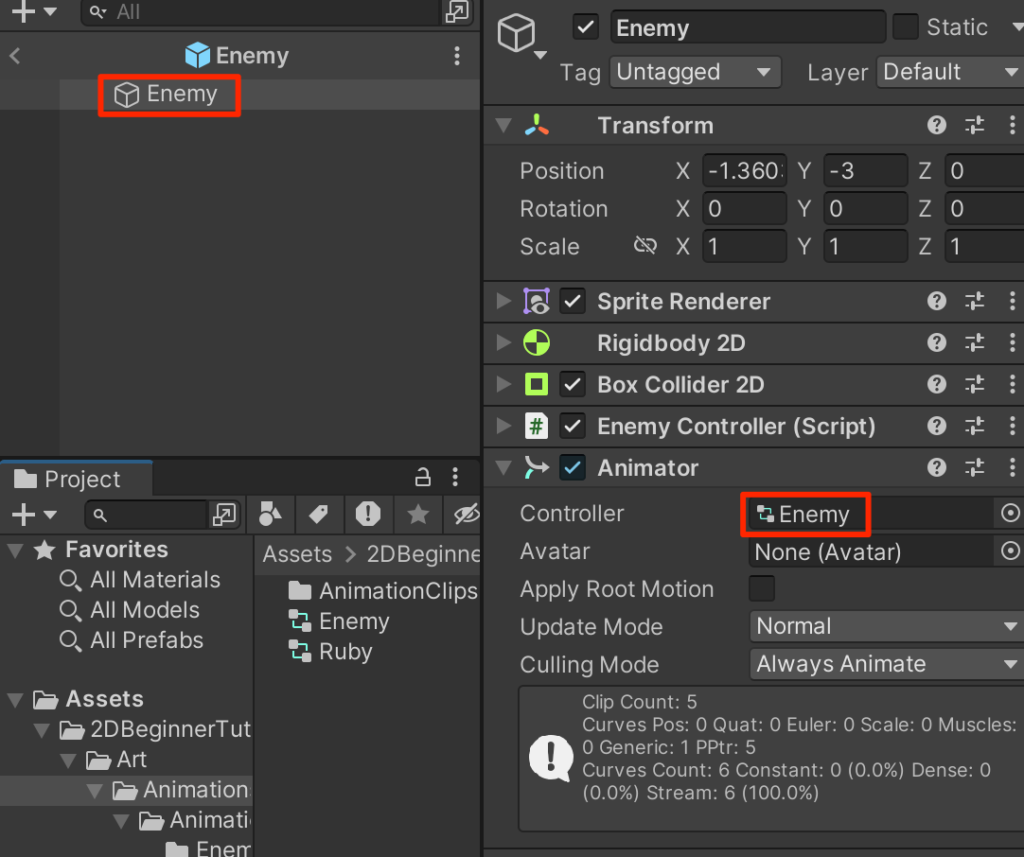
まずはプレファブフォルダにあるEnemyプレファブをダブルクリックしてプレファブ編集モードで開き、AddComponentからAnimatorコンポーネントを付与する。
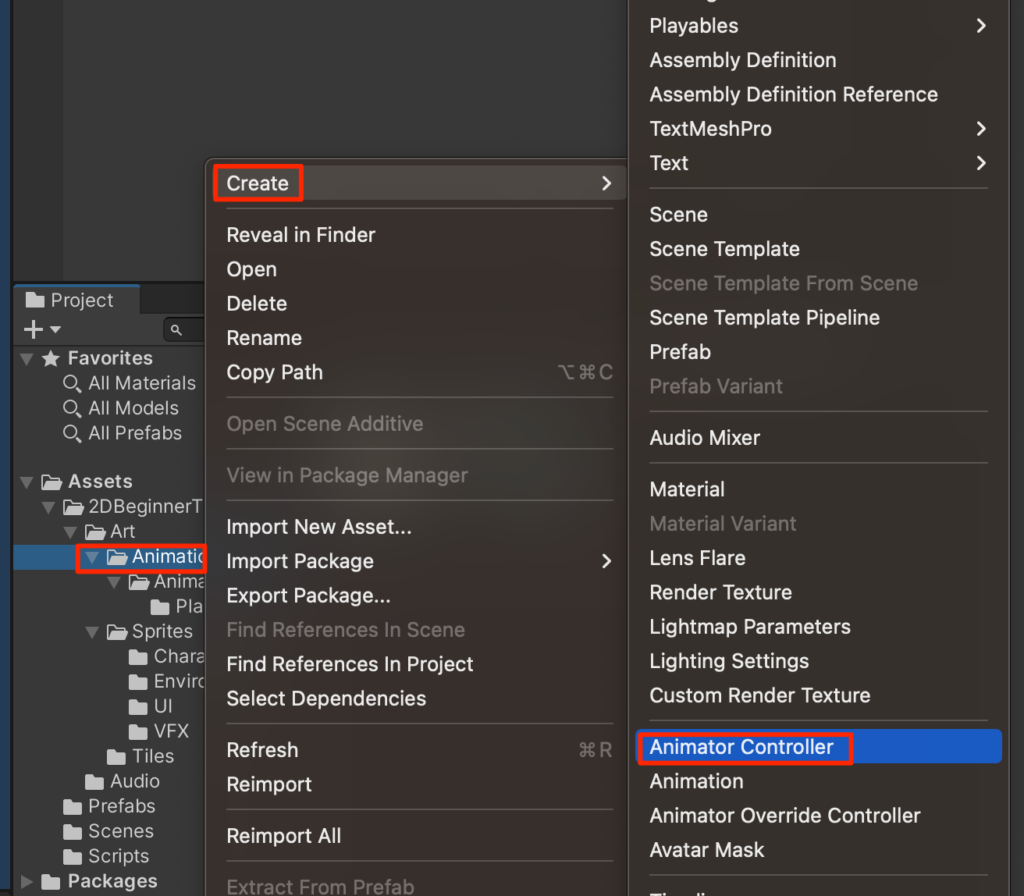
ProjectビューのAnimationフォルダを右クリックしてCreateからAnimatorControllerを作成し名前をEnemyとする。
Enemyを選択し直して、Enemy アニメーターコントローラを 登録する。
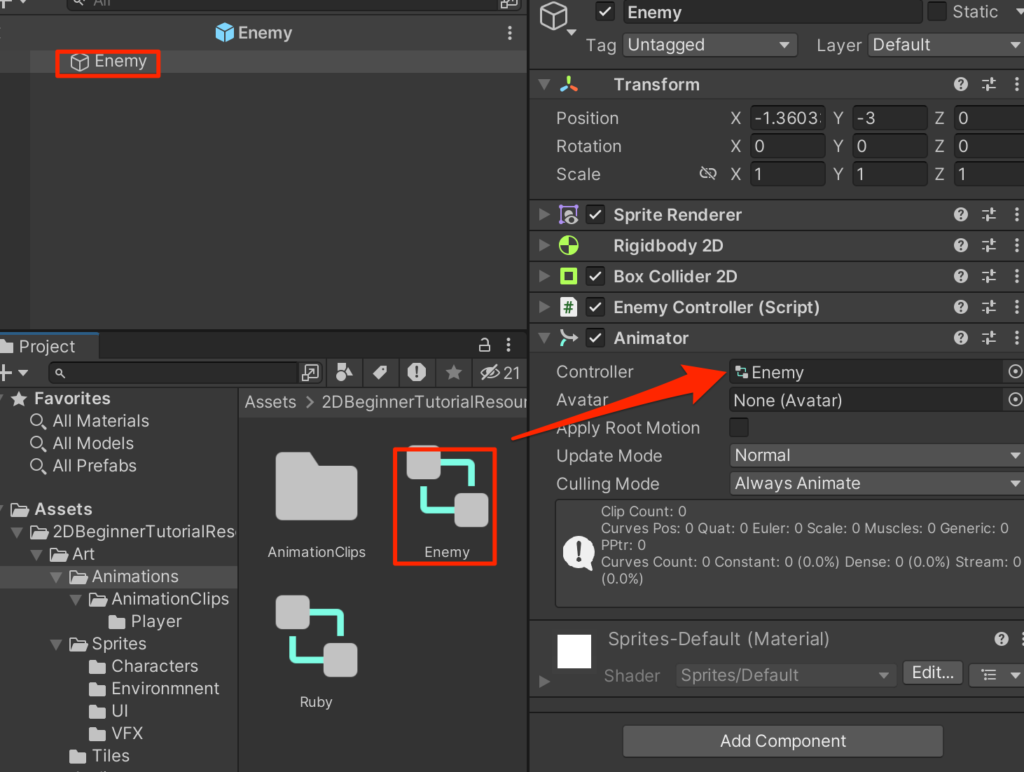
これでEnemyはEnemyアニメーターコントローラで定義されたアニメーションを行うことができるようになった。
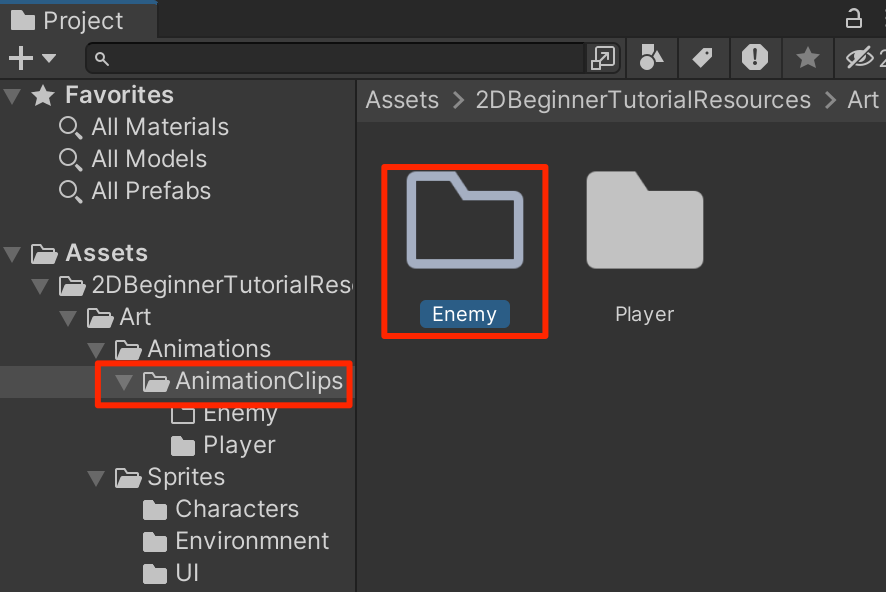
Animationクリップの作成
まずはEnemyのAnimationクリップを格納するフォルダを作成しておこう。
AnimationClipsフォルダの中にEnemyフォルダを作成する。
LeftWalkアニメーション
それでは、一つずつアニメーションクリップを作成していこう。
Window->Animation->Animation
としてAnimationウィンドウを開く
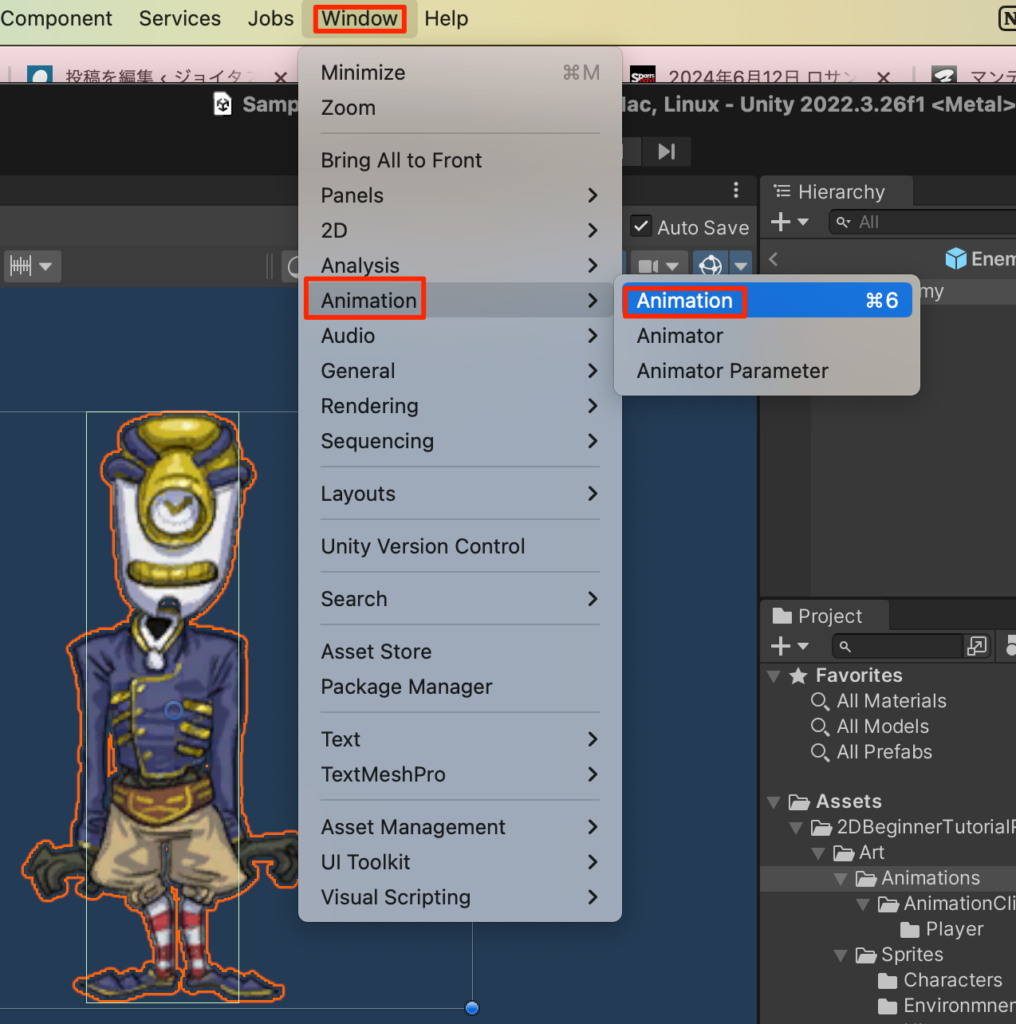
タブをつかんで作業がやりやすい場所に移動する。下図のように画面下部に持ってくることを推奨。
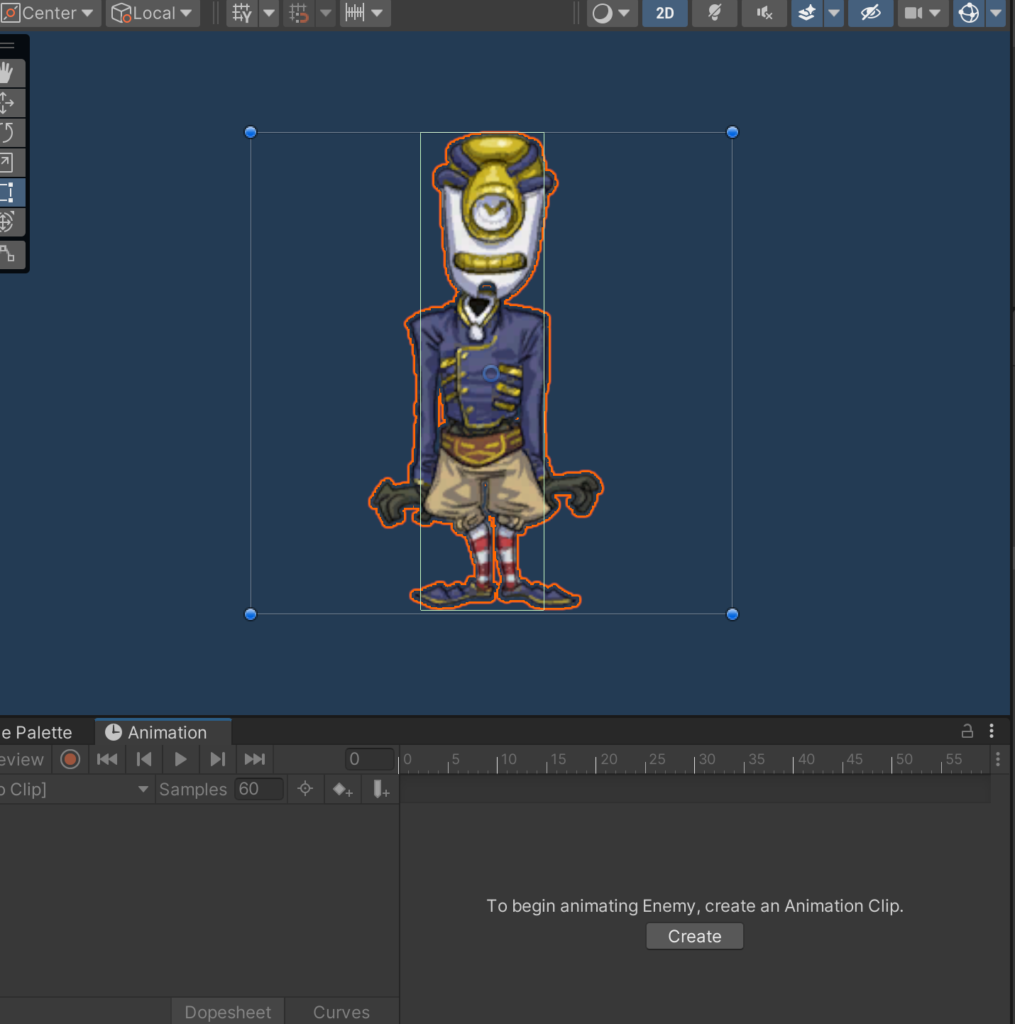
下部にある、Createボタンを押す。
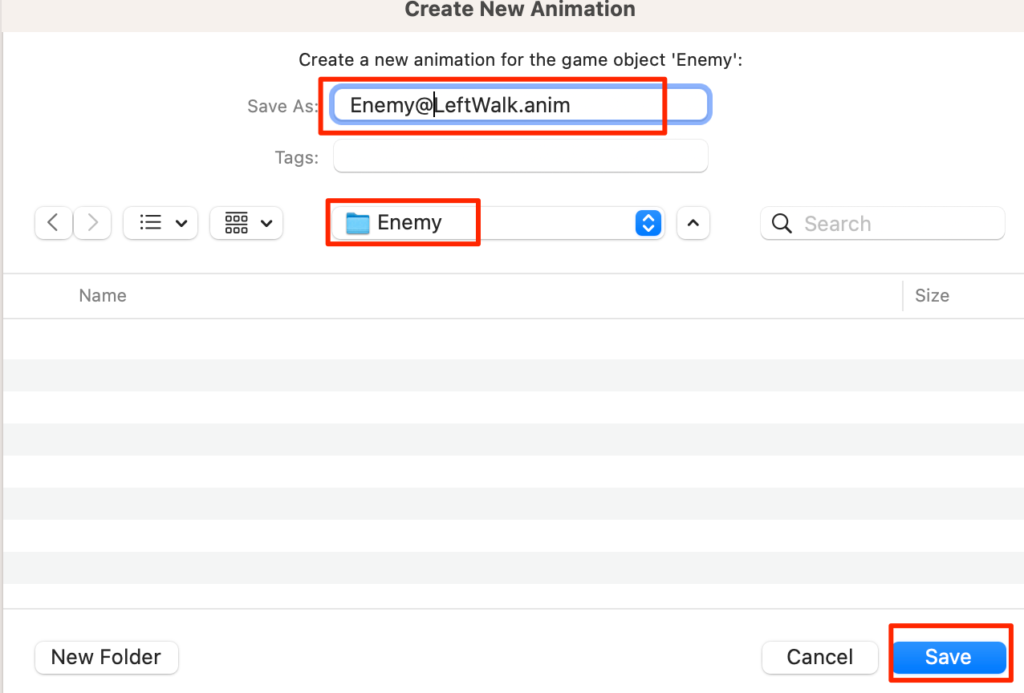
保存ウインドウが開くので先ほど作成したEnemyフォルダに
Enemy@LeftWak.anim
という名で保存する。
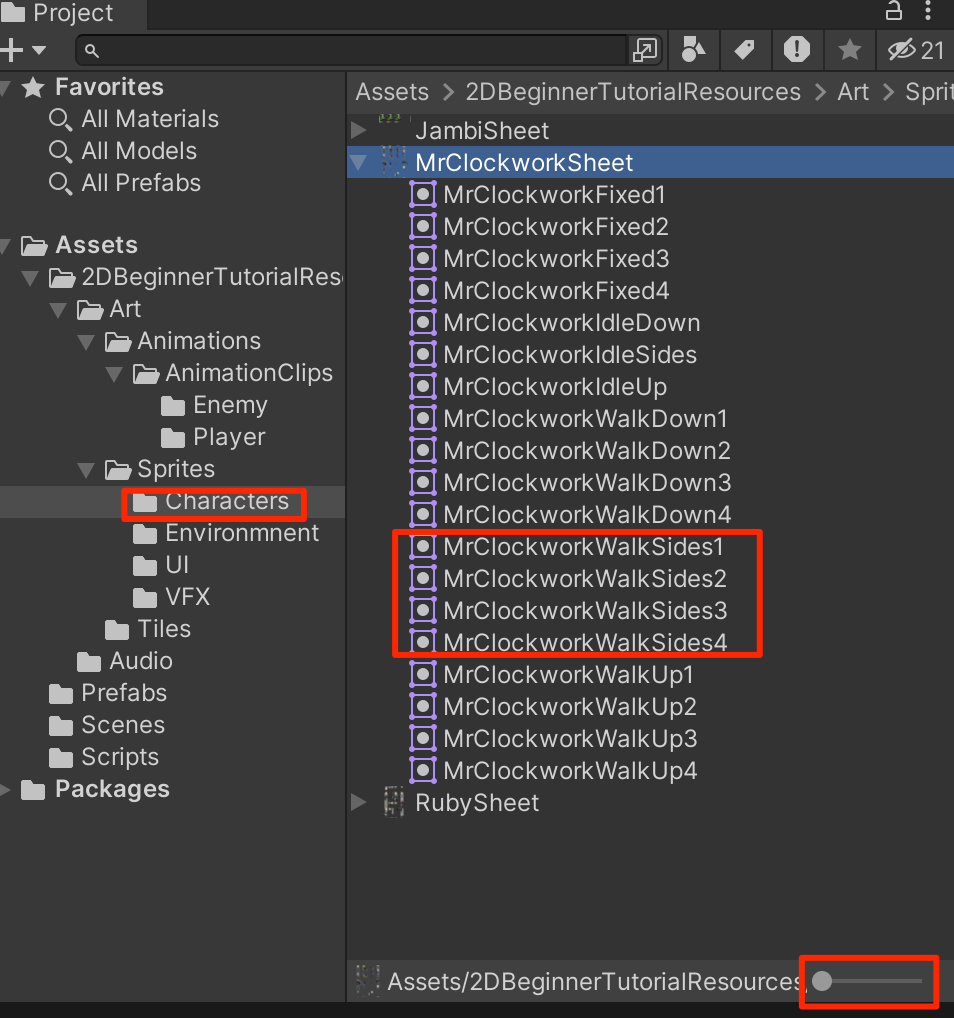
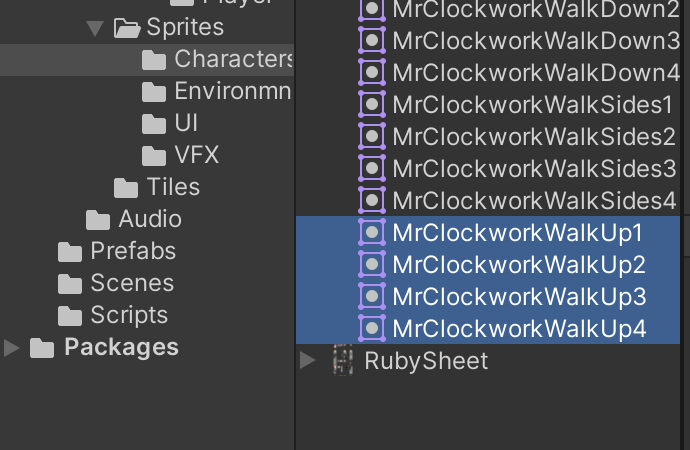
スプライトはあらかじめ用意されてるので
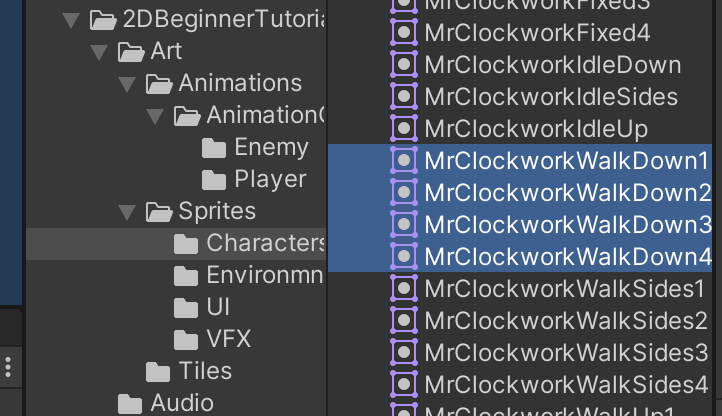
Sprites->Charactersの中にある
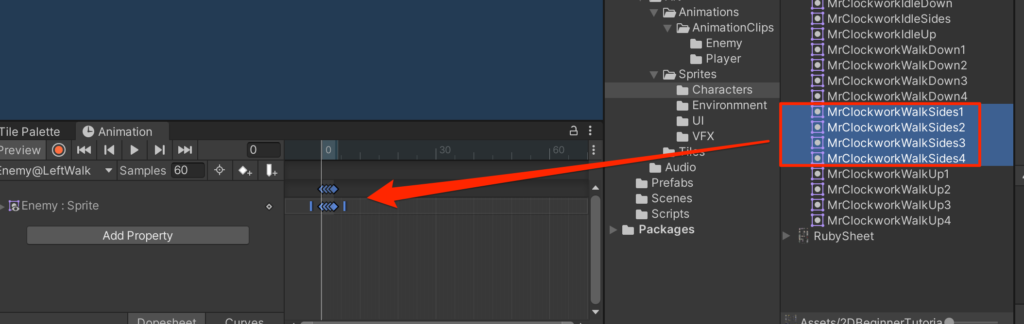
WalkSides1~WalkSides4を選択する。
ファイル名を表示したい場合は下部のつまみを一番左にする。
4つを選択して、タイムラインにドラッグする
下の再生ボタンを押して動きを確認しよう。
いろいろおかしい。。。
まず動きが速すぎる。これは1秒間を60個に分割した上で最初の4コマに配置しているからだ 。サンプル数を4に変更しよう。
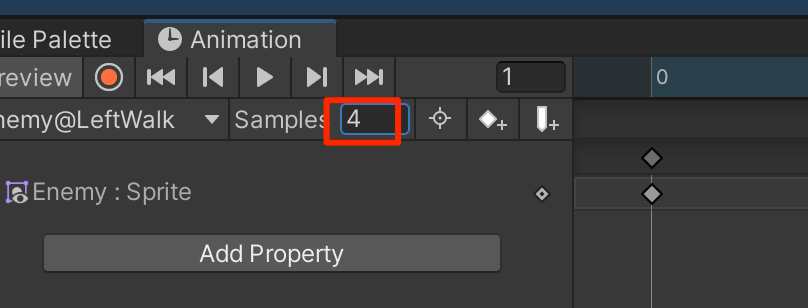
(注意)もし、Samplesの項目が非表示になっていた場合は右の3点ポッチからShowSampleRateにチェックをいれる

これで1秒間で4コマになった。再生してみると適切な速さであることがわかる。
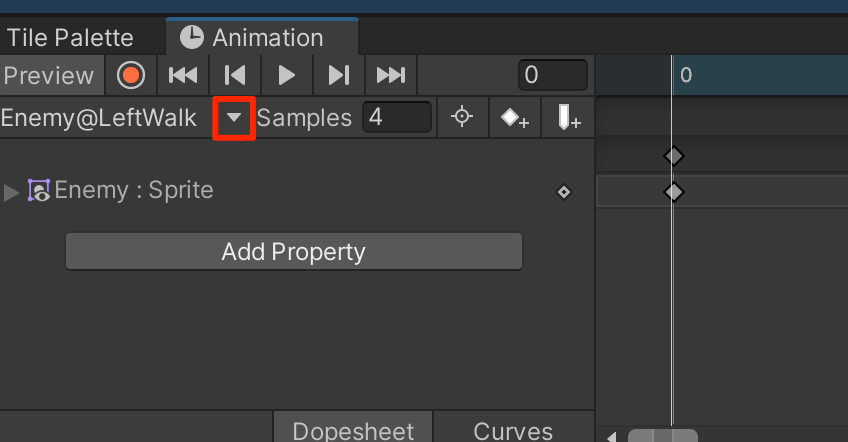
次に再生と同時にキャラが上にせり上がる現象だ。これはピボットの設定が異なっていることに起因する。
今回用意されているアニメーションスプライトを見てみるとピボットがBottomCenterに設定されている。
なので最初に持ってきたダウンロードしたEnemy画像のピボットをBottomにしてApplyする。

改めてEnemyプレファブを開き直すと、コライダがずれているのでEditColliderを押して、下図のよういキャラに合わせる。

改めて下部の再生ボタンを押してみよう。適切にアニメーションするようになった!
RightWalkアニメーション
次にRightWalkだが、スプライトとしては付属していない。
実はUnityには左右や上下反転のアニメーションクリップを作る方法がある。それで作成しよう。
下図の三角ボタンをクリックして、CreateNewClipを選択する。
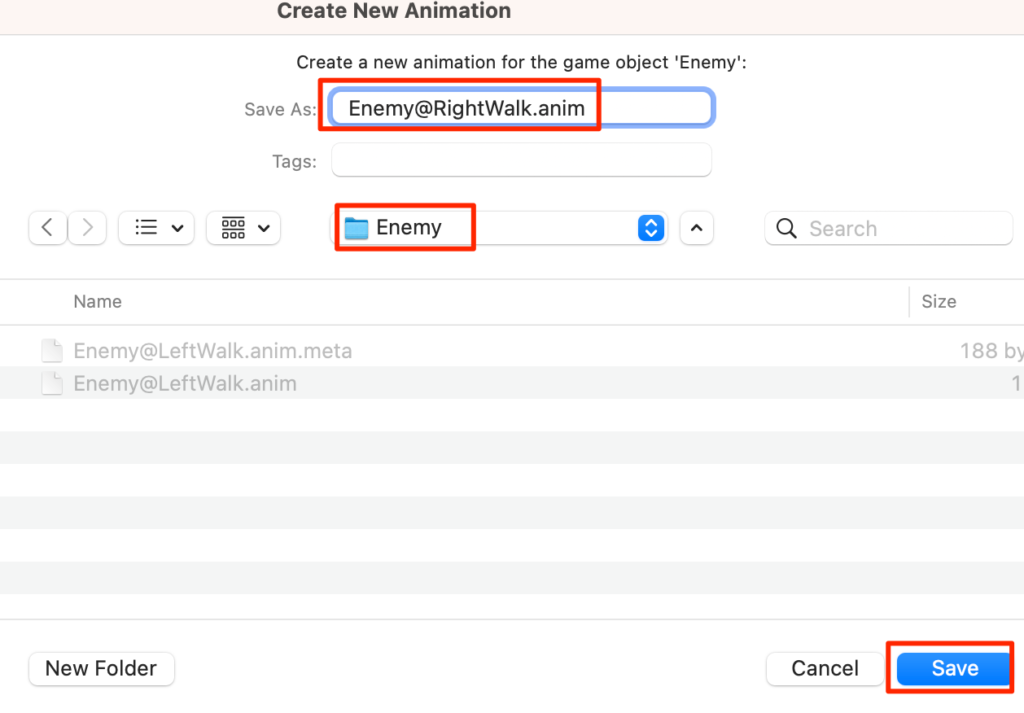
保存画面が開くので先ほど同じEnemyフォルダに
Enemy@RightWalk.anim
として保存する
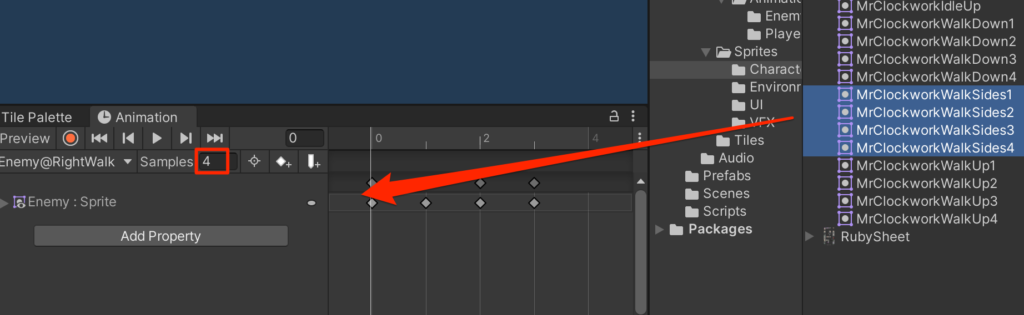
まずは先程と同じ左に歩く4枚のクリップを配置し、Samplesを4にする。
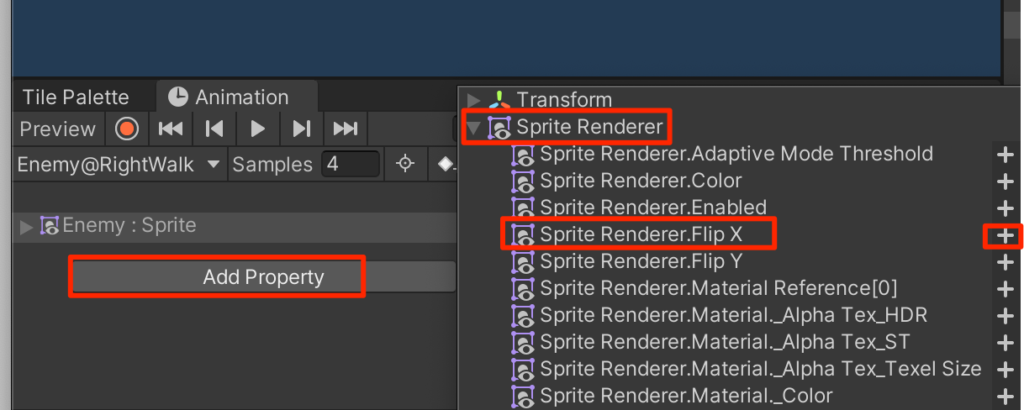
AddProperty -> SpriteRenderer -> Sprite Renderer.Flip Xを選択し+を押す
FlipXのチェックボックスをいれる。
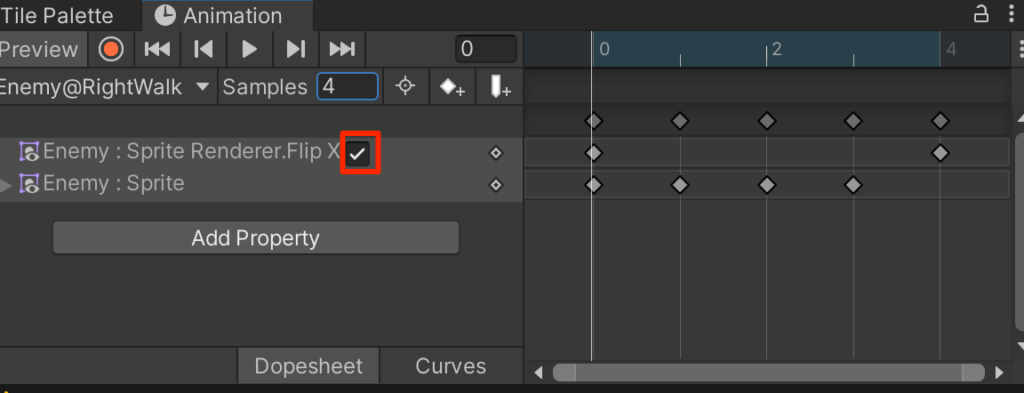
再生ボタンを押してみよう。右に歩くアニメーションが再生されるはずだ。
Up & Down
同じ要領で
Enemy@Up.animと
Enemy@Down.animを作成する。
Enemy@Upは
Enemy@Downは
から作成する。(ともにsamplesは4)
Animator Controllerの設定
4つのAnimationクリップができたので、これがどのように遷移するのかを定義していく。
AnimatorコンポーネントのControllerのところのEnemyをダブルクリックする。
するとAnimatorコントローラウインドウが開くのでタブをつかんで下に移動する。
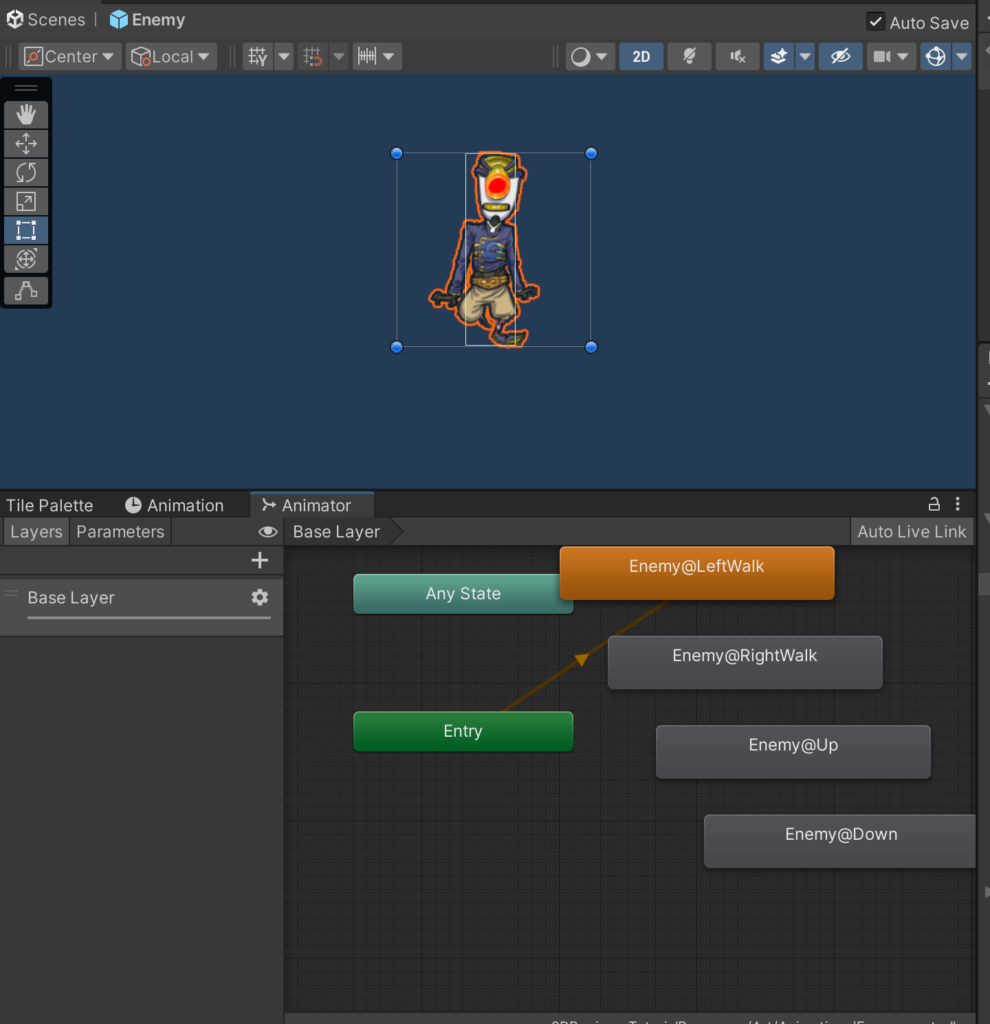
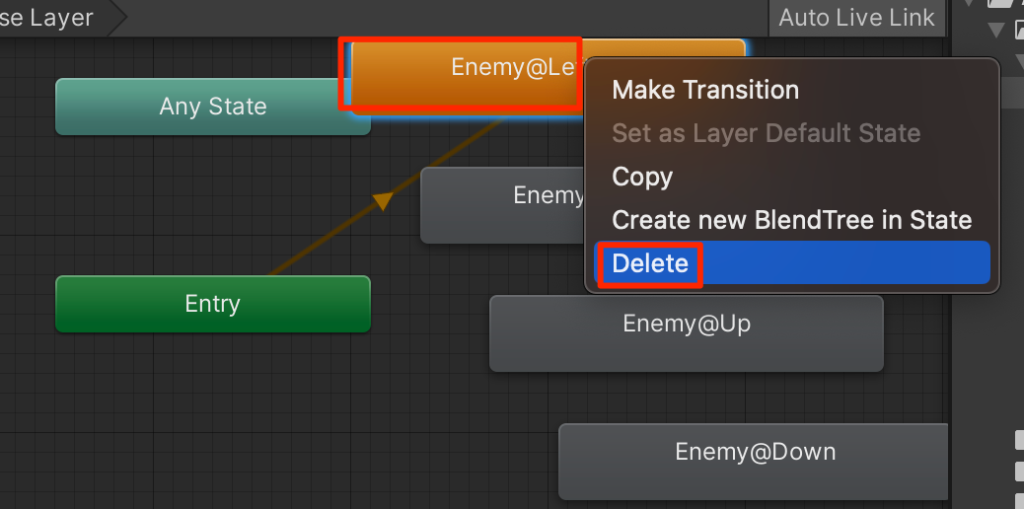
作成済みの4つのアニメーションクリップが表示されているが、右クリック->Deleteで4つとも消す
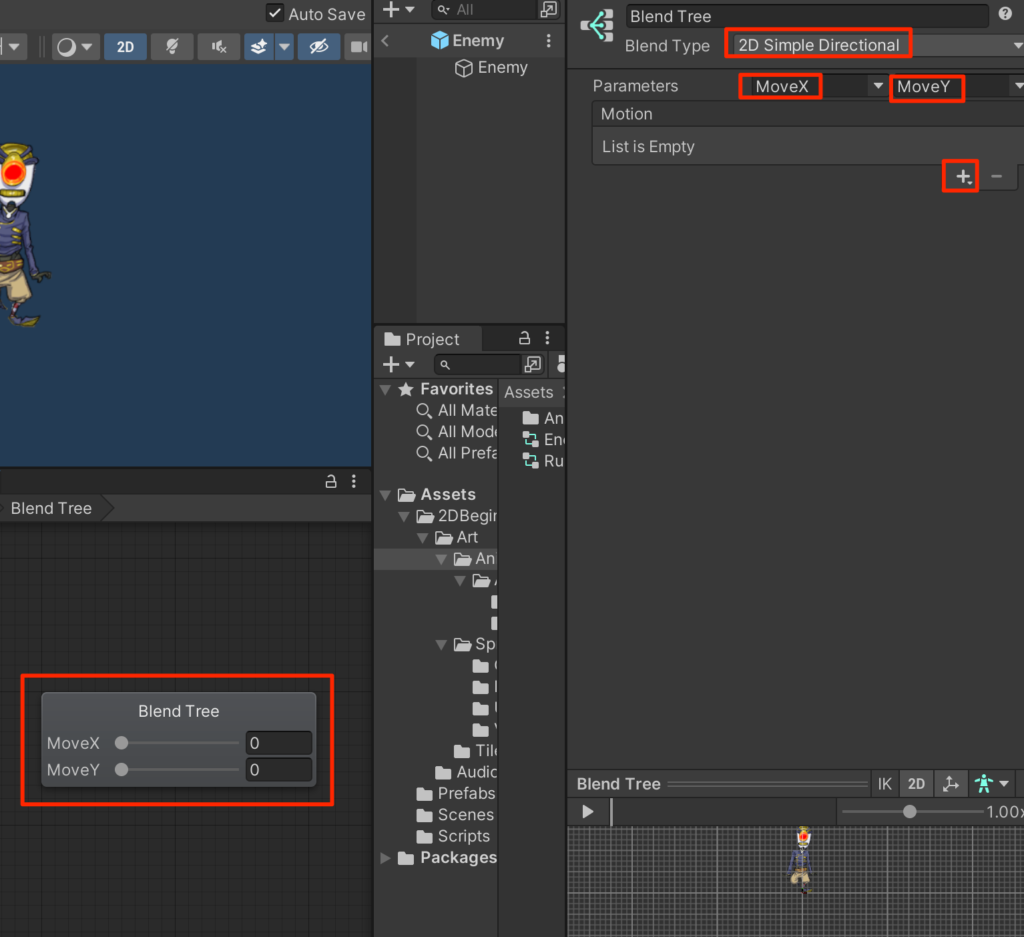
Blend Tree
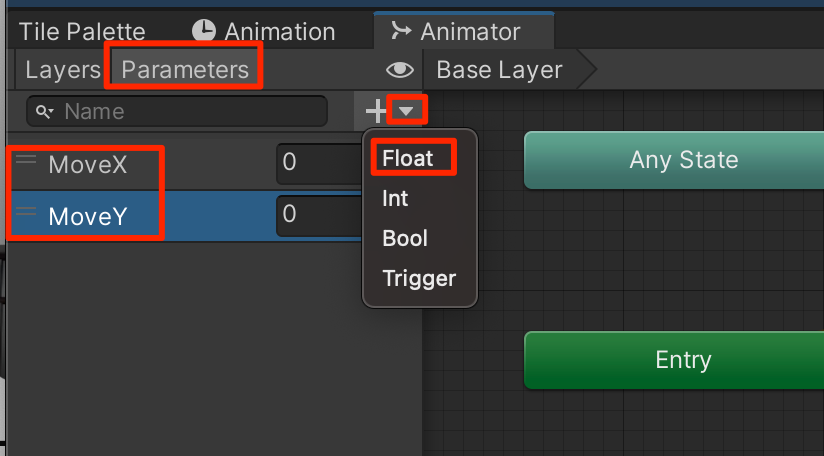
今回は横方向の移動量と縦方向の移動量の関係からモーションを決定するので、まずはパラメータとしてMoveXとMoveYをfloatで用意する。(最初からあるBlendは消すかRename)
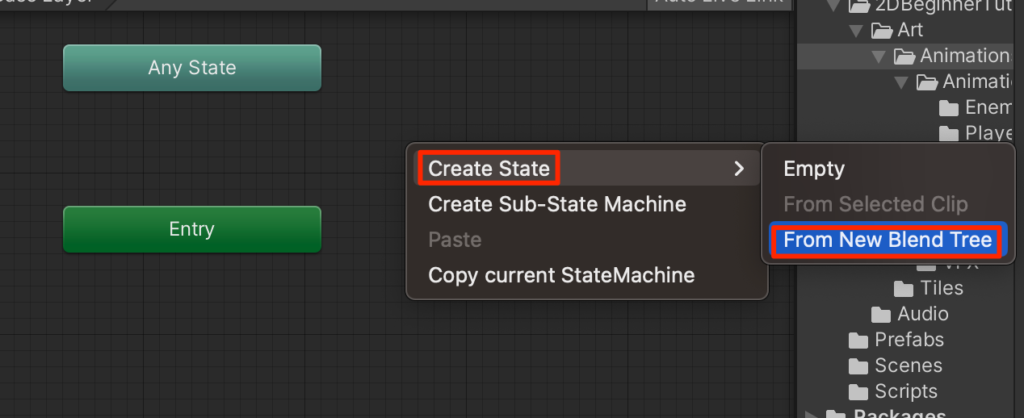
今回この4つのアニメーションの遷移はブレンドツリーを使って行う。
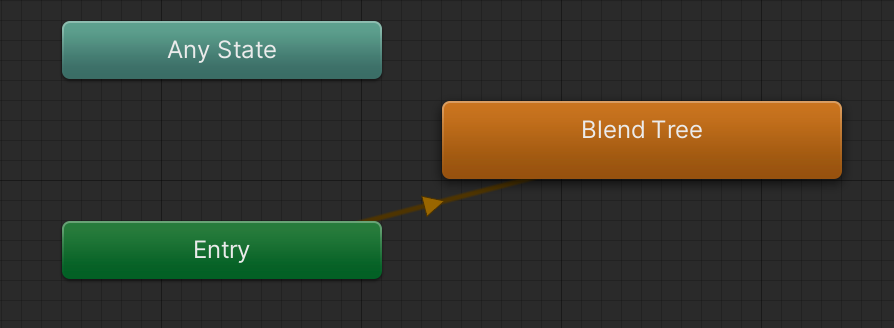
何もないところで右クリックしてCreate State -> From New Blend Treeを選択
新しいBlend Treeができるのでそれをダブルクリック
Blend Treeをクリックして選択状態にして
BlendTypeを2D Simple Directional
Parameters MoveX と MoveY
とした上で+を押す。
New Blend Treeを選択
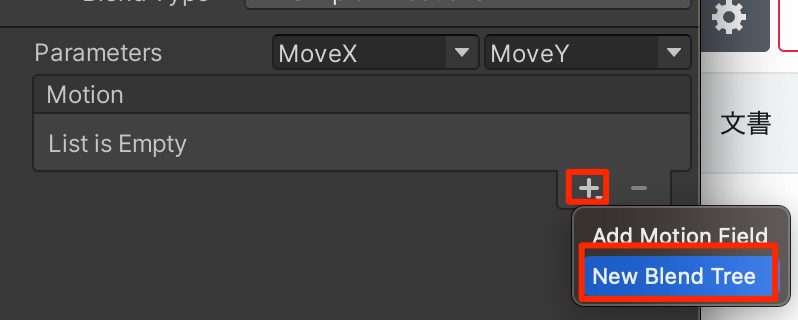
もう一度、+からNew Blend Tree
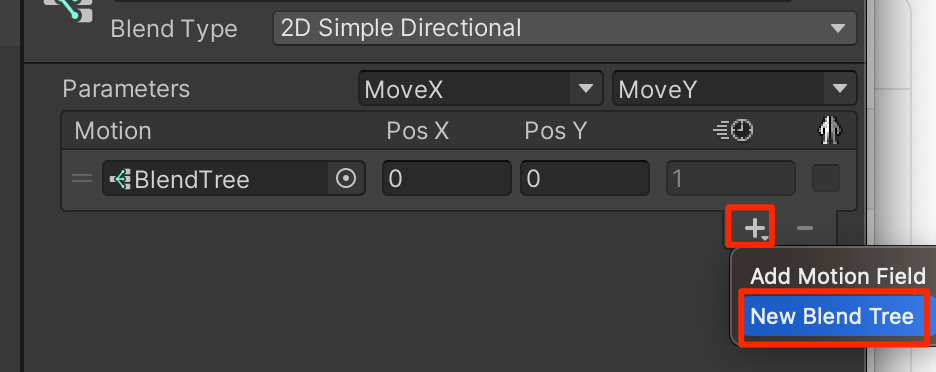
さらに+を押し、Add Motion Fieldを登録したいモーションの数だけ作成する(今回は4つ)
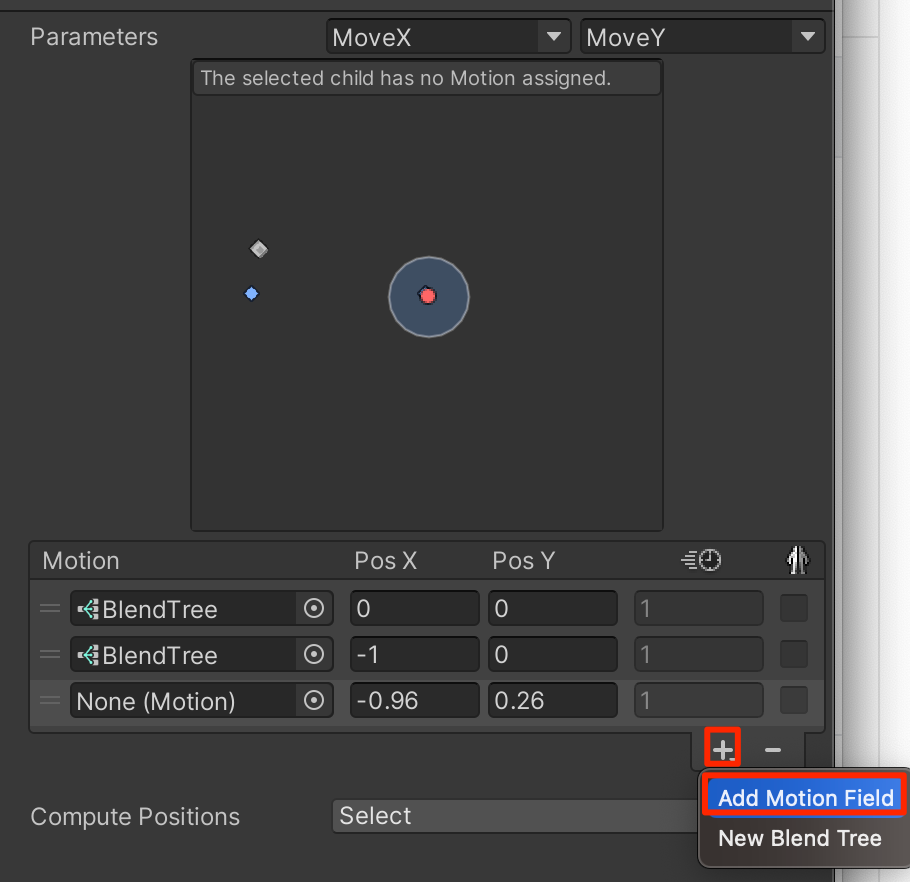
計4つのMotionフィールドを作成したらまるポチを押して作成したEnemy@~のアニメーションを順番に登録し、PosXとPosYの値を以下のように調節する。

こうすることで、2つの入力された値から適切なアニメーションが再生される。
下部でプレビューできるので上図の赤丸を動かしてみよう。
EnemyControllerの変更
MoveXとMoveYの値によって適切にアニメーションするようになったので
EnemyControllerを以下のように変更しよう。
using System.Collections;
using System.Collections.Generic;
using UnityEngine;

public class EnemyController : MonoBehaviour
{
    public float speed = 1.0f;
    public bool isVertical;
    public float changeTime = 2.0f;

    Rigidbody2D rb;
    float timer;
    int direction = 1;

    Animator anim;

    void Start()
    {
        rb=GetComponent<Rigidbody2D>();
        timer = changeTime;
        anim = GetComponent<Animator>();

    }

    void Update()
    {
        timer -= Time.deltaTime;

        if(timer < 0){
            direction = -direction;
            timer = changeTime;
        }
        Vector2 pos = rb.position;

        if(isVertical){
            pos.y=pos.y + Time.deltaTime * speed * direction;
            anim.SetFloat("MoveX",0);
            anim.SetFloat("MoveY",direction);
        }else{
            pos.x=pos.x + Time.deltaTime * speed * direction;
            anim.SetFloat("MoveX",direction);
            anim.SetFloat("MoveY",0);
        }
        rb.MovePosition(pos);
    }
    void OnCollisionEnter2D(Collision2D other) {
        RubyController rubyCon = other.gameObject.GetComponent<RubyController>();
        if(rubyCon != null){
            rubyCon.ChangeHealth(-1);
        }
    }
}
ゲームを実行してみよう。敵キャラが適切にアニメーションされていることがわかる。
Rubyのアニメーション
Rubyのアニメーションを同じように1から作成するのも大変勉強になるが、今回は付属してあるのでそれを使っていこう。
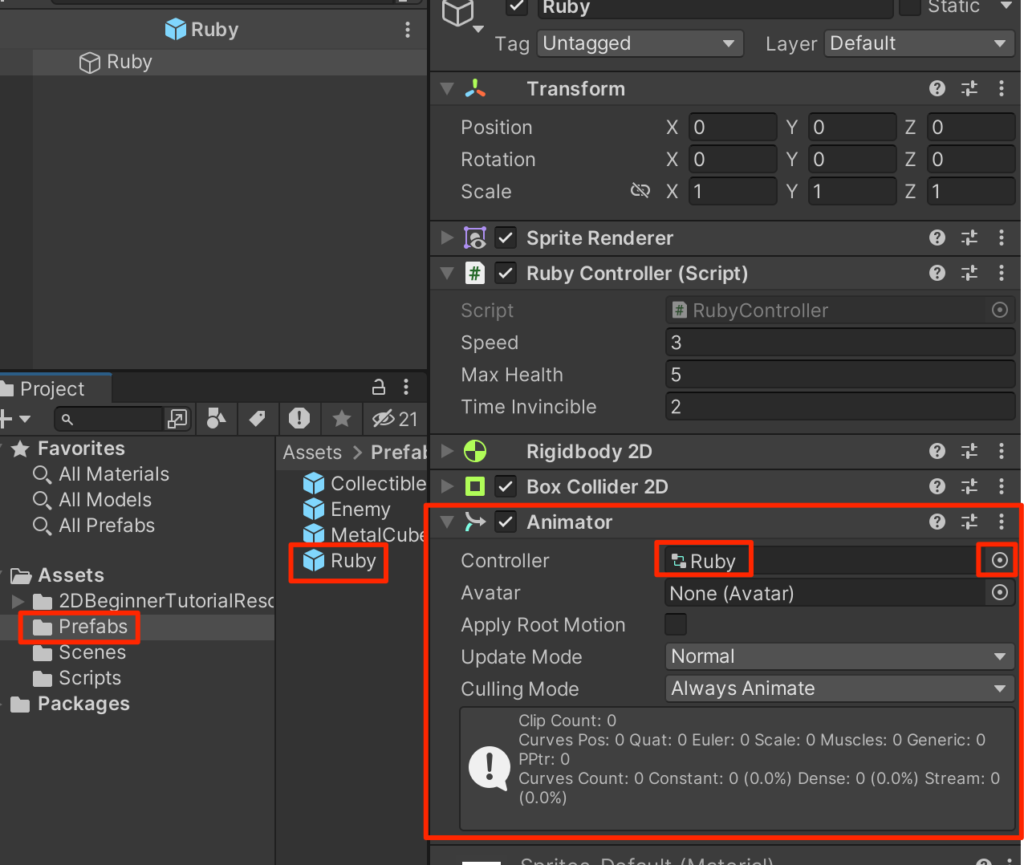
Rubyプレファブをダブルクリックしてプレファブモードで開いて、AddComponentからAnimatorコンポーネントを付与。
Controllerの右のまるポチからRubyを選択する。
RubyControllerの変更
using System.Collections;
using System.Collections.Generic;
using UnityEngine;

public class RubyController : MonoBehaviour
{
    public float speed=3.0f;

    public int maxHealth=5;
    int currentHealth;
    public int health{get{return currentHealth;}}
    public float timeInvincible=2.0f;
    bool isInvincible;
    float invincibleTimer;

    Rigidbody2D rb;

    Animator anim;
    Vector2 lookDirection = new Vector2(1f,0);
    void Start()
    {
        rb=GetComponent<Rigidbody2D>();
        currentHealth=maxHealth;
        anim=GetComponent<Animator>();
    }
    void Update()
    {
        float horizontal = Input.GetAxis("Horizontal");
        float vertical = Input.GetAxis("Vertical");

        Vector2 move = new Vector2(horizontal,vertical);
        if(move.sqrMagnitude > 0f){
            lookDirection.Set(move.x,move.y);
            lookDirection.Normalize();
        }

        anim.SetFloat("Look X",lookDirection.x);
        anim.SetFloat("Look Y",lookDirection.y);
        anim.SetFloat("Speed",move.magnitude);
        Vector2 position = rb.position;
        position.x = position.x + speed * horizontal * Time.deltaTime;
        position.y = position.y + speed * vertical * Time.deltaTime;
        rb.MovePosition(position);

        if(isInvincible){
            invincibleTimer -= Time.deltaTime;
            if(invincibleTimer < 0){
                isInvincible = false;
            }
        }
    }
    public void ChangeHealth(int amount){
        if(amount < 0){
            if(isInvincible) return;
            isInvincible = true;
            invincibleTimer = timeInvincible;
            anim.SetTrigger("Hit");
        }
        currentHealth = Mathf.Clamp(currentHealth + amount,0,maxHealth);
        Debug.Log(currentHealth + "/" + maxHealth);
    }
}
これで今回は終了だ。次回はRubyの攻撃手段を作成していく。


コメント