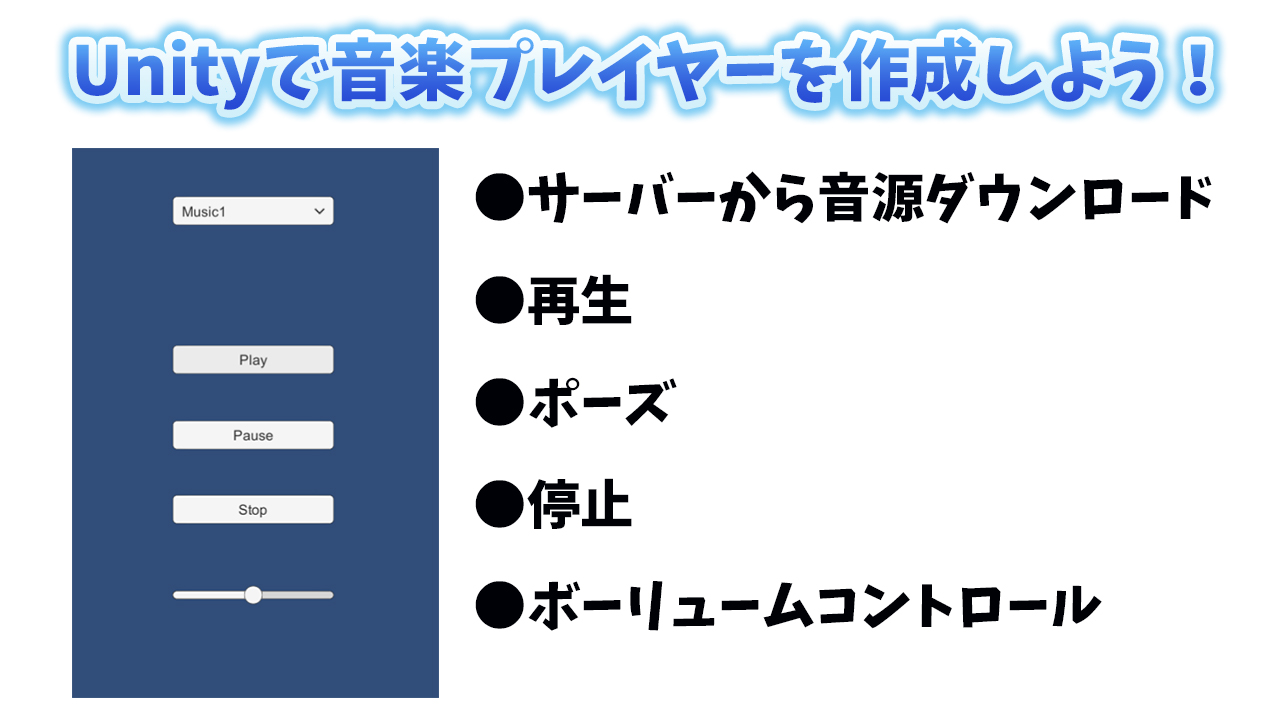
Unityで音楽プレイヤーを作成してみよう。なお、今回音源はサーバーに配置する。
UIの設定
① Unityで新規プロジェクトを2Dで作成する。今回プロジェクト名はUnityMusicPlayerとした。
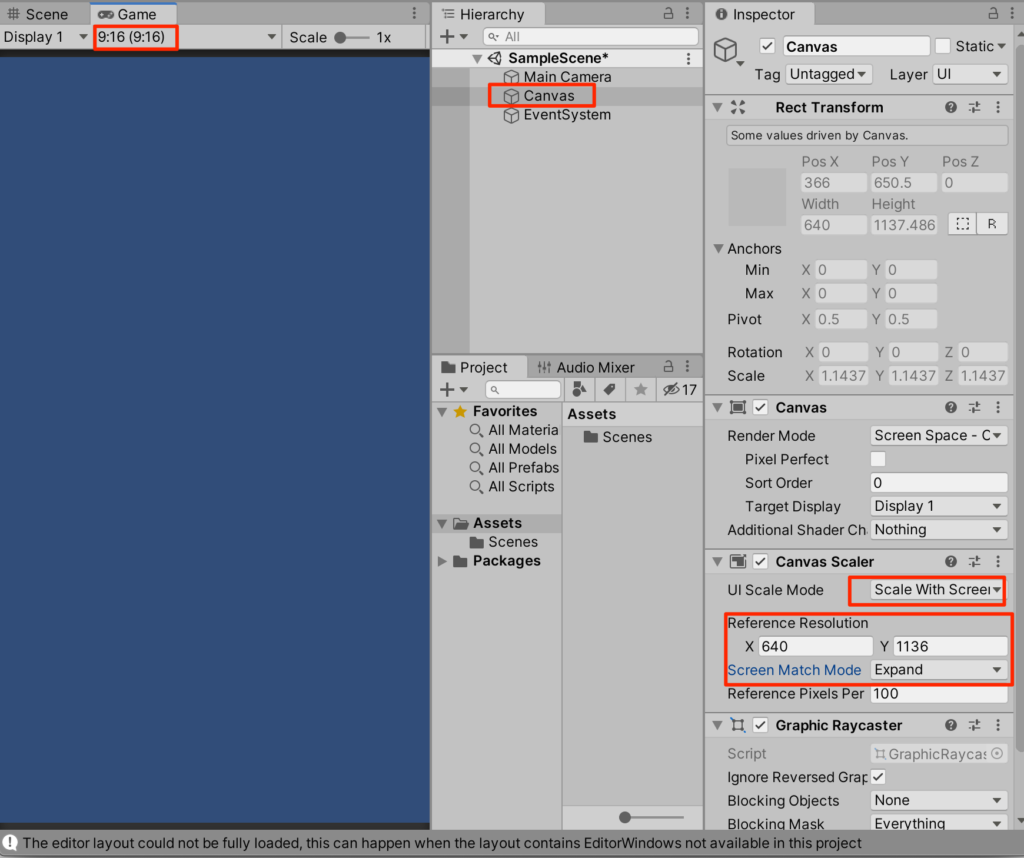
② 新規にキャンバスを配置し、以下のように縦長に設定する。
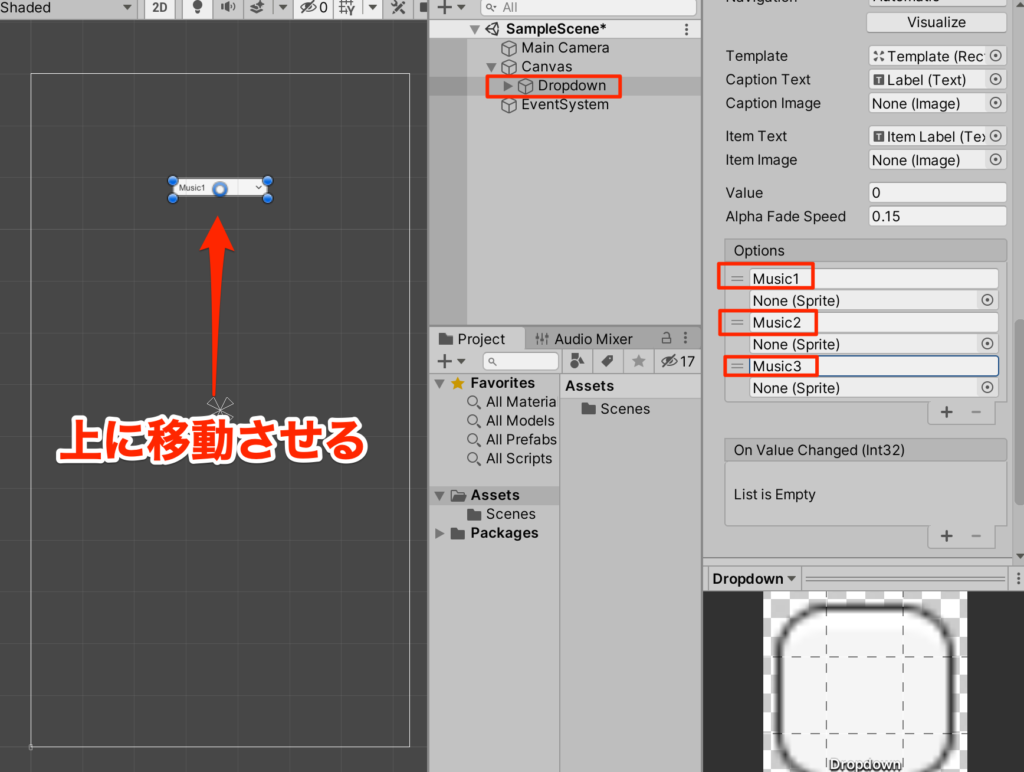
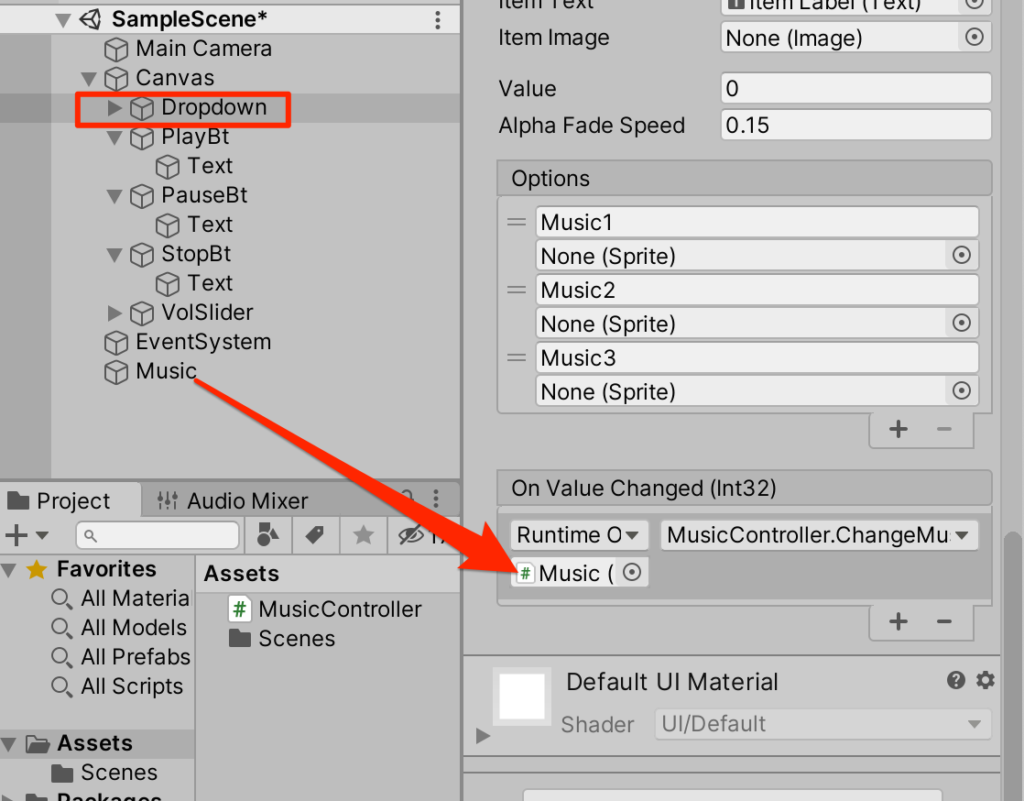
③ Canvasの子要素にDropdownを作成し、上方に配置した後、Optionsの値を以下のように書き換える
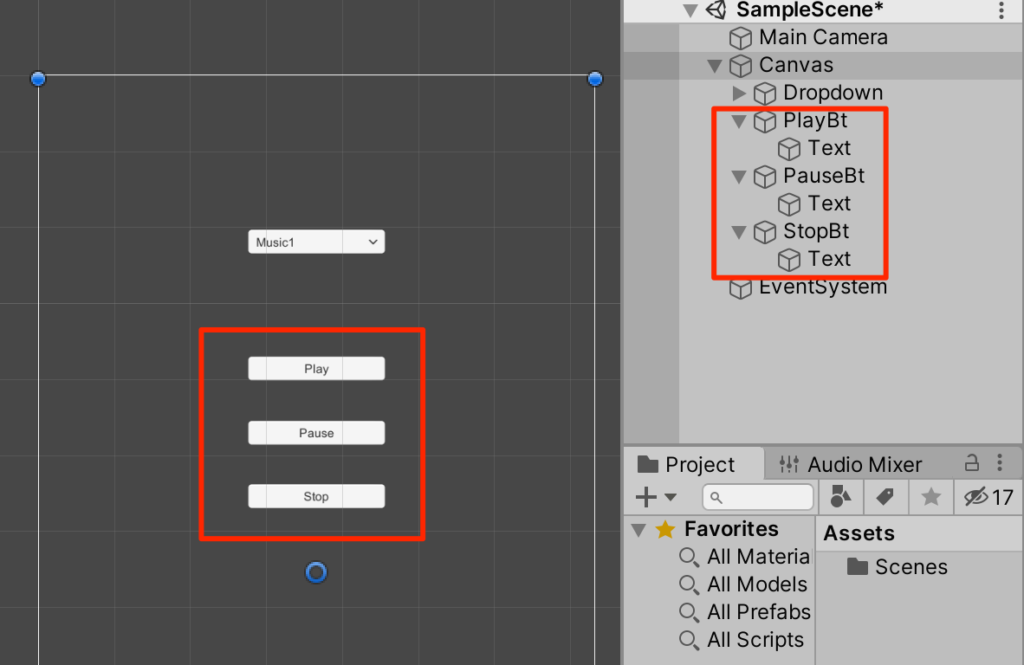
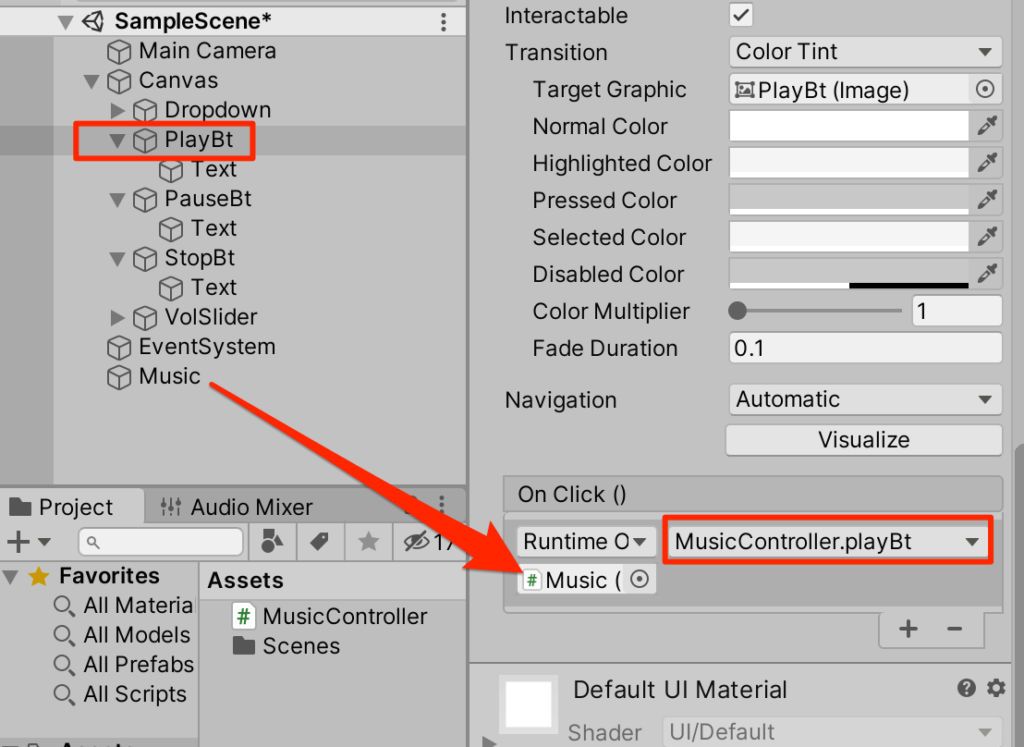
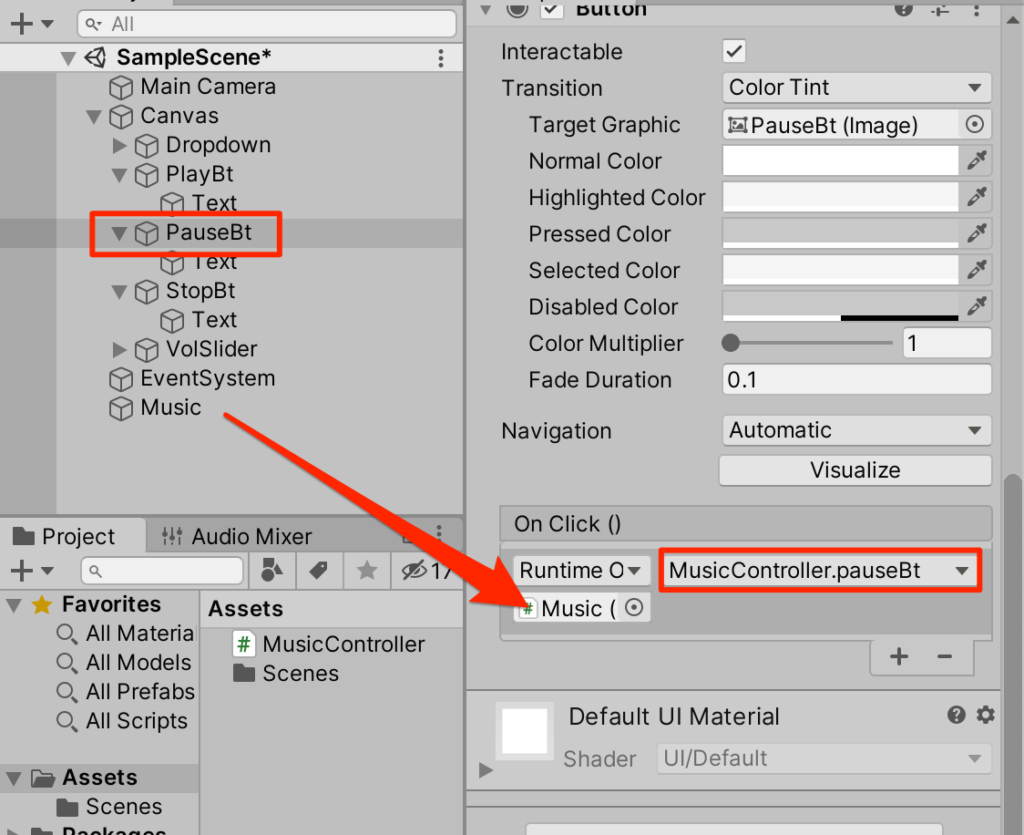
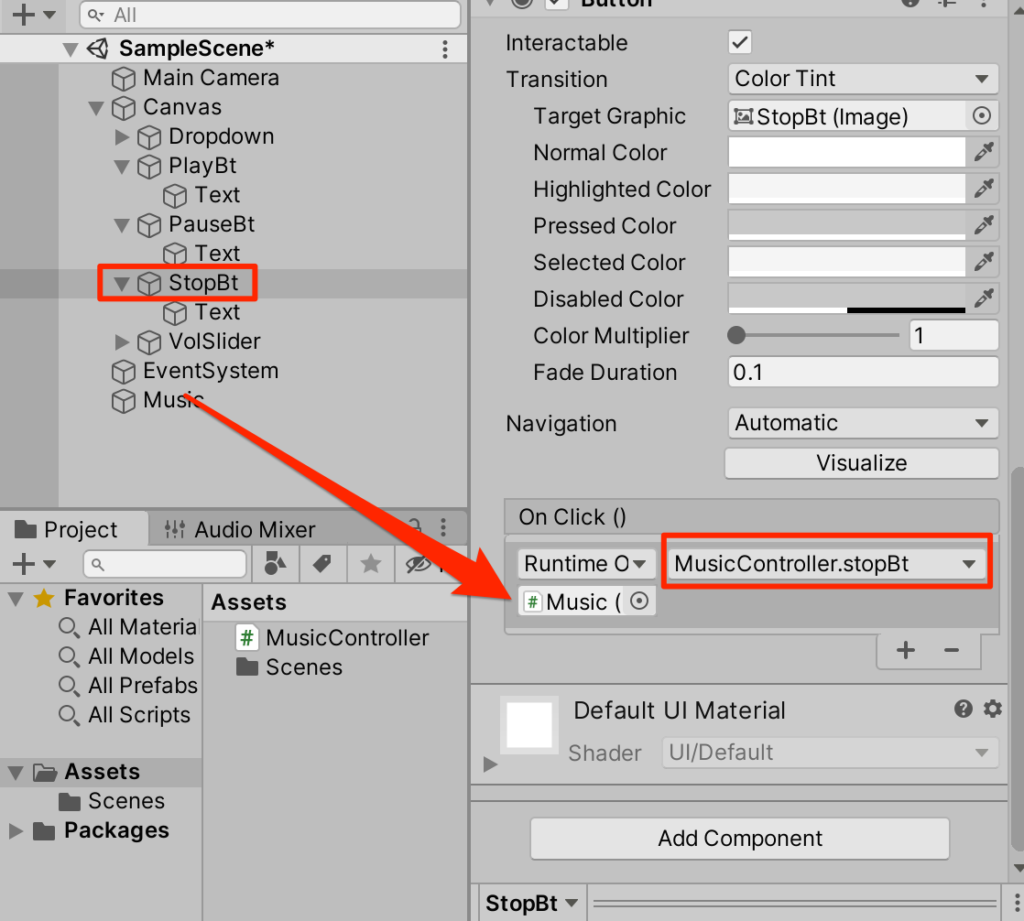
④ Canvasの子要素にButtonを3つ配置し、以下のように設定する
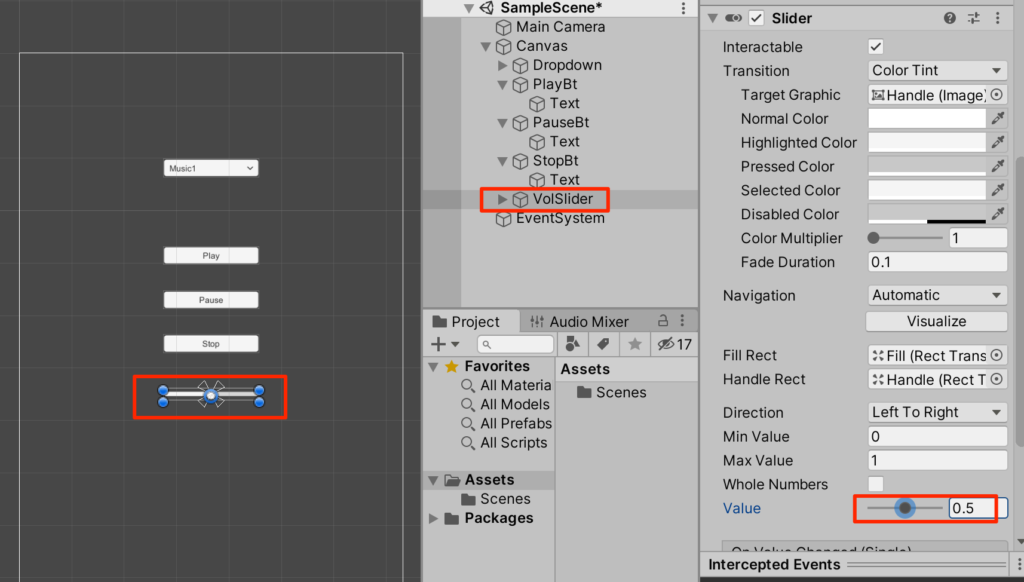
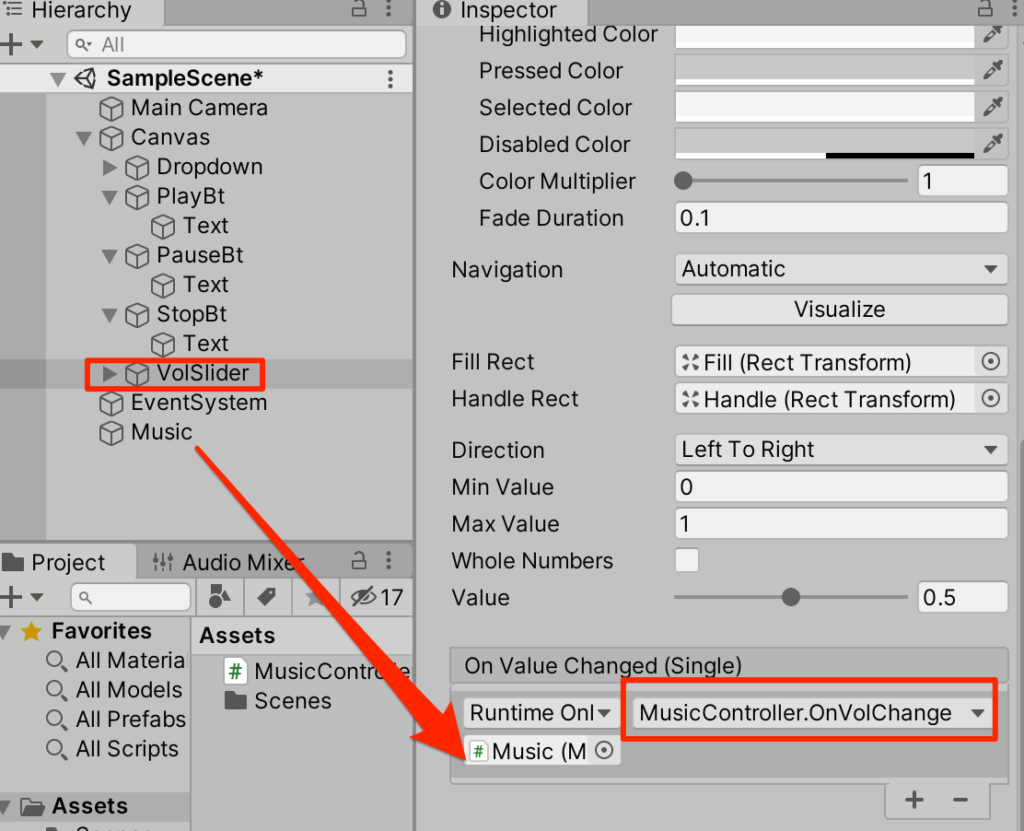
⑤ Canvasの子要素にsliderを配置し、VolSliderとリネーム後、初期値のvalueを0.5にしておく
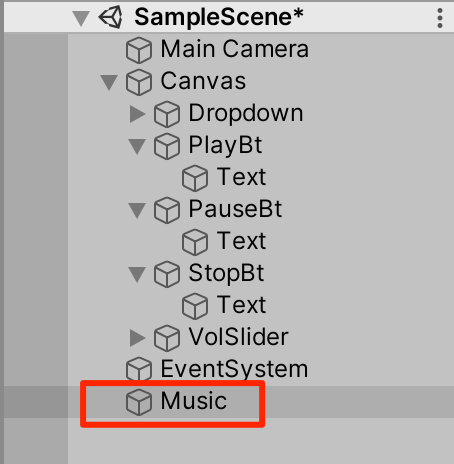
Musicオブジェクトの作成
① CreateEmptyから空のゲームオブジェクトを作成してMusicとリネームする。
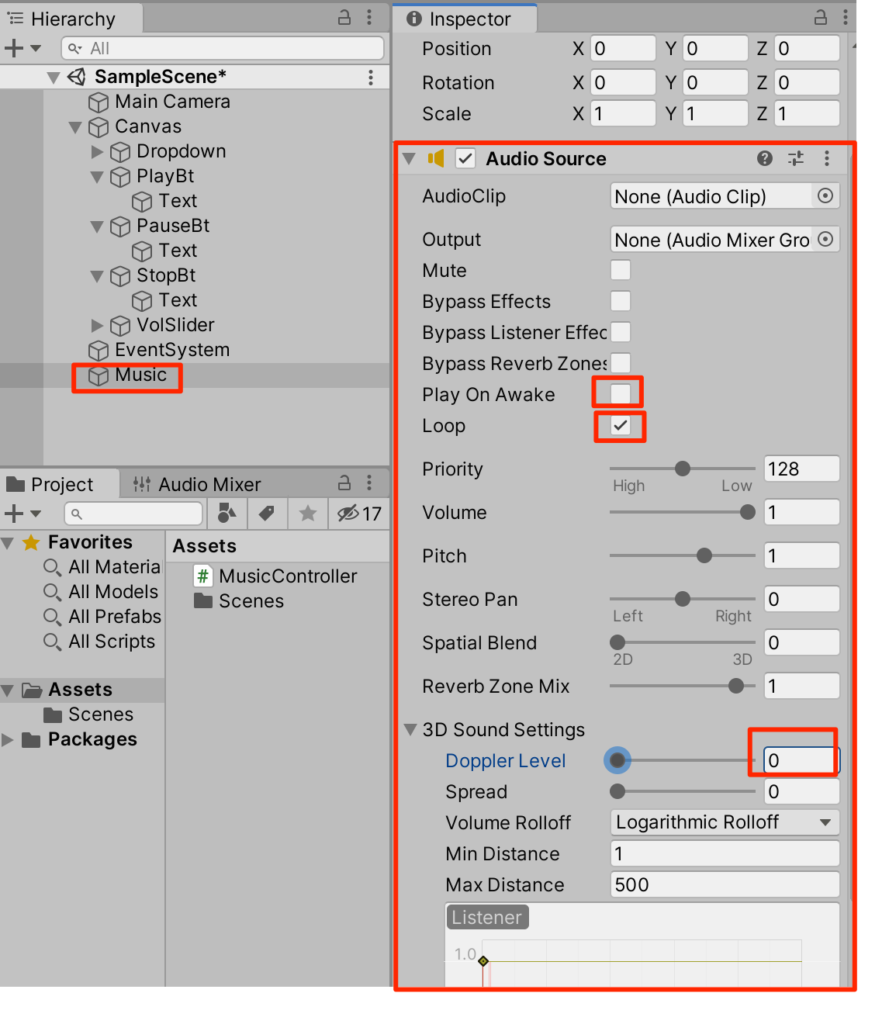
② MusicにAudioSourceコンポーネントを付与し、以下のように設定する。
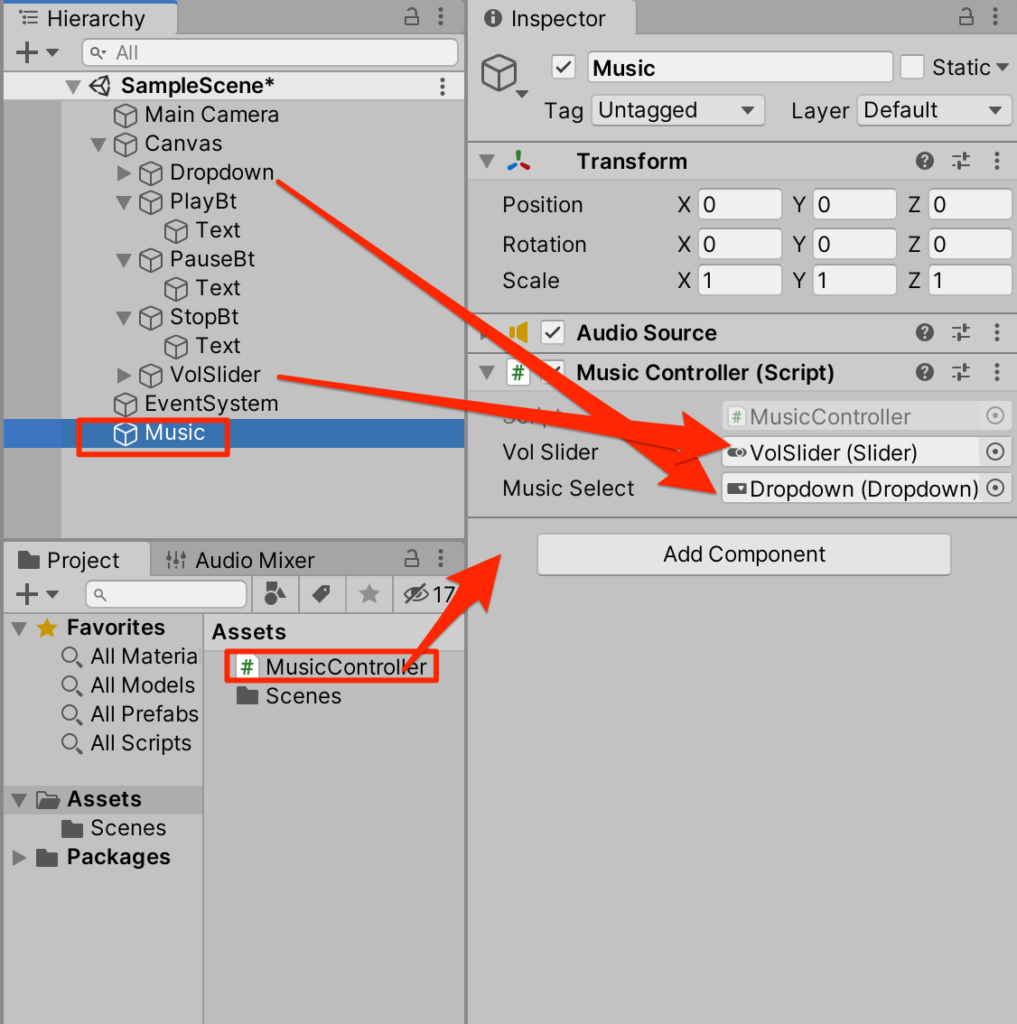
③ 新規C#よりMusicControllerスクリプトを作成し、以下のように記述する
using System.Collections;
using System.Collections.Generic;
using UnityEngine;
using UnityEngine.UI;
using UnityEngine.Networking;

public class MusicController : MonoBehaviour {
    //アタッチされたAudioSourceをキャッシュするための変数
    AudioSource myAudio;

    //スライダーの値をもとにボリュームを調整する
    public Slider volSlider;
    //選択項目をもとに読み込むファイルを決定する
    public Dropdown musicSelect;
    //番号とファイルUrlのDictionary
    Dictionary<int, string> dict = new Dictionary<int, string>();

    void Start() {
        dict.Add(0, "https://joytas.net/php/futta-fly3t.wav");
        dict.Add(1, "https://joytas.net/php/futta-rainbow3t.wav");
        dict.Add(2, "https://joytas.net/php/futta-snowman3t.wav");

        myAudio = GetComponent<AudioSource>();
        myAudio.volume = volSlider.value;
        //1曲目をセット
        StartCoroutine(GetAudioClip(dict[0]));
    }
    IEnumerator GetAudioClip(string musicUrl) {
        //音楽ファイルURLを元にuwrインスタンスを生成(今回ファイルタイプはwav)
        using (var uwr = UnityWebRequestMultimedia.GetAudioClip(musicUrl, AudioType.WAV)) {
            yield return uwr.SendWebRequest();
            if (uwr.isNetworkError || uwr.isHttpError) {
                Debug.LogError(uwr.error);
                yield break;
            }
            //無事音楽ファイルが取得できたらオーディオソースにセット
            myAudio.clip = DownloadHandlerAudioClip.GetContent(uwr);

        }
    }

    public void playBt() {
        myAudio.Play();
    }

    public void pauseBt() {
        myAudio.Pause();
    }
    public void stopBt() {
        myAudio.Stop();
    }

    public void OnVolChange() {
        myAudio.volume = volSlider.value;
    }
    public void ChangeMusic() {
        //ドロップダウンの情報を引数にしてコルーチン起動
        StartCoroutine(GetAudioClip(dict[musicSelect.value]));
    }
}
④ スクリプトをMusicに付与してDropDownとVolSliderを以下のように登録する
各UIの設定
① Dropdownを選択してOnValueChangedにMusicオブジェクトを登録。
Functionの中からMusicController.ChangeMusicを選択する。
② PlayBtを選択し、OnClickにMusicを登録しfunctionの中からMusicController.playBtを選択する
③ 同様にPauseBtにはpauseBtをStopBtにはstopBtを割り付ける
④ 最後にVolSliderも同じようにMusicController.OnVolChangeを割り付ける
完成
以上で完成だ。サーバーからの音源のダウンロード方法とスライダーでの音量調整などを参考にしてもらいたい。


コメント