
今回はカリキュラム学習を行う。カリキュラム学習とは最初は簡単な学習から始め徐々に学習内容を難しくしていくというものだ。簡単なことから徐々にステップアップさせていくことで複雑な事象も効率的に学習できる。参考にしている以下の書物のカリキュラム学習の部分がバージョン違いによってエラーが出るのであわせてこれも修正していこう。
参考書

作成
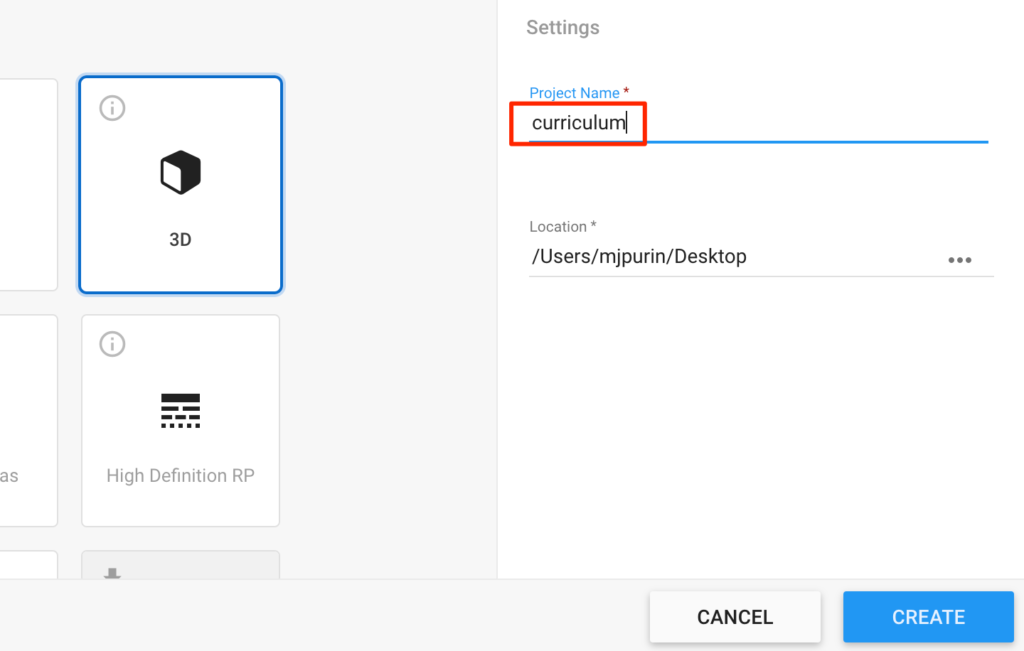
UnityHumを開き新規3Dプロジェクトからcurriculumという名でプロジェクトを作成する。
packageのインストール
PackageManagerを開き+ボタンからadd package from diskを選択する
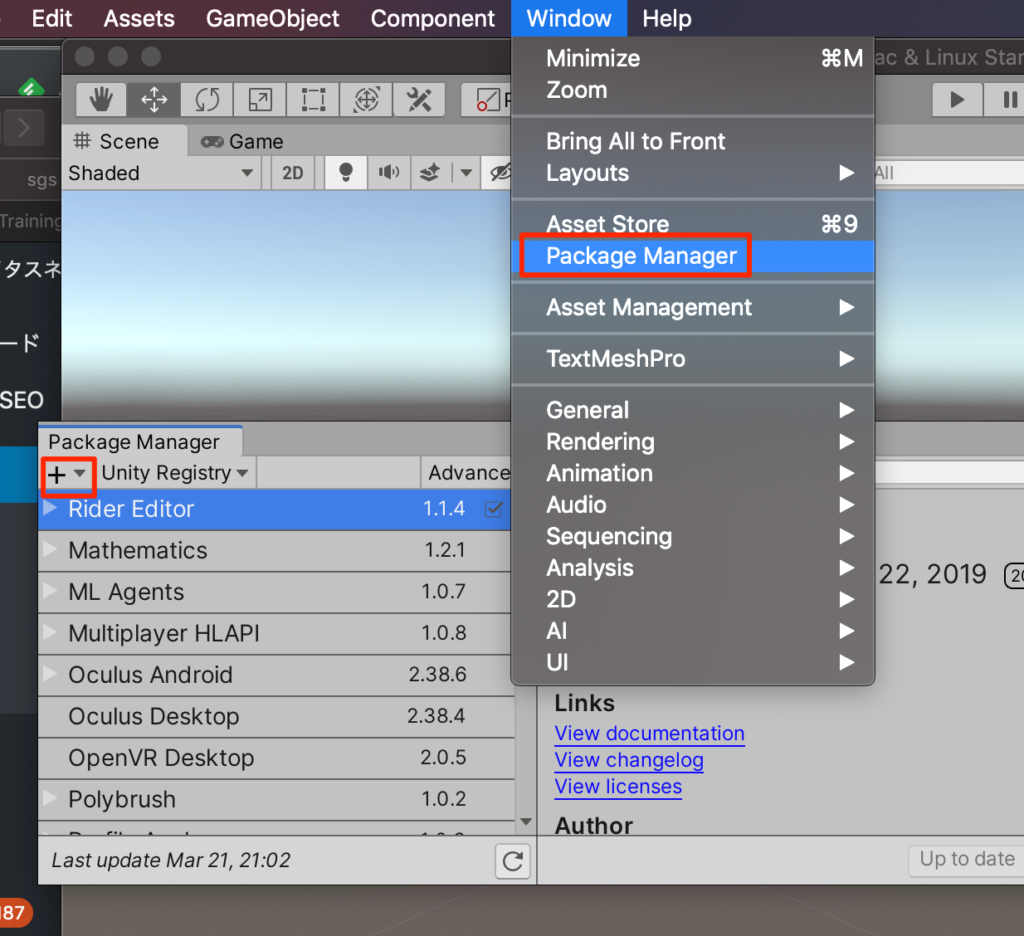
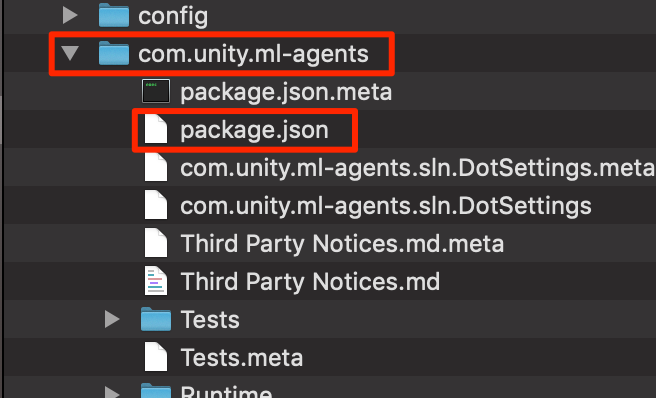
GitHubからインストール済みのml-agentsフォルダ->com.unity.ml-agents->package.jsonを選択しインポートする。(ここらへんの手順はここに詳しく記載Mac,Win)
ステージの作成
準備ができたのでさっそくステージを作成していこう。
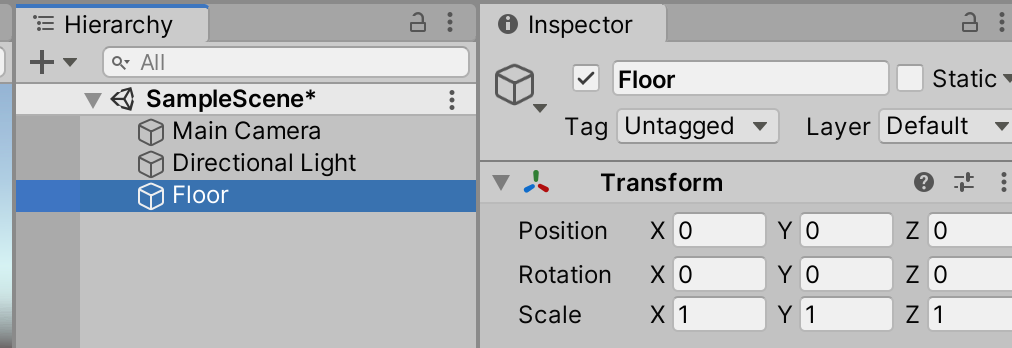
○Create3Dオブジェクトからplaneを選択。Floorとリネームする
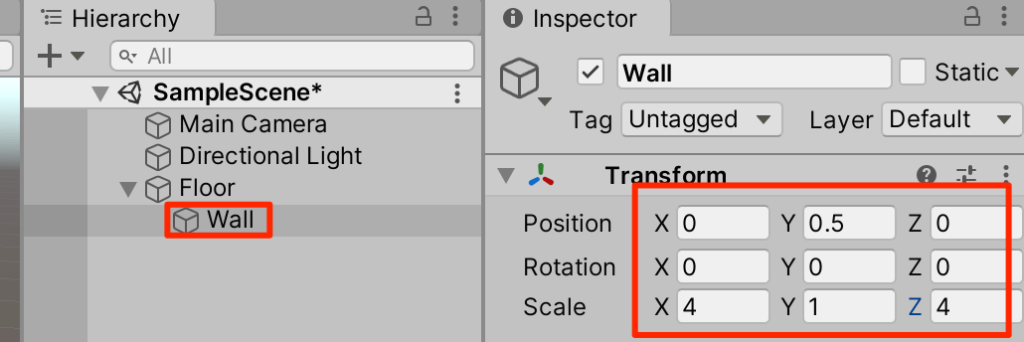
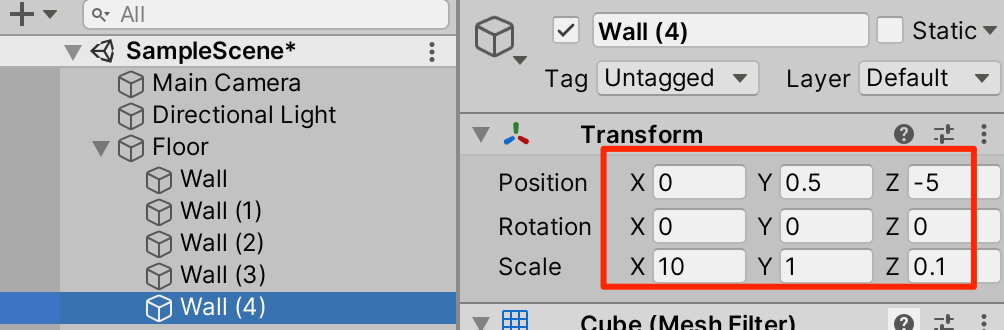
○Floorを右クリックしてFloorの子要素としてCubeを作成。Wallとリネームしてトランスフォームを以下のように調整
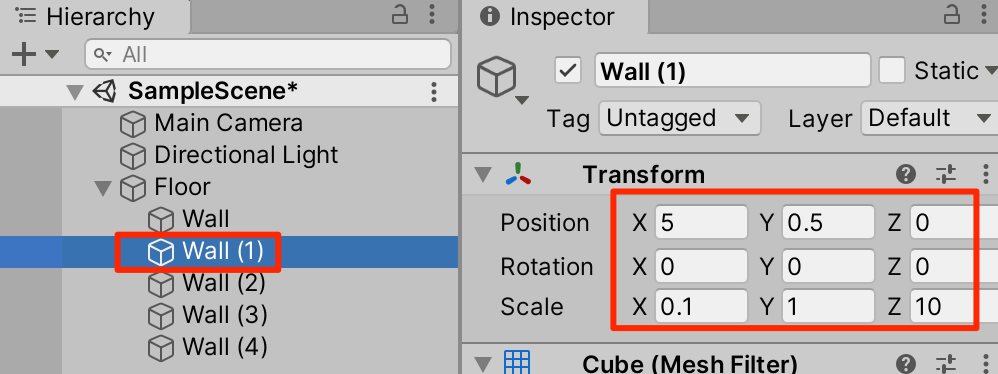
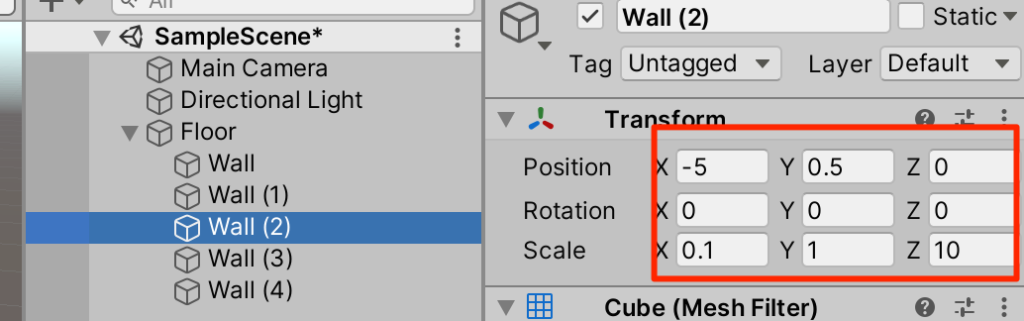
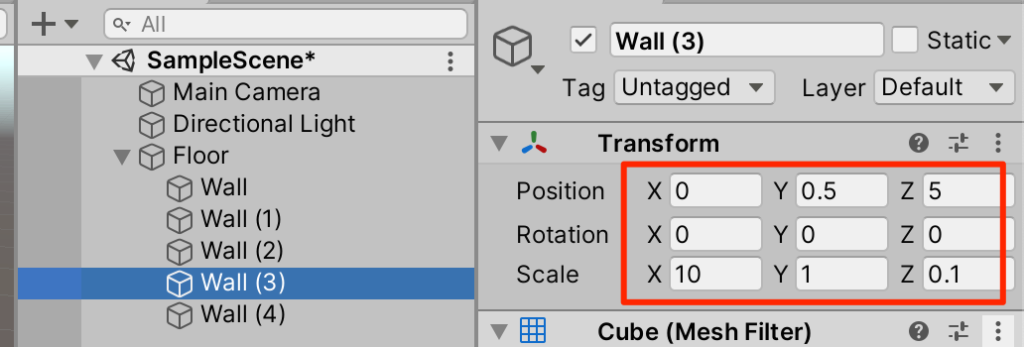
○Wallを4回複製(ctrl+D)してトランスフォームを以下のように調整
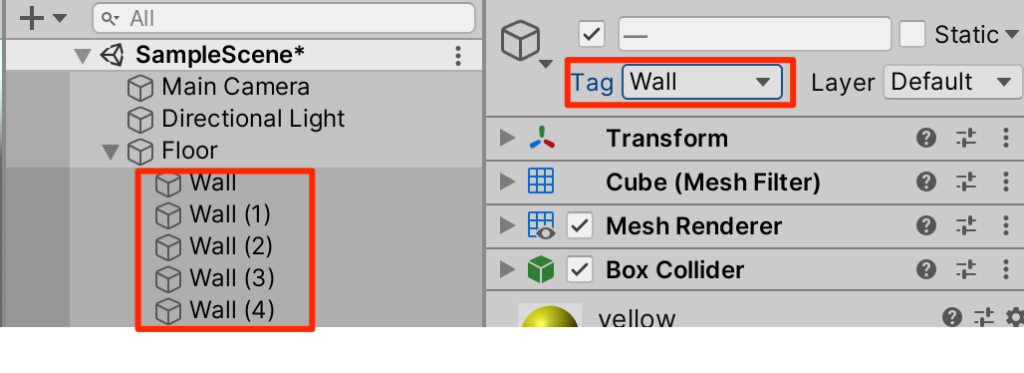
タグの設定
○新たにWallというタグを作成し、すべてのWallに付与する
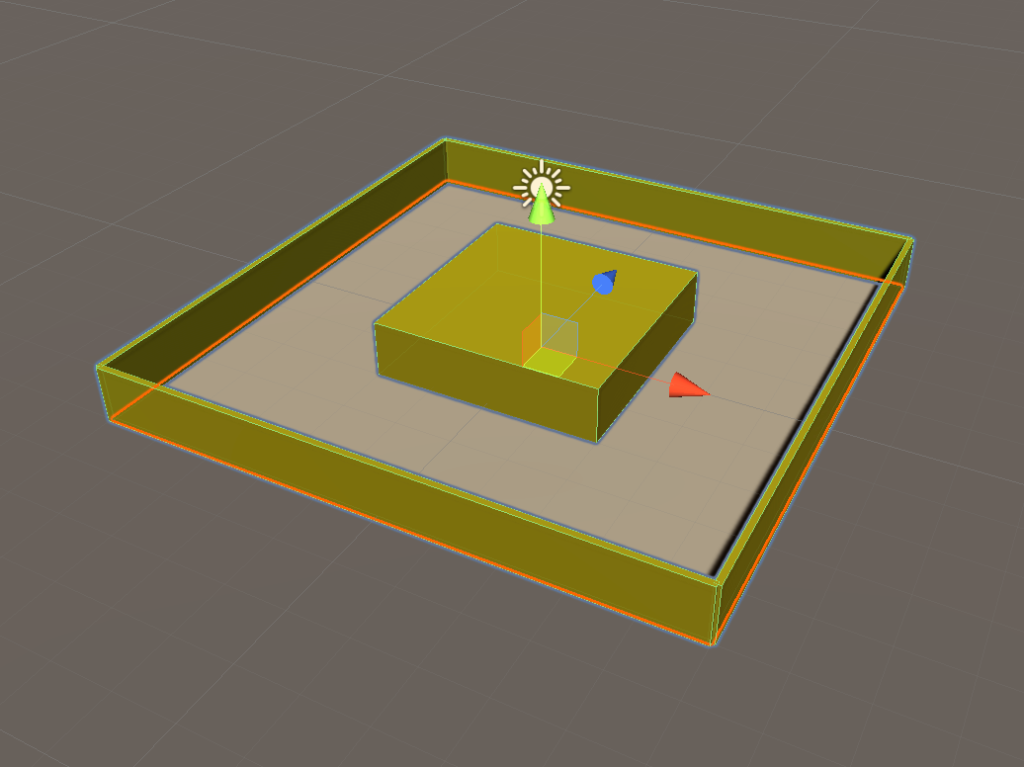
確認
以下のようになっていればOKだ。
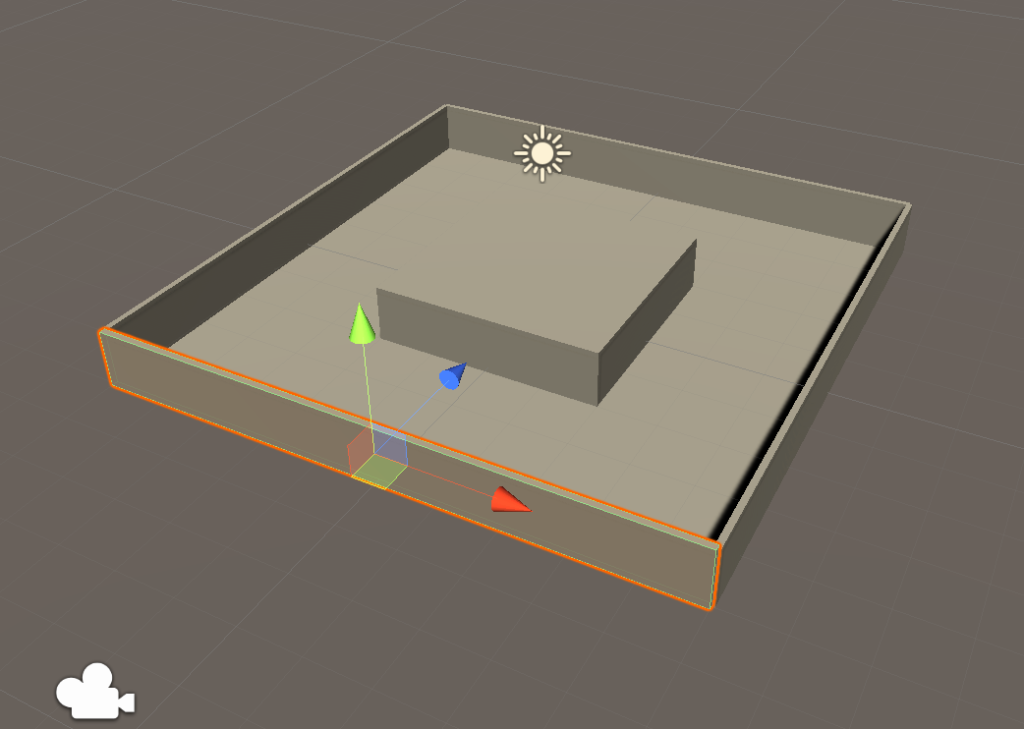
○(任意)素材の設定。マテリアルを作成し好きに色付けしてもらいたい。
エージェントの作成
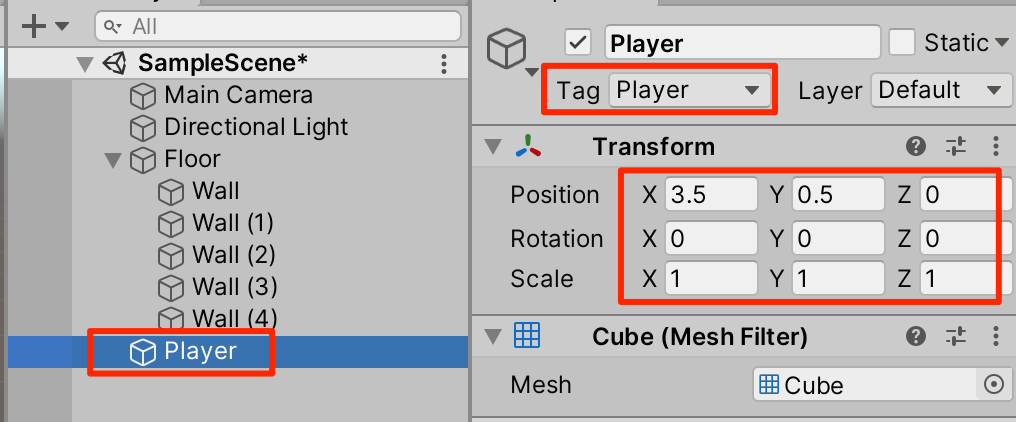
○新規にCubeを作成し、Playerとリネーム。Playerタグを付与してトランスフォームを以下のように調整し、好きな色を設定する
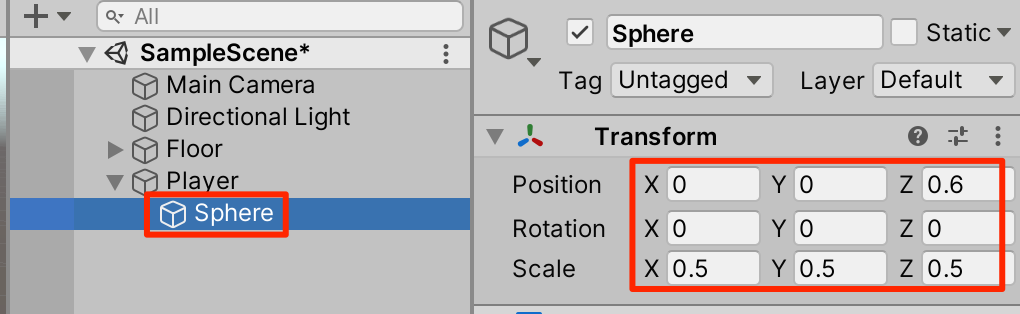
○鼻の追加。進行方向がわかるように鼻を追加しよう。Playerを右クリックしてSphereを追加。トランスフォームを以下のように調整
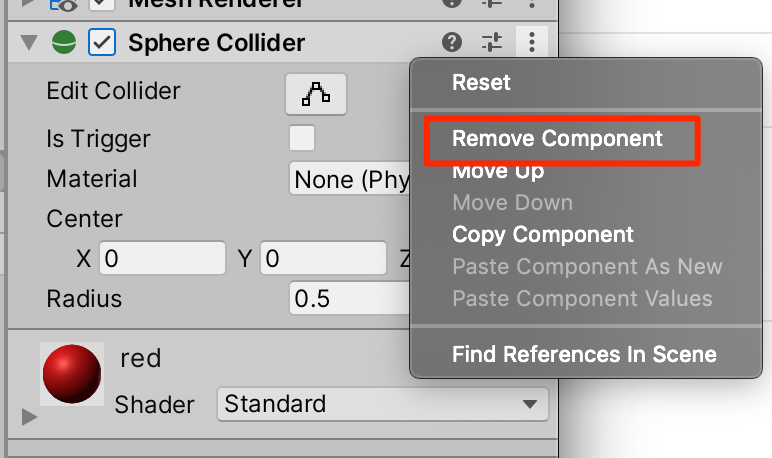
○赤い素材を付与して、コライダーを削除する
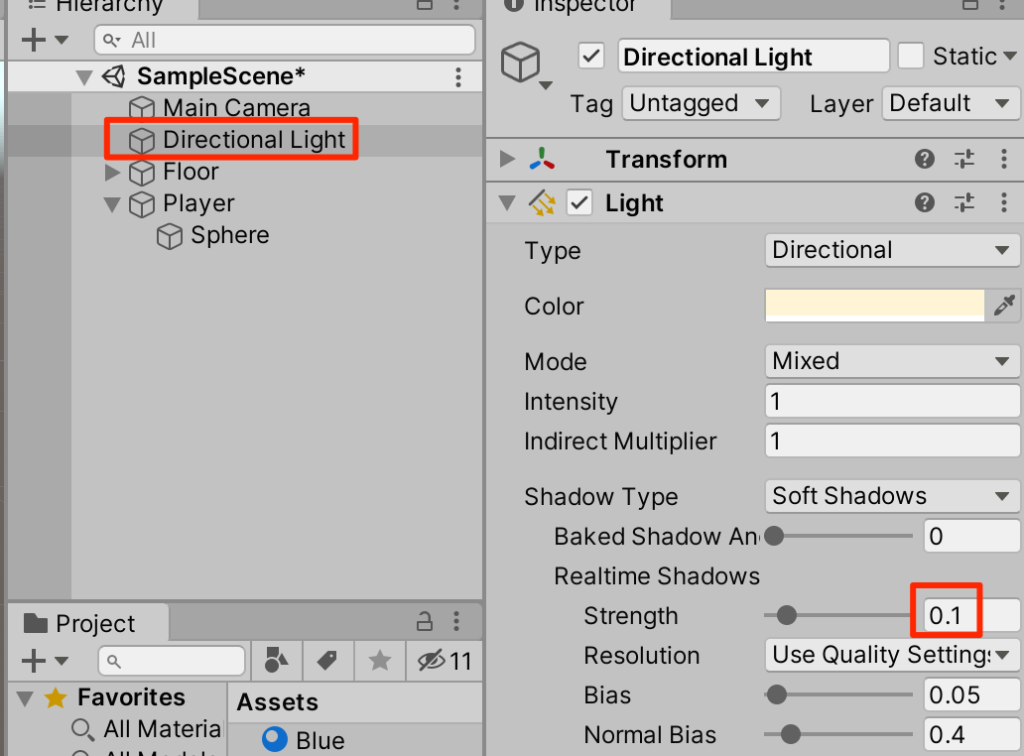
影の調整
○影が強すぎるのでDirectionalライトを選択して、影を弱めよう
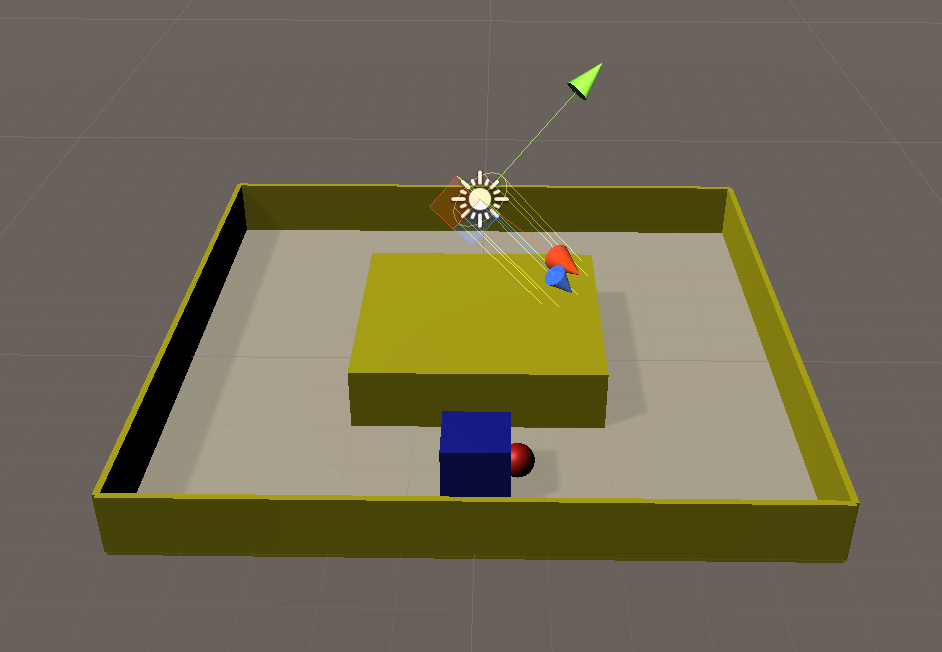
確認
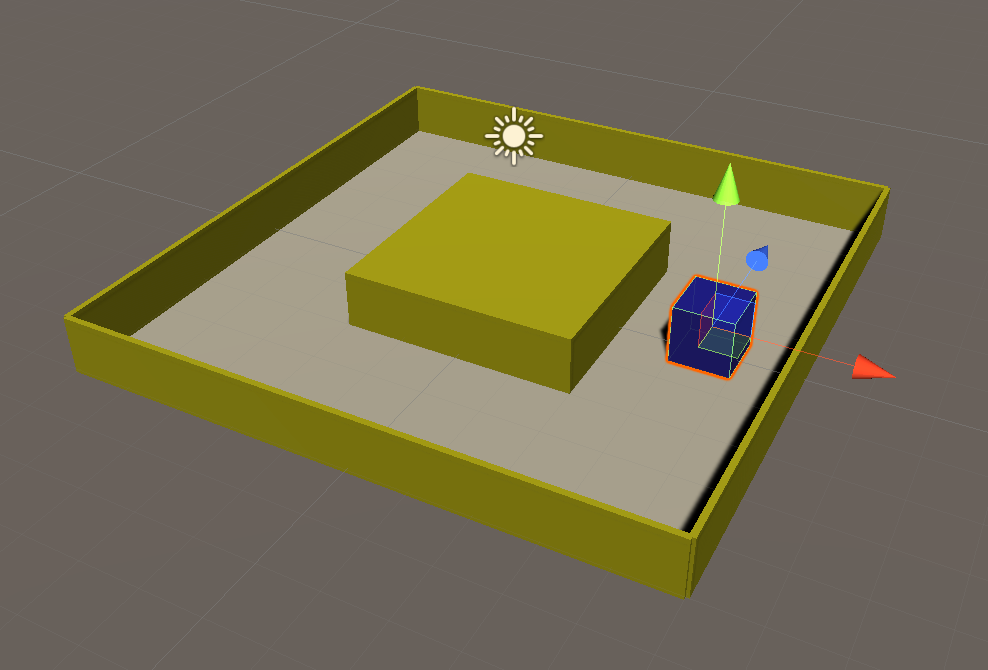
アングルを変えて確認してみよう。Playerに赤鼻がついていればここまではOKだ。
プレイヤーの設定
○Playerを選択し、Rigidbodyを付与する。この際、y軸回転以外は不要なので固定させておく

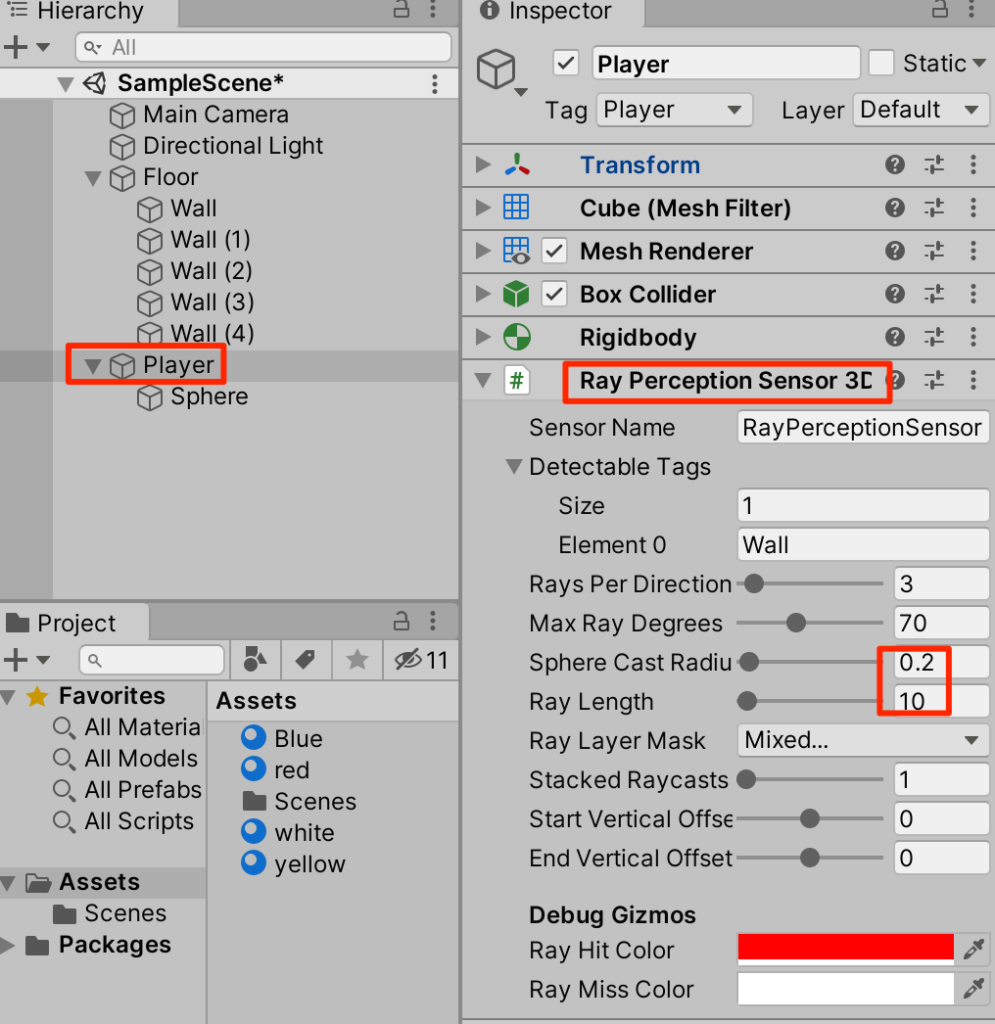
センサーの追加
○センサーで壁を検出できるようにしよう。PlayerにRay Perception Sensor Component 3Dを追加し、以下のように設定する。
Playerスクリプトの追加
新規C#スクリプトから以下のようにAgentを継承した。Playerクラスを作成する
using UnityEngine;
using Unity.MLAgents;
using Unity.MLAgents.Sensors;
using Unity.MLAgents.Actuators;
public class Player: Agent {
Rigidbody rb;
// 初期化時に呼ばれる
public override void Initialize() {
rb = GetComponent<Rigidbody>();
}
// 行動実行時に呼ばれる
public override void OnActionReceived(ActionBuffers actions) {
Vector3 dirToGo = Vector3.zero;
Vector3 rotateDir = Vector3.zero;
int action = actions.DiscreteActions[0];
if (action == 1) dirToGo = transform.forward;
if (action == 2) dirToGo = transform.forward * -1.0f;
if (action == 3) rotateDir = transform.up * -1.0f;
if (action == 4) rotateDir = transform.up;
this.transform.Rotate(rotateDir, Time.deltaTime * 200f);
this.rb.AddForce(dirToGo * 0.4f, ForceMode.VelocityChange);
}
// ヒューリスティックモードの行動決定時に呼ばれる
public override void Heuristic(in ActionBuffers actionsOut) {
var actions = actionsOut.DiscreteActions;
actions[0] = 0;
if (Input.GetKey(KeyCode.UpArrow)) actions[0] = 1;
if (Input.GetKey(KeyCode.DownArrow)) actions[0] = 2;
if (Input.GetKey(KeyCode.LeftArrow)) actions[0] = 3;
if (Input.GetKey(KeyCode.RightArrow)) actions[0] = 4;
}
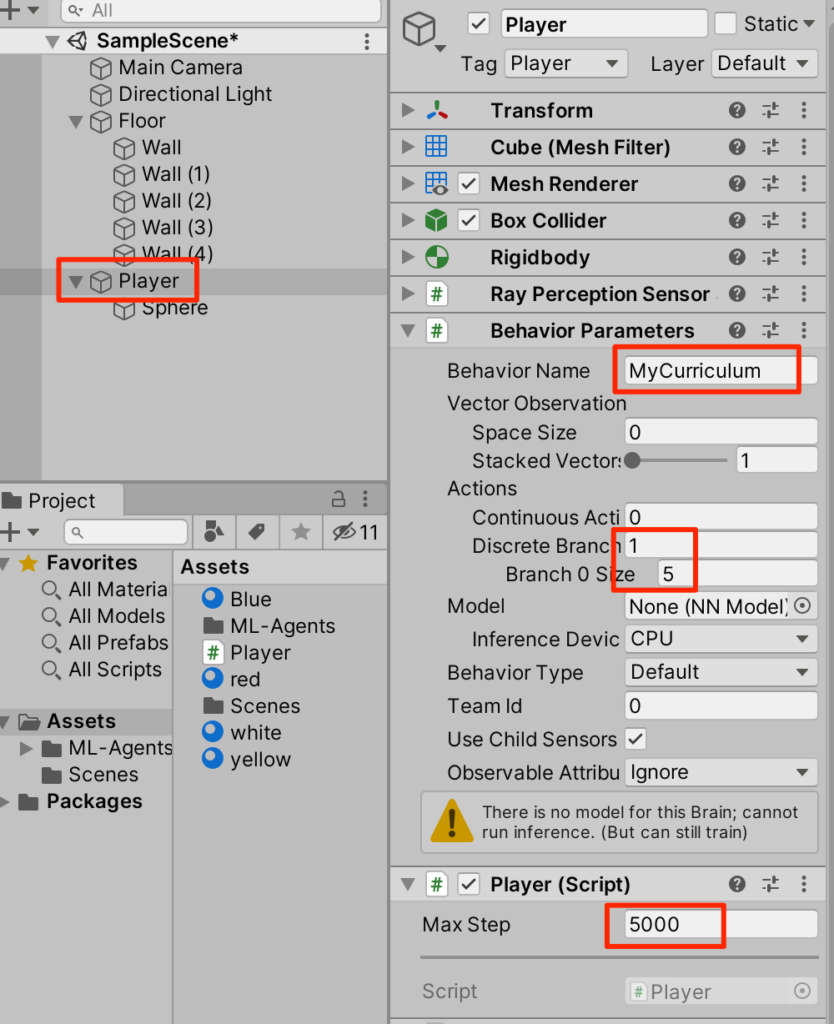
}○作成したスクリプトをPlayerにアタッチして以下のように設定する
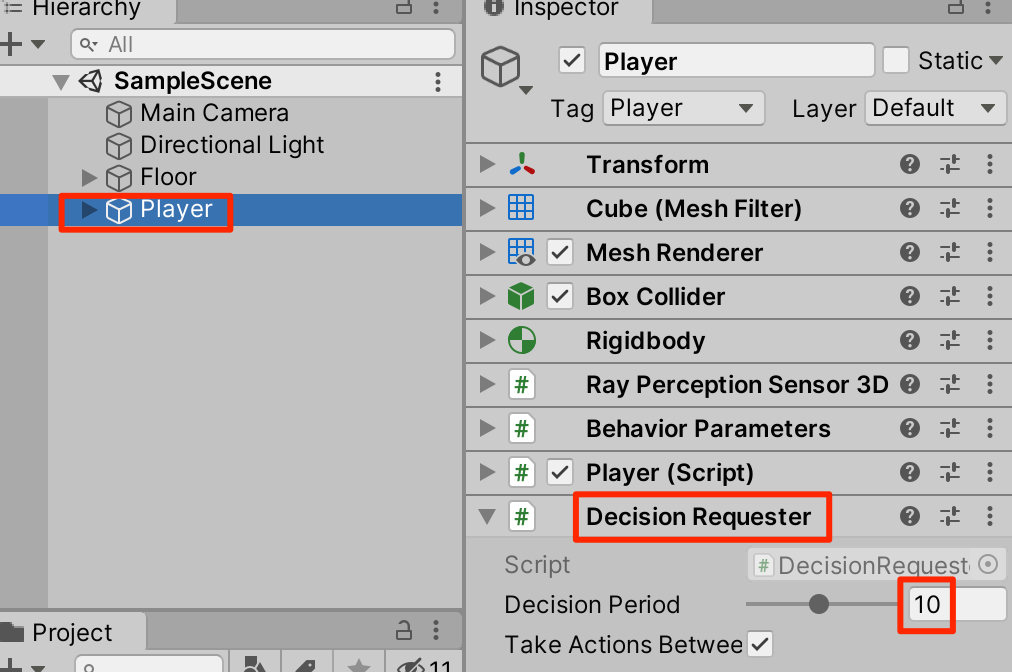
○まだ動かすことはできない。Playerを選択し、DecisionRequesterをアタッチ。Decision Periodを10に設定する
Heuristicで実行
ここまで行えばHeuristicで実行できる。実行し矢印キーを操作してコースを反時計回りに回ってみよう。
機械学習
観察値の追加
機械学習ではまずはその時の状態を取得しなければならない。これを観察(Observation)という。現在、レイによるセンサーによって壁との距離を観察しているが、それに現在のPlayerの速度を加えよう。
○Behavior ParametersコンポーネントのSpace Sizeを2に設定する。これで観測時に2つのfloat値を扱うことができるようになる
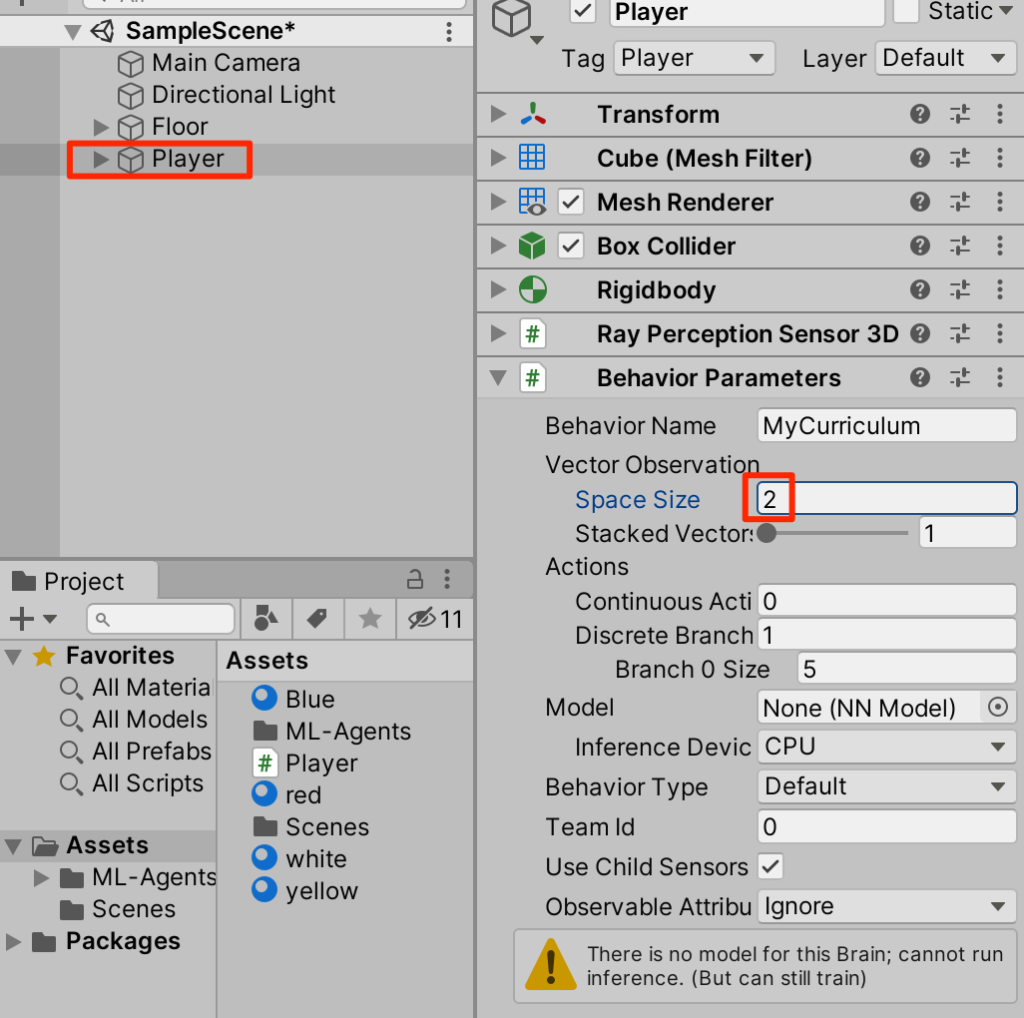
○Playerスクリプトに以下ハイライトの部分を追記する。これで観測時にplayerの速度のx成分とz成分の2つのfloat値が使われるようになる。
using UnityEngine;
using Unity.MLAgents;
using Unity.MLAgents.Sensors;
using Unity.MLAgents.Actuators;

public class Player: Agent {
    Rigidbody rb;

    // 初期化時に呼ばれる
    public override void Initialize() {
        rb = GetComponent<Rigidbody>();
    }

    // 状態取得時に呼ばれる
    public override void CollectObservations(VectorSensor sensor) {
        sensor.AddObservation(rb.velocity.x); // PlayerのX速度
        sensor.AddObservation(rb.velocity.z); // PlayerのZ速度
    }


    // 行動実行時に呼ばれる
    public override void OnActionReceived(ActionBuffers actions) {
        Vector3 dirToGo = Vector3.zero;
        Vector3 rotateDir = Vector3.zero;

        int action = actions.DiscreteActions[0];
        if (action == 1) dirToGo = transform.forward;
        if (action == 2) dirToGo = transform.forward * -1.0f;
        if (action == 3) rotateDir = transform.up * -1.0f;
        if (action == 4) rotateDir = transform.up;
        this.transform.Rotate(rotateDir, Time.deltaTime * 200f);
        this.rb.AddForce(dirToGo * 0.4f, ForceMode.VelocityChange);
    }

    // ヒューリスティックモードの行動決定時に呼ばれる
    public override void Heuristic(in ActionBuffers actionsOut) {
        var actions = actionsOut.DiscreteActions;
        actions[0] = 0;
        if (Input.GetKey(KeyCode.UpArrow)) actions[0] = 1;
        if (Input.GetKey(KeyCode.DownArrow)) actions[0] = 2;
        if (Input.GetKey(KeyCode.LeftArrow)) actions[0] = 3;
        if (Input.GetKey(KeyCode.RightArrow)) actions[0] = 4;
    }
}
カリキュラム学習の方針
ではさきほど手動で行った動きを機械学習によって自動的にできるようにしていこう。今回はカリキュラム学習を行うのだが以下のように3つのステップに分けて行っていく。
Lesson0:チェックポイントを(反時計回りに)通過すると報酬がもらえる
Lesson1:1周すると報酬がもらえる
Lesson2 : 1周するのにかかった時間が短い方が報酬が増える
最初から一度にすべてを行うのではなく、徐々に訓練を難しくしてイメージだ。こうして学習することで結果としてより効率的に学習することができる。
チェックポイントの追加
ということでまずは、小目標となるチェックポイントを設置していこう。
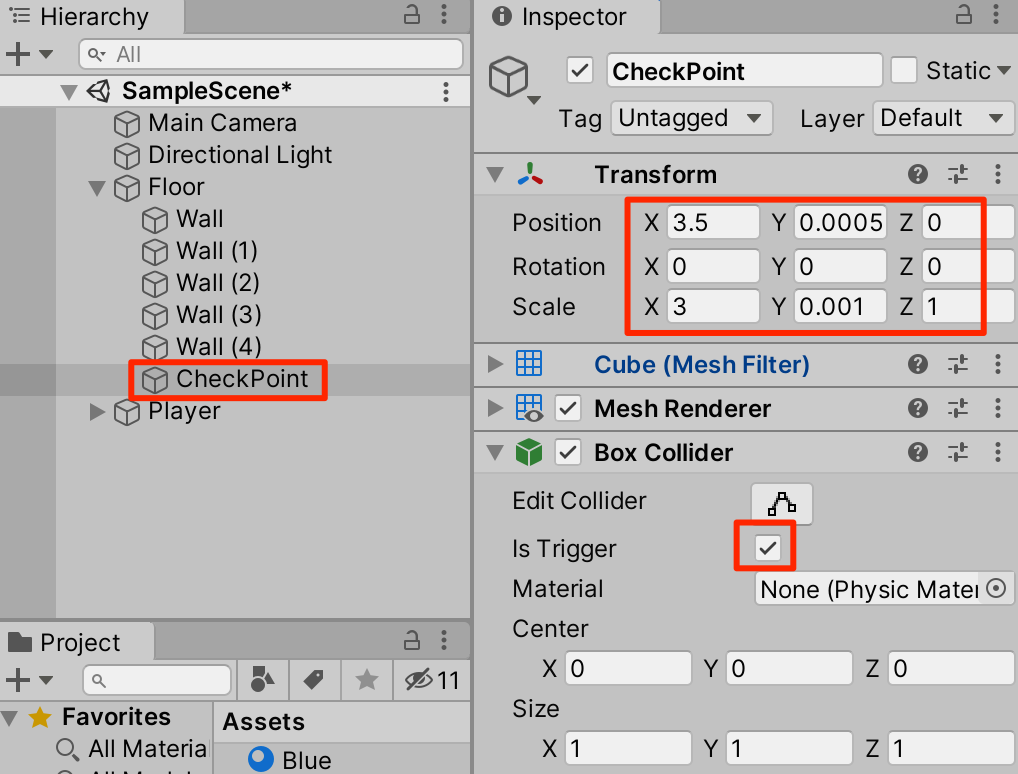
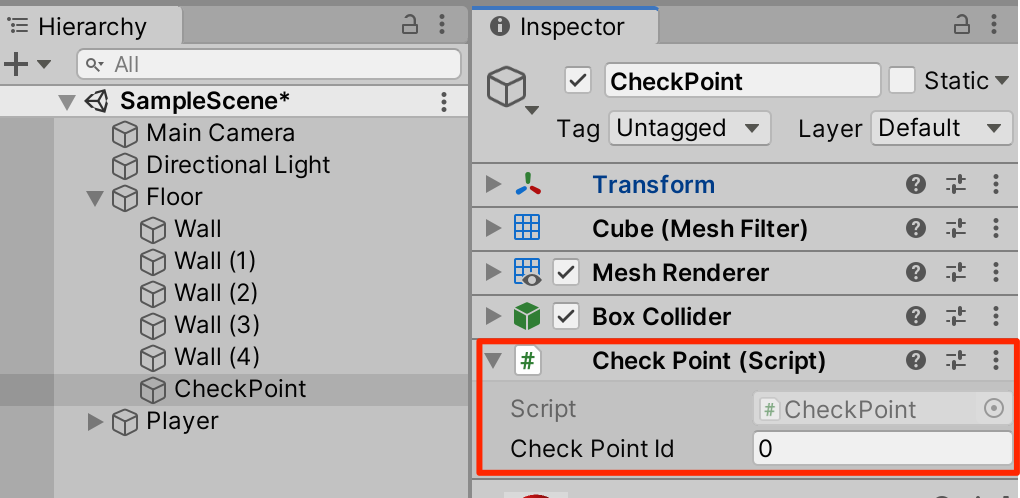
○Floorの子要素といてCubeを作成。トランスフォームを以下のように調整し、IsTriggerにチェックをいれる。
○赤の素材を設定
○CheckPointスクリプトを以下のように作成し、アタッチする
using System.Collections;
using System.Collections.Generic;
using UnityEngine;

public class CheckPoint : MonoBehaviour
{
    public int checkPointId;
}
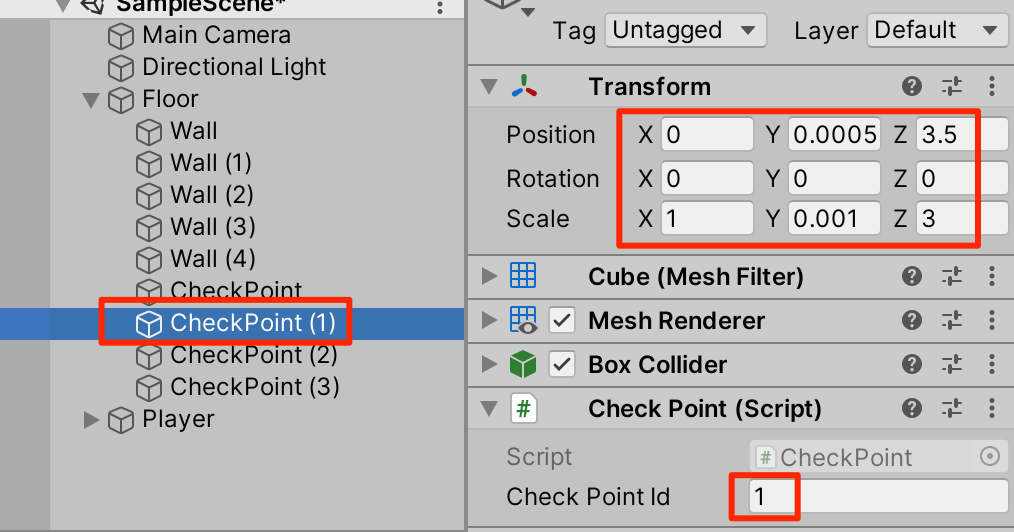
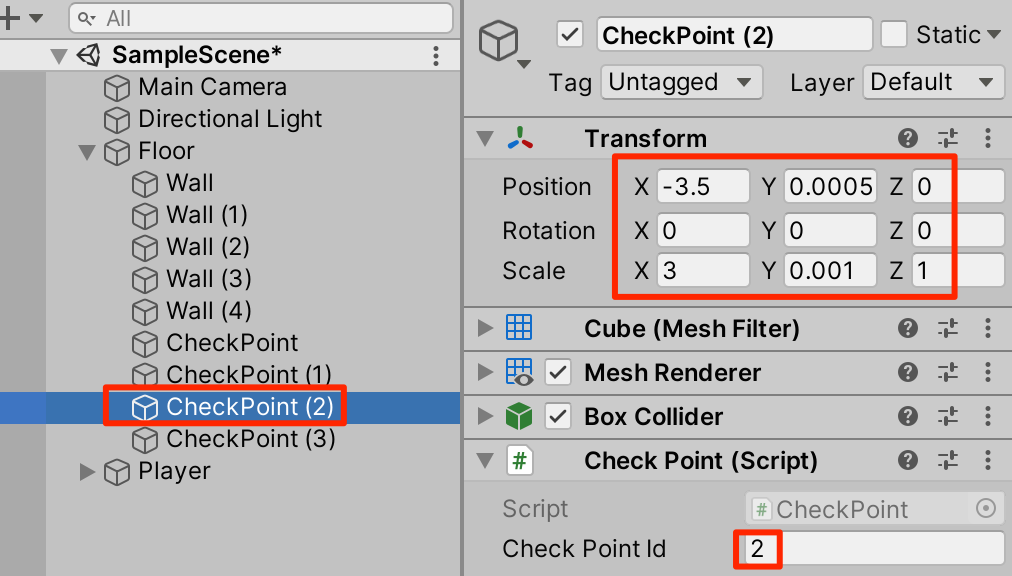
○CheckPointを3回複製(Ctrl+D)して以下のように設定する

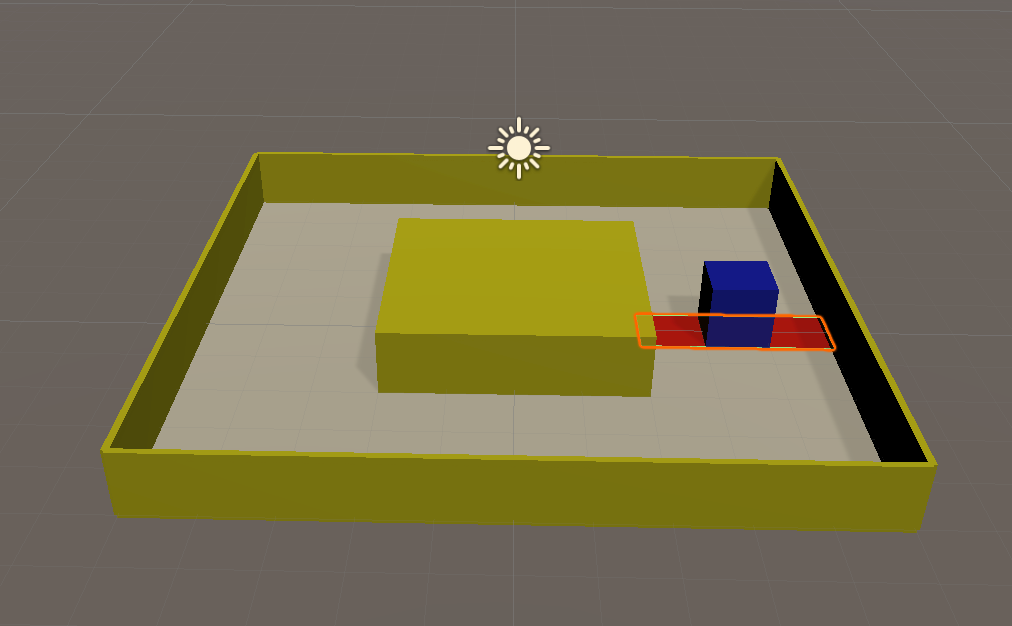
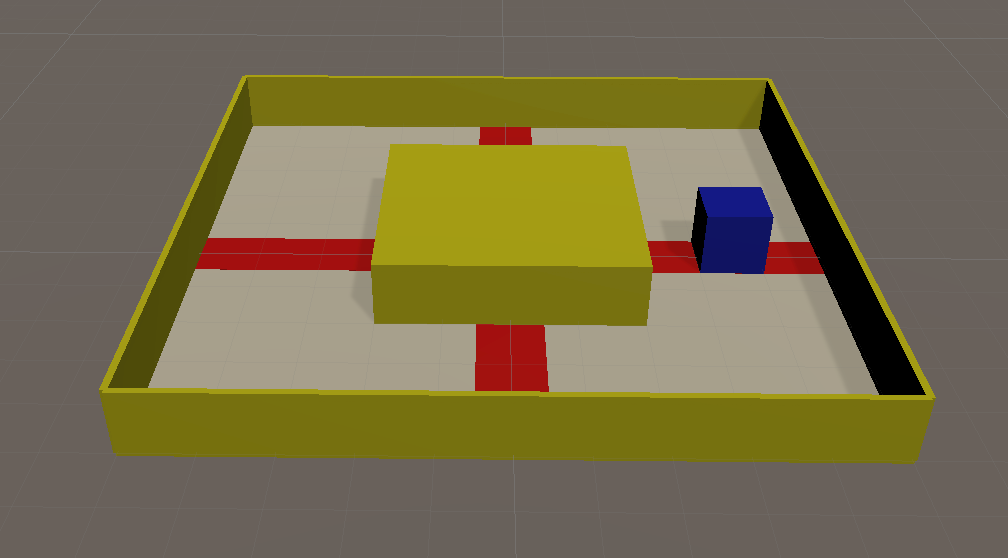
確認
訓練ファイルの準備
カリキュラム学習をするための訓練ファイル、Curriculum.yamlを以下のように作成する。(ml-agents/config/Curriculum.yaml)
behaviors:
  MyCurriculum:
    trainer_type: ppo
    hyperparameters:
      batch_size: 128
      buffer_size: 2048
      learning_rate: 0.0003
      beta: 0.01
      epsilon: 0.2
      lambd: 0.95
      num_epoch: 3
      learning_rate_schedule: linear
    network_settings:
      normalize: false
      hidden_units: 512
      num_layers: 2
      vis_encode_type: simple
    reward_signals:
      extrinsic:
        gamma: 0.99
        strength: 1.0
    keep_checkpoints: 5
    checkpoint_interval: 500000
    max_steps: 10000000
    time_horizon: 128
    summary_freq: 10000
    threaded: true
environment_parameters:
  checkpoint_reward: # 環境パラメータの名前
    curriculum:
      - name: Lesson0 # レッスンの名前
        completion_criteria: # 次のレッスンに進む条件
          measure: reward
          behavior: MyCurriculum
          signal_smoothing: true
          min_lesson_length: 10
          threshold: 0.7
        value: 0.3 # 環境パラメータの値
      - name: Lesson1 # レッスンの名前
        completion_criteria: # 次のレッスンに進む条件
          measure: reward
          behavior: MyCurriculum
          signal_smoothing: true
          min_lesson_length: 10
          threshold: 0.9
        value: 0.0 # 環境パラメータの値
      - name: Lesson2 # レッスンの名前
        value: 0.0
  episode_reward: # 環境パラメータの名前
    curriculum:
      - name: Lesson0 # レッスンの名前
        completion_criteria: # 次のレッスンに進む条件
          measure: reward
          behavior: MyCurriculum
          signal_smoothing: true
          min_lesson_length: 10
          threshold: 0.7
        value: 0.0 # 環境パラメータの値
      - name: Lesson1 # レッスンの名前
        completion_criteria: # 次のレッスンに進む条件
          measure: reward
          behavior: MyCurriculum
          signal_smoothing: true
          min_lesson_length: 10
          threshold: 0.9
        value: 1.0 # 環境パラメータの値
      - name: Lesson2 # レッスンの名前
        value: 2.0
  step_reward: # 環境パラメータの名前
    curriculum:
      - name: Lesson0 # レッスンの名前
        completion_criteria: # 次のレッスンに進む条件
          measure: reward
          behavior: MyCurriculum
          signal_smoothing: true
          min_lesson_length: 10
          threshold: 0.7
        value: 0.0 # 環境パラメータの値
      - name: Lesson1 # レッスンの名前
        completion_criteria: # 次のレッスンに進む条件
          measure: reward
          behavior: MyCurriculum
          signal_smoothing: true
          min_lesson_length: 10
          threshold: 0.9
        value: 0.0 # 環境パラメータの値
      - name: Lesson2 # レッスンの名前
        value: -0.001 # 環境パラメータの値
(解説)
カリキュラム学習を行うにはまず訓練ファイルに
environment_parameters:
の項目を設定する。今回はこのparameterに
checkpoint_reward
episode_reward
step_reward
の3つを設定した。
それぞれの項目に目を向けると、checkpoint_rewardは開始時(Lesson0)にはvalueとして0.3を取るが、Lesson1に遷移したあとは使われない(0.0)。
checkpoint_reward: # 環境パラメータの名前
    curriculum:
      - name: Lesson0 # レッスンの名前
        completion_criteria: # 次のレッスンに進む条件
          measure: reward
          behavior: MyCurriculum
          signal_smoothing: true
          min_lesson_length: 10
          threshold: 0.7
        value: 0.3 # 環境パラメータの値
      - name: Lesson1 # レッスンの名前
        completion_criteria: # 次のレッスンに進む条件
          measure: reward
          behavior: MyCurriculum
          signal_smoothing: true
          min_lesson_length: 10
          threshold: 0.9
        value: 0.0 # 環境パラメータの値
      - name: Lesson2 # レッスンの名前
        value: 0.0
同様にepisode_rewardは訓練開始時(Lesson0)は使われないが(0.0),Lesson1のときは1.0の重みをもち、Lesson2のときは2.0の重みを持つように設定した。
episode_reward: # 環境パラメータの名前
    curriculum:
      - name: Lesson0 # レッスンの名前
        completion_criteria: # 次のレッスンに進む条件
          measure: reward
          behavior: MyCurriculum
          signal_smoothing: true
          min_lesson_length: 10
          threshold: 0.7
        value: 0.0 # 環境パラメータの値
      - name: Lesson1 # レッスンの名前
        completion_criteria: # 次のレッスンに進む条件
          measure: reward
          behavior: MyCurriculum
          signal_smoothing: true
          min_lesson_length: 10
          threshold: 0.9
        value: 1.0 # 環境パラメータの値
      - name: Lesson2 # レッスンの名前
        value: 2.0
このようにそれぞれのパラメーターがカリキュラムの進行に合わせてどのように重みを持つかを訓練ファイルで設定することができる。こうすることによって今回はまずはチェックポイントを通過する訓練を行い。それができるようになったら1周することに対して報酬を与え、それができるようになったらよりスピーディに1周できたらポイントが増えるというカリキュラム学習が可能となる。
Playerスクリプトの変更
訓練ファイルにてLesson状況によるValueの設定ができたので、Playerスクリプトで実際にこの値を使う処理を記述していこう。Playerスクリプトを以下のように変更する。
using UnityEngine;
using Unity.MLAgents;
using Unity.MLAgents.Sensors;
using Unity.MLAgents.Actuators;

public class Player: Agent {
    Rigidbody rb;
    int lastCheckPoint; // 最終チェックポイント
    int checkPointCount; // チェックポイント通過数
    float checkPointReward;//チェックポイント通過報酬(Lessonモードにより変化)
    float episodeReward;//1周できたとき報酬(Lessonモードにより変化)
    float stepReward;//ステップ毎に減算される報酬(Lessonモードにより変化)

    // 初期化時に呼ばれる
    public override void Initialize() {
        rb = GetComponent<Rigidbody>();
    }
    // 環境パラメータの設定
    public void SetEnvParameters() {
        //訓練ファイルにアクセス
        EnvironmentParameters envParams = Academy.Instance.EnvironmentParameters;
        //訓練ファイルからcheckpoint_rewardを取得(初期値は0.0f)
        //これらの値はLessonの進行に応じて変化していく
        checkPointReward = envParams.GetWithDefault("checkpoint_reward", 0.0f);
        episodeReward = envParams.GetWithDefault("episode_reward", 2.0f);
        stepReward = envParams.GetWithDefault("step_reward", -0.001f);
    }
    // エピソード開始時に呼ばれる
    public override void OnEpisodeBegin() {
        // 周回数の環境
        lastCheckPoint = 0;
        checkPointCount = 0;

        // 環境パラメータの設定
        SetEnvParameters();
    }

    // 状態取得時に呼ばれる
    public override void CollectObservations(VectorSensor sensor) {
        sensor.AddObservation(rb.velocity.x); // PlayerのX速度
        sensor.AddObservation(rb.velocity.z); // PlayerのZ速度
    }


    // 行動実行時に呼ばれる
    public override void OnActionReceived(ActionBuffers actions) {
        Vector3 dirToGo = Vector3.zero;
        Vector3 rotateDir = Vector3.zero;

        int action = actions.DiscreteActions[0];
        if (action == 1) dirToGo = transform.forward;
        if (action == 2) dirToGo = transform.forward * -1.0f;
        if (action == 3) rotateDir = transform.up * -1.0f;
        if (action == 4) rotateDir = transform.up;
        transform.Rotate(rotateDir, Time.deltaTime * 200f);
        rb.AddForce(dirToGo * 0.4f, ForceMode.VelocityChange);

        // ステップ毎の報酬(Lesson2において負の値が設定される)
        AddReward(stepReward);
    }

    // チェックポイントに衝突時に呼ばれる
    public void EnterCheckPoint(int checkPoint) {
        // 次のチェックポイントに衝突
        if (checkPoint == (lastCheckPoint + 1) % 4) {
            // チェックポイント毎の報酬
            AddReward(checkPointReward);
            checkPointCount++;

            // ゴール
            if (checkPointCount >= 4) {
                // エピソード毎の報酬
                AddReward(episodeReward);
                EndEpisode();
            }
        }
        // 前のチェックポイントに衝突
        else if (checkPoint == (lastCheckPoint - 1 + 4) % 4) {
            // チェックポイント毎の報酬
            AddReward(-checkPointReward);
            checkPointCount--;
        }

        // 最終チェックポイントの更新
        lastCheckPoint = checkPoint;
    }

    // ヒューリスティックモードの行動決定時に呼ばれる
    public override void Heuristic(in ActionBuffers actionsOut) {
        var actions = actionsOut.DiscreteActions;
        actions[0] = 0;
        if (Input.GetKey(KeyCode.UpArrow)) actions[0] = 1;
        if (Input.GetKey(KeyCode.DownArrow)) actions[0] = 2;
        if (Input.GetKey(KeyCode.LeftArrow)) actions[0] = 3;
        if (Input.GetKey(KeyCode.RightArrow)) actions[0] = 4;
    }
}
CheckPointスクリプトの変更
チェックポイントに触れたときにPlayerスクリプトに作成した
public void EnterCheckPoint(int checkPoint){}
が動くようにCheckPointスクリプトを以下のように変更する
using System.Collections;
using System.Collections.Generic;
using UnityEngine;

// チェックポイント
public class CheckPoint : MonoBehaviour {
    public Player player;
    public int checkPointId;

    // 他のオブジェクトとの接触時に呼ばれる
    void OnTriggerEnter(Collider other) {
        //接触したのがPlayerだったら
        if (other.gameObject.tag == "Player") {
            player.EnterCheckPoint(checkPointId);
        }
    }
}
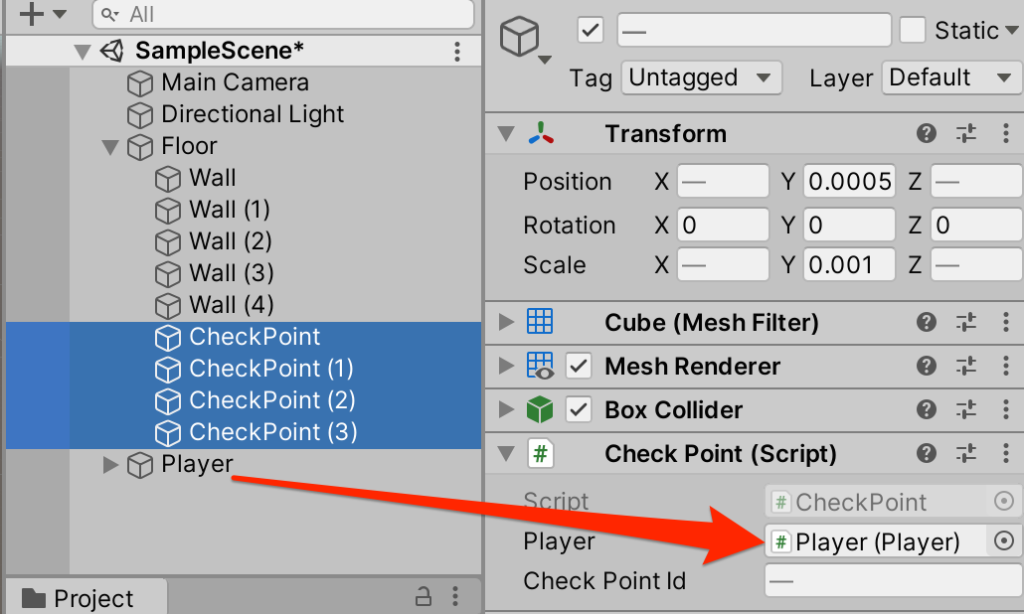
○4つのCheckPointを選択して、Playerを登録する
訓練開始
以上で準備はOKだ。ターミナルに行って訓練を開始しよう。
$ mlagent-learn config/Curriculum.yaml --run-id=Curriculum_ppo

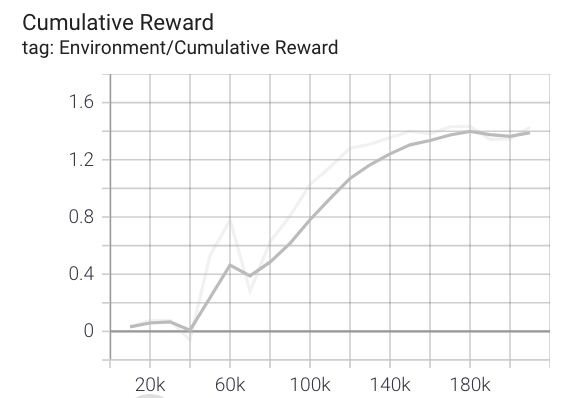
今回の例ではおよそ50000ステップ後にLesson1に遷移し、パラメータが更新された。

○約200000ステップ後、かなりスムーズに周回できるようになった。
報酬遷移の確認
$ tensorboard --logdir results
ブラウザから以下のアドレスを入力
localhost:6006
終わりに
今回は簡単なことから段階的に学習を進めるカリキュラム学習について学んだ。
複雑な事象を学習する際にとても有用なのでしっかりと基本を理解してもらいたい。

コメント
記事投稿ありがとうございます。最近、ジョイタスネットさんのサイトを拝見しつつ、Unityでの機械学習を学習中です。この記事の内容も大変勉強になりました。
進める上で、2点気づきがありましたのでご連絡させていただきます。
(1)
機械学習を実行するところで、
mlagent-learn config/Curriculum.yaml –run-id=Curriculum_ppo
と記載がありますが、mlagents の「s」が抜けています。
(2)
最初、yamlファイルがエラーで通らなかったのですが、コメントの部分( # ○○○ )を削除すると通るようになりました。
当方の環境
・Unity 2021.3.18f1
・mlagents 0.29.0 (Anaconda使用)
私と同じように、このサイトで機械学習を学ばれている方の参考になれば幸いです。