
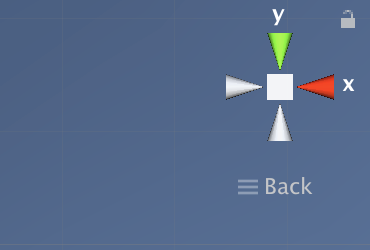
1.3Dでプロジェクトを作成したら3dギズモを以下のように調整する
2.Cubeを新規に作成しWall1とリネーム。transformを以下のように設定する

3.Wall1を複製(Ctr+d)してWall2にリネーム。transformのyにマイナスをつける

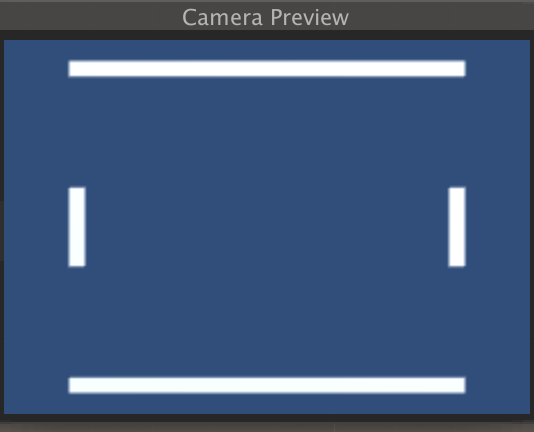
4.カメラを調整しよう。背景色を単色にし遠近感をなくして見える範囲を調整している。
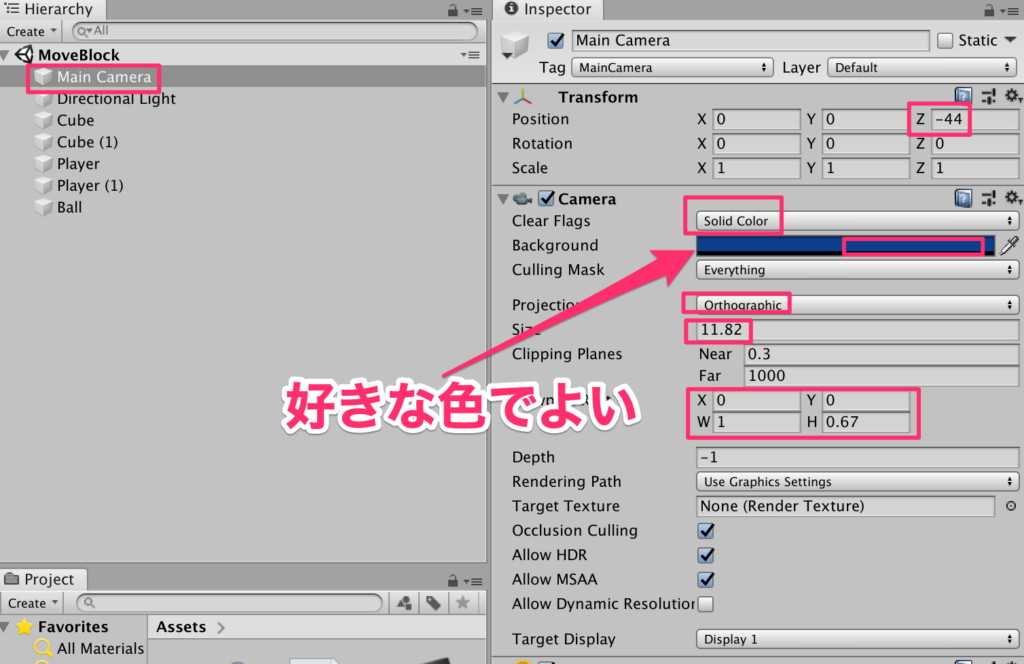
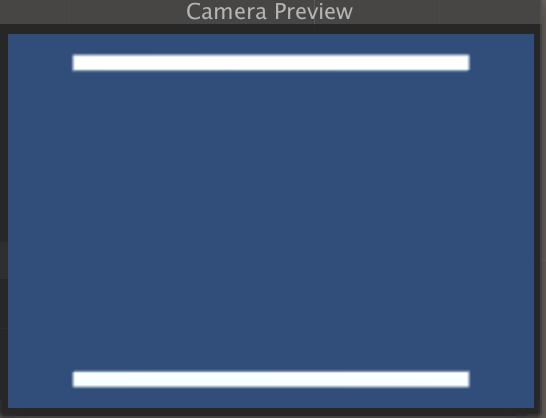
こんな感じになっていればOKだ
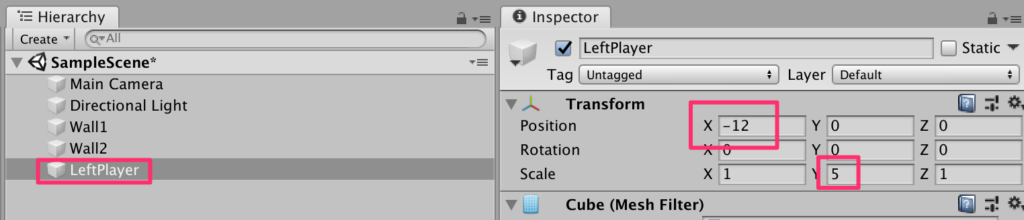
5.LeftPlayerの作成。
新規CubeをリネームしてLeftPlayerとする。transformは以下
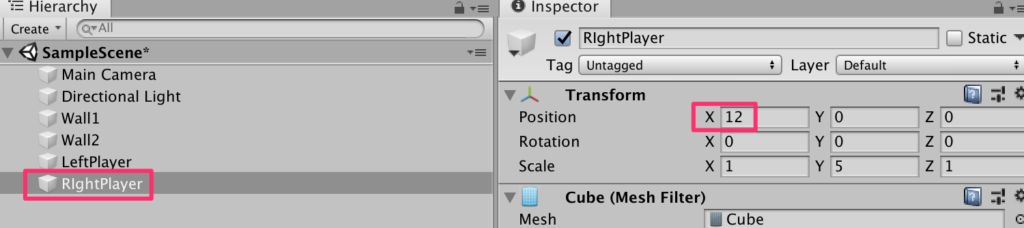
6.RightPlayerの作成
LeftPlayerを複製(ctr+d)してRightPlayerとリネーム。トランスフォームのxを変更する
ここまででこんな感じになっていればOKだ。
7.Playerの動きの実装。プレイヤーが上下に動けるようにする。
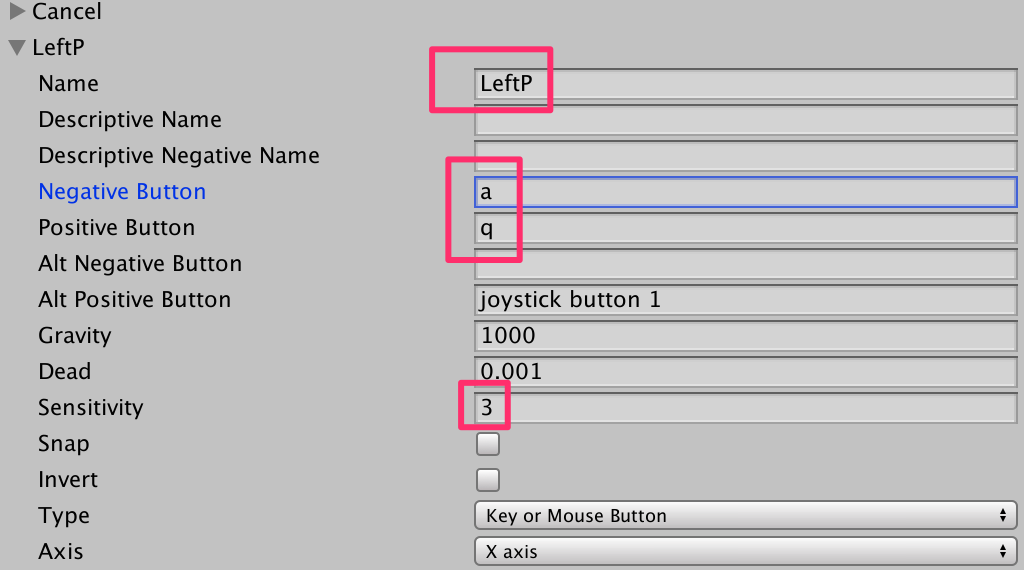
左のプレイヤーはqキーで上、aキーで下。
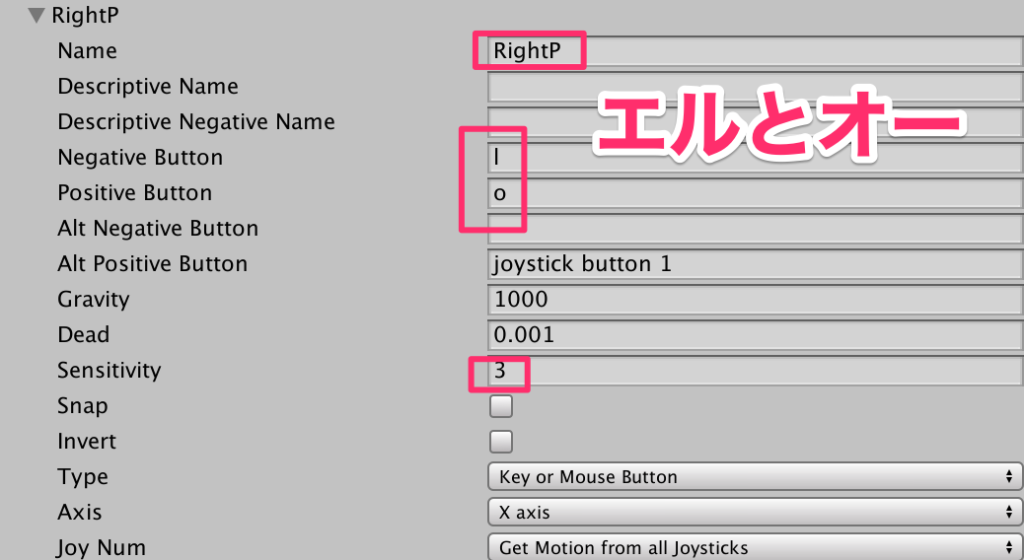
右のプレイヤーはl(エル)キーで上,o(オー)キーで下に設定してみよう。
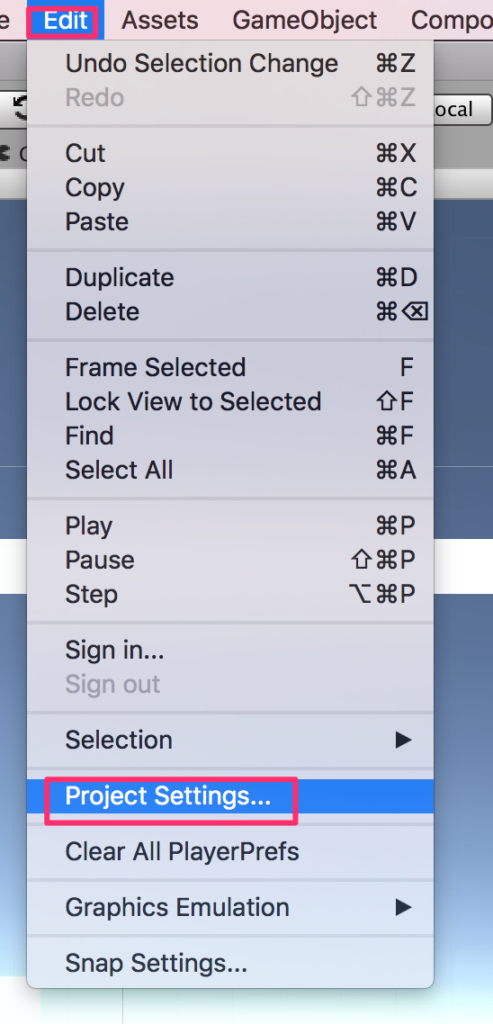
まずはEdit->Project Settingsを開く
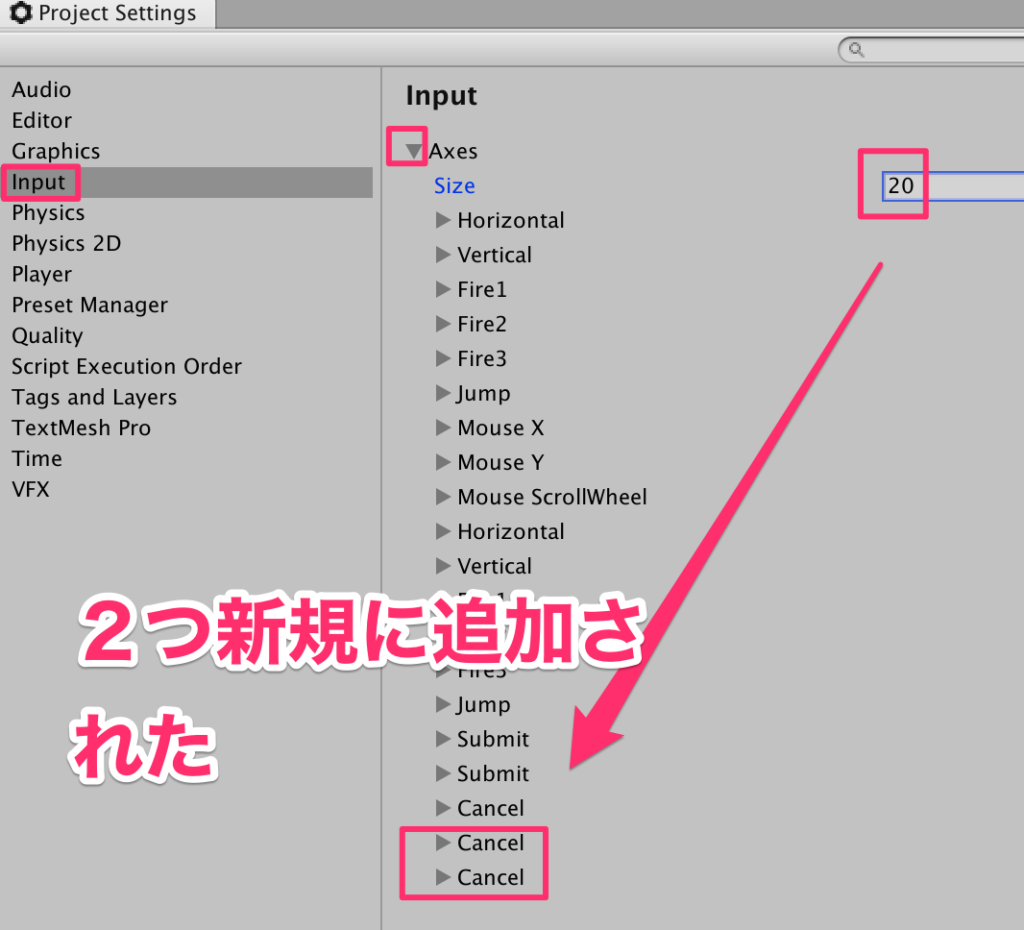
Input->Axesから項目数を20にして新たなAxisを2つ増やす
8.LeftPの設定。LeftPlayer用の設定をしよう。新規に作成された2つのCancelのうちの上の方を開き以下のように入力する。
9.RightPの設定。同様に一番下にできたCancelを開いて以下のように設定する。
10.Playerスクリプトの作成。
新規C#スクリプトを作成し、Playerとリネームし以下のように作成する。
using System.Collections;
using System.Collections.Generic;
using UnityEngine;

public class Player : MonoBehaviour
{
    public string keyName;
    Vector3 vec;

    void Start()
    {
        vec = transform.position;
    }

    void Update()
    {
        vec.y += Input.GetAxis(keyName);
        if(vec.y> 7f) {
            vec.y = 7f;
        }
        if (vec.y < -7f) {
            vec.y = -7f;
        }
        transform.position = vec;
    }
}
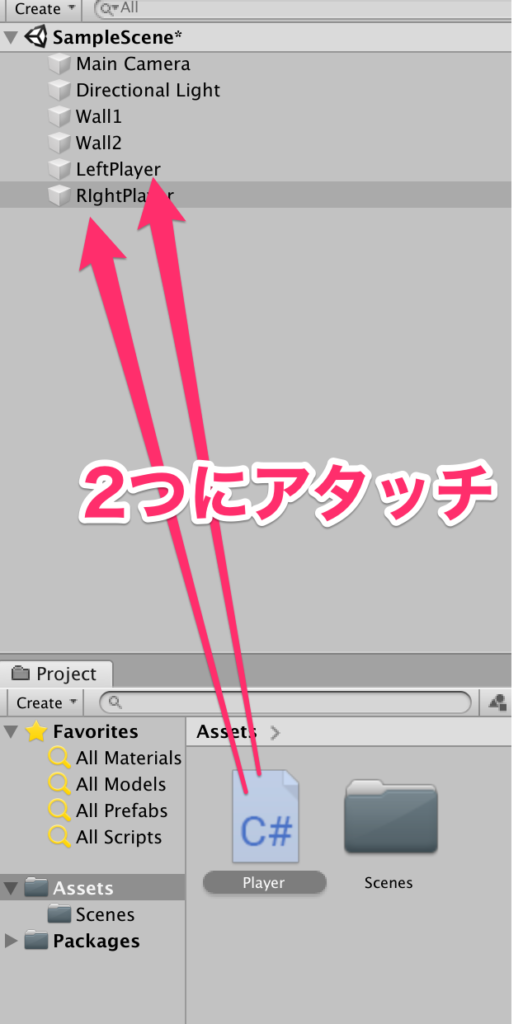
作成したPlayerスクリプトを2つのPlayerにアタッチする
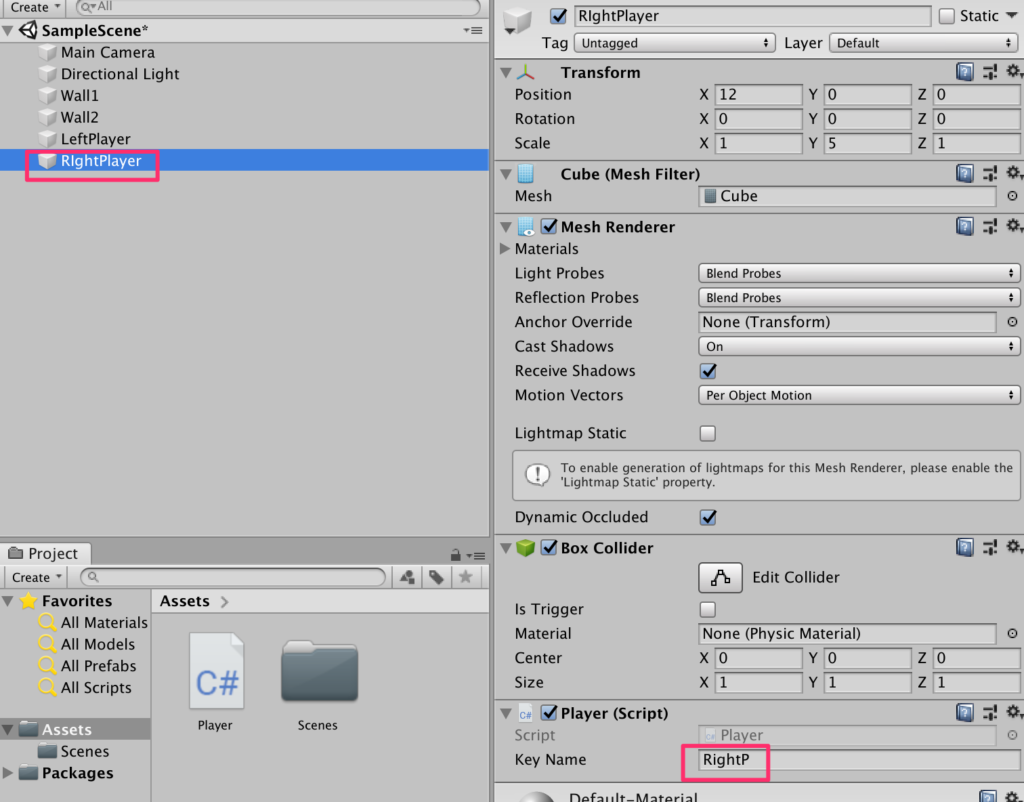
LeftPlayerを開いてkeyNameを以下のように設定する。

同様にRightPlayerにはRightPを割り付ける
実行してみよう。左手でqまたはaを右手でlまたはoを押すことでプレイヤーが上下に動けば成功だ。
11.ボールの作成
新規Sphereを作成しBallとリネーム。transformは以下

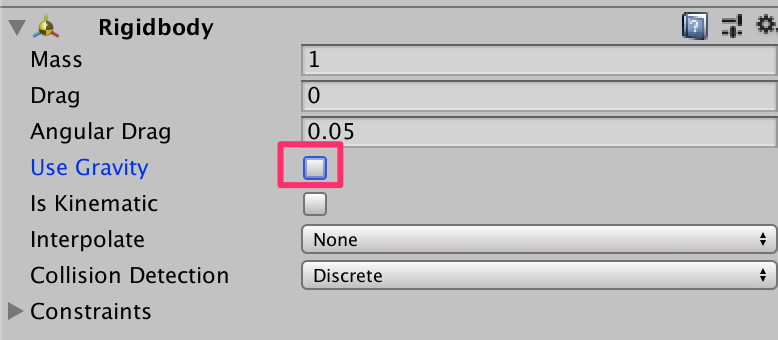
BallにRigidbodyを付与し、以下のように設定する。
重力は使わないのでUse Gravityをoffにする
12.Ballスクリプトの作成
新規C#スクリプトを名前をBallで作成する。記述は以下
using System.Collections;
using System.Collections.Generic;
using UnityEngine;

public class Ball : MonoBehaviour {
    void Start() {
        GetComponent<Rigidbody>().velocity = new Vector3(1f, 2f, 0) * 5f;
    }
}
Ballにアタッチして実行してみよう。
全く跳ね返らないことがわかる。
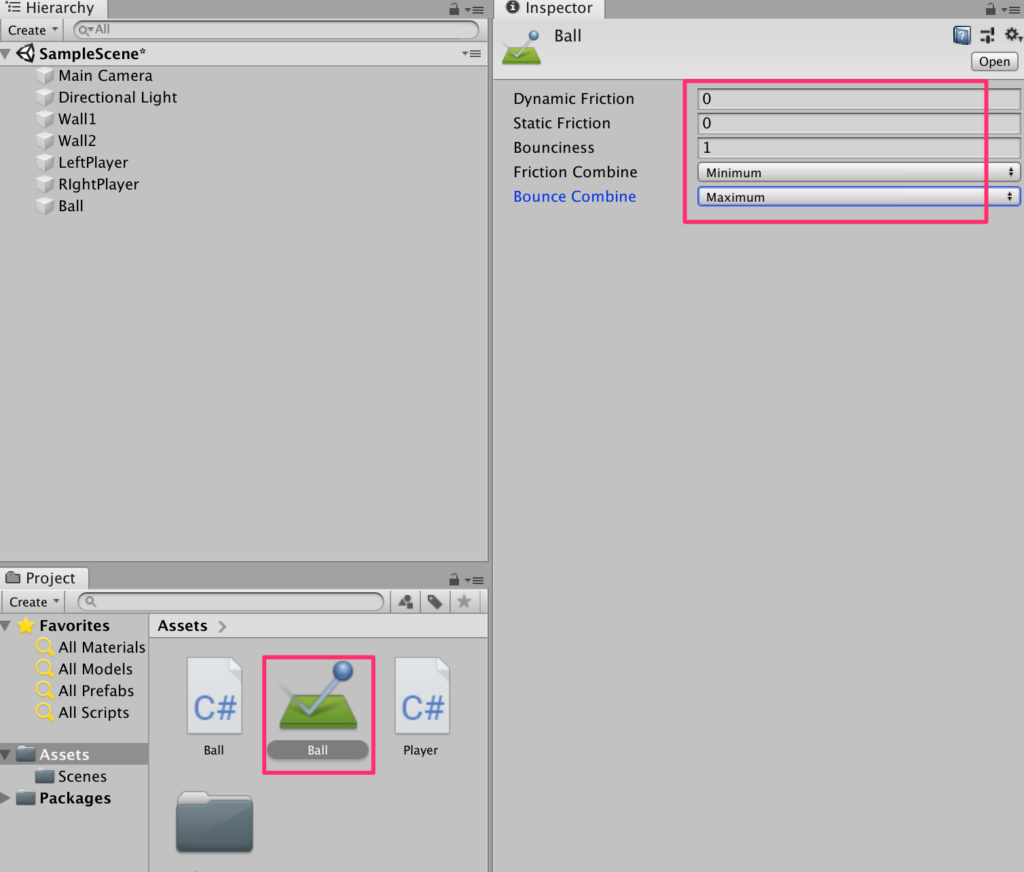
13.PhysicMaterialの作成
プロジェクトビューのCreateからPhysicMaterialを作成しBallとリネーム。
以下のように設定を変更する。
以下のようにBallにアタッチする。
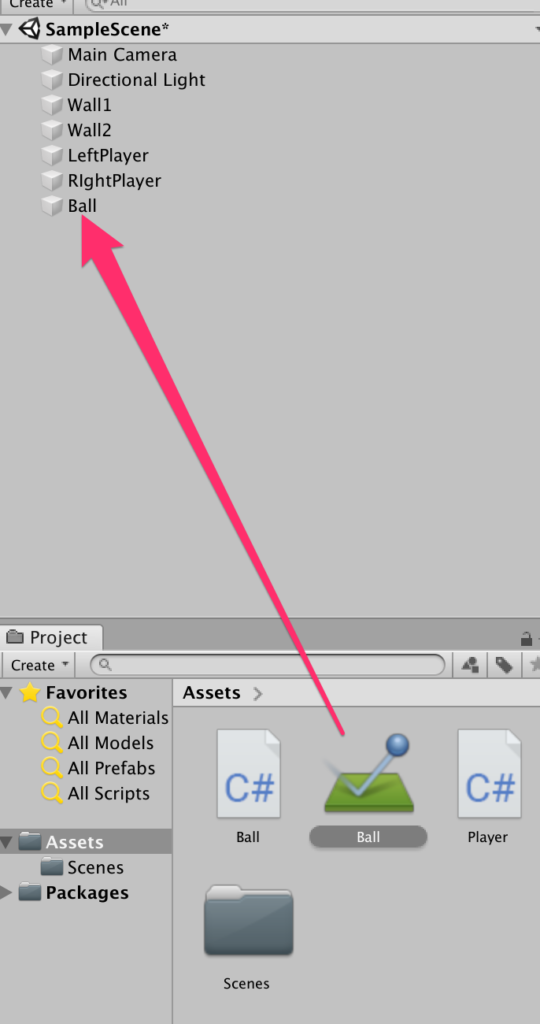
実行してみよう。70年代風テニスゲームの動きが再現できた。

コメント