Unityチュートリアルの中でも秀逸の出来栄えだったRuby’s Adventureが公式サイトから削除されてしまったのでここに作成手順をまとめておく。
少し古くなっている部分があるので、Unity2022.2~のバージョンに合わせて若干の修正をいれていく。なので同じように作業を行いたい人はUnity2022.2~以降のバージョンを用意しておくこと。
この記事ではUnity2022.3.26f1を使っていく。
新規プロジェクトの作成
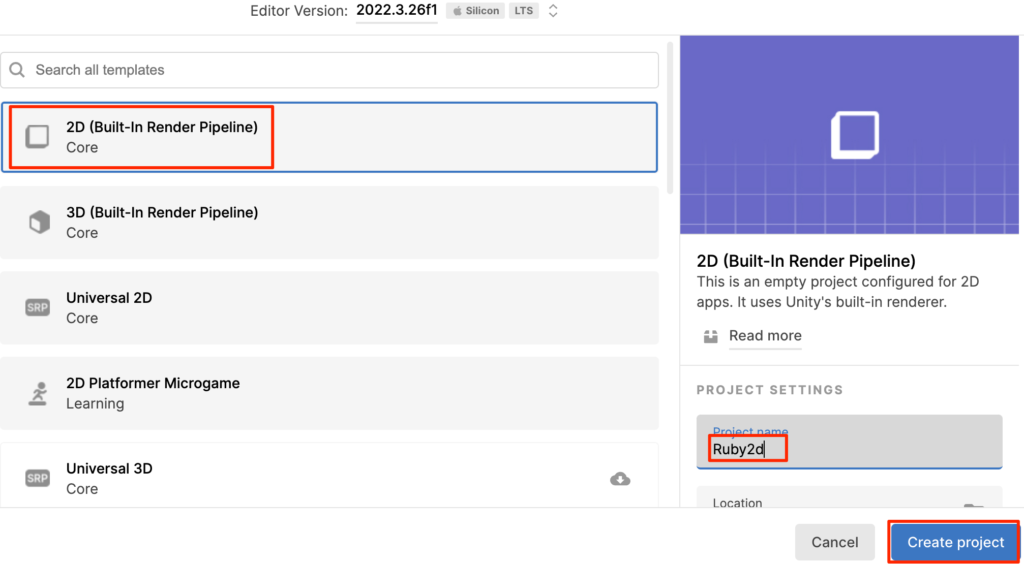
新規2DプロジェクトをRuby2dという名で作成し、起動する。
素材のダウンロード & インポート
以下をクリックして、ゲーム素材をダウンロードする
https://joytas.net/downloads/ruby2d.unitypackage
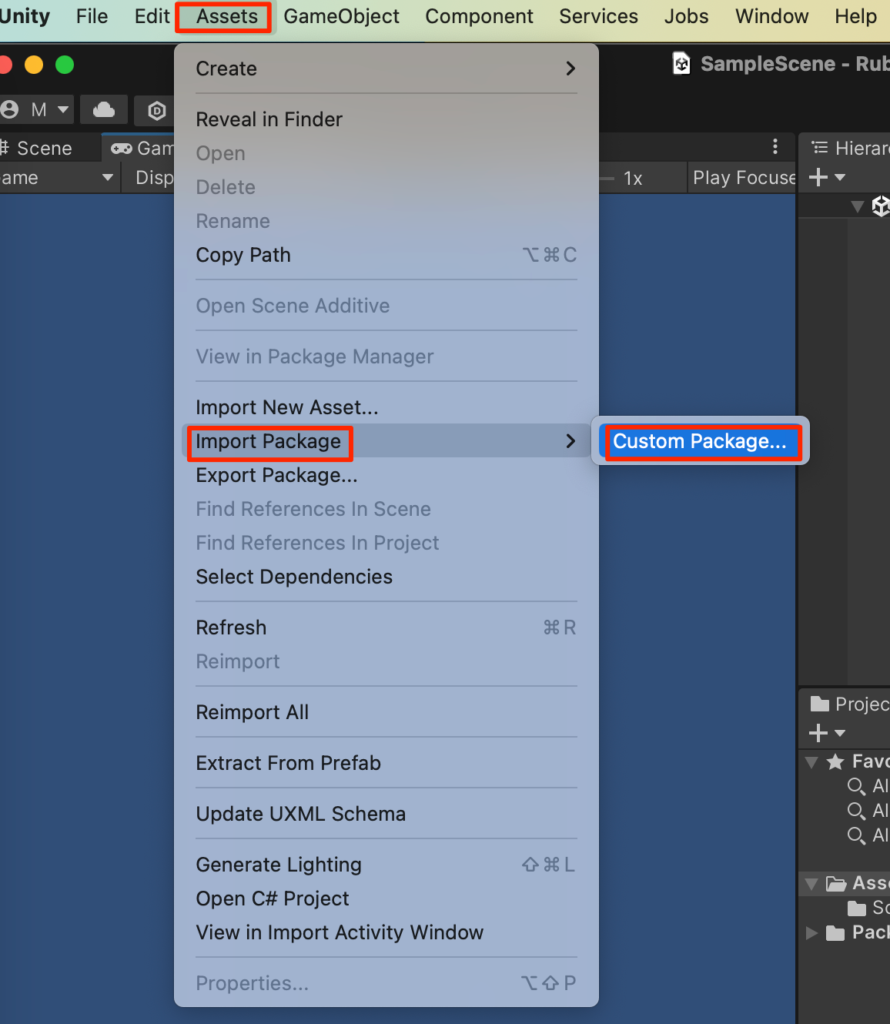
Assets->ImportPackage->CustomPackageよりさきほどダウンロードしたファイルをインポートする。
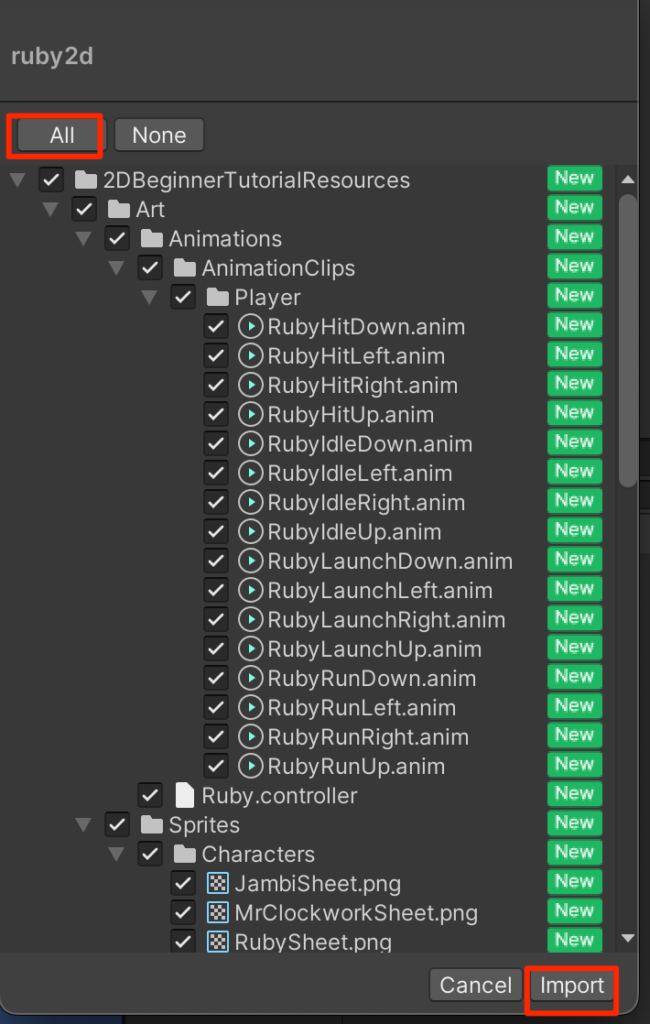
Allを押して、Importを押す
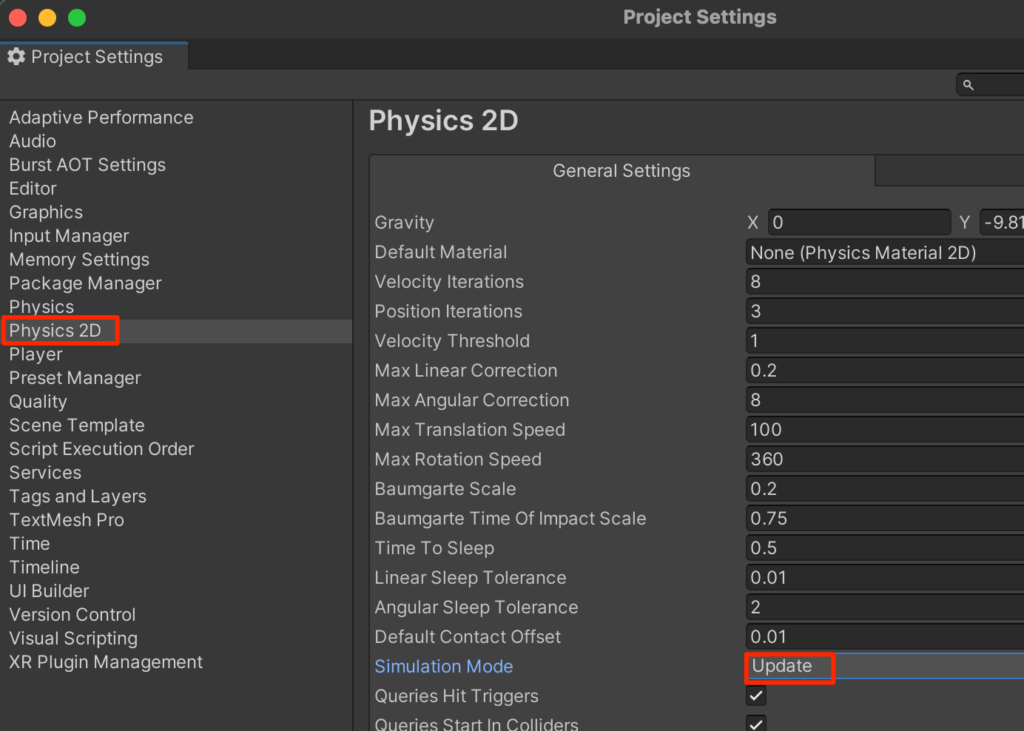
Simlation Modeの変更
画面上部にあるeditメニューからProject Settingsを開いて
Physics2DにあるSimulation ModeをFixedUpdateからUpdateに変更する。
これはUpdate関数と物理演算を同じタイミングで行うようにするもので、これを使うとUpdate関数内に物理演算の挙動を記すことができる。(2022.2より前のバージョンでは物理演算はFixedUpdate内に書く必要があった)
メインキャラ(Ruby)の作成Ruby
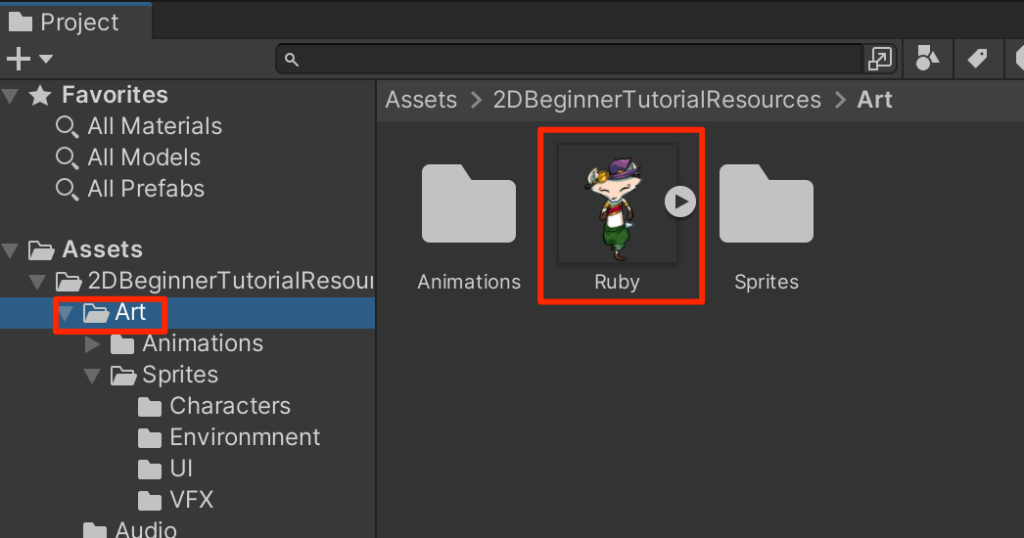
まずは以下の画像を右クリックからダウンロードし、ファイル名をRuby.pngとして保存する

ダウンロードした画像をドラッグ&ドロップで
Assets>2DBdginnerTutorialResources>Art
フォルダ内に配置する。
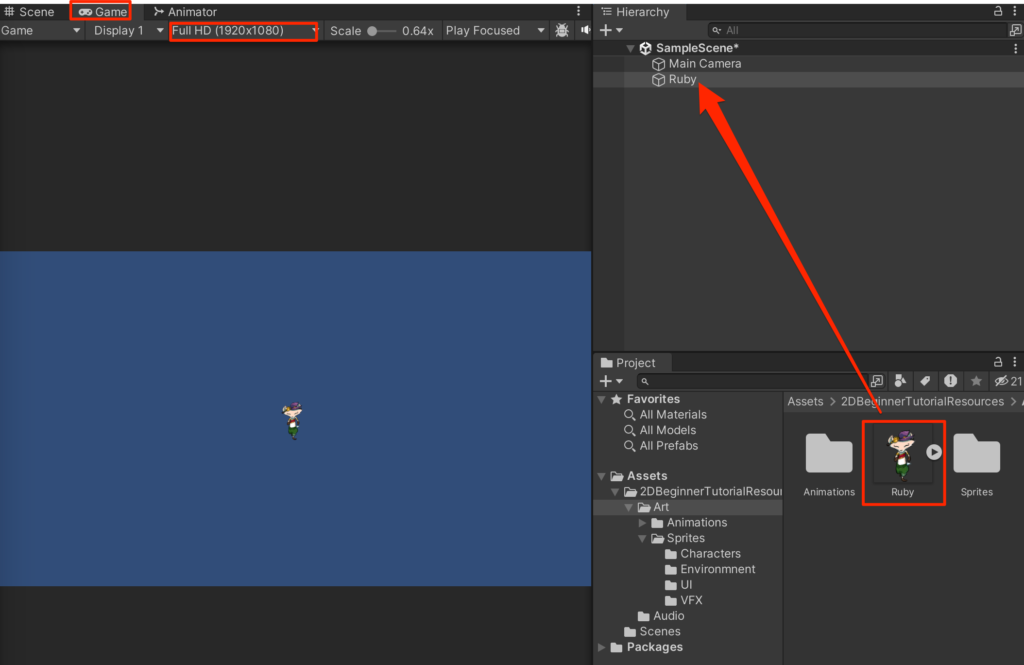
ゲームビューにして、画面比率をFull HD(1920*1080)を選択した後、
Ruby画像をヒエラルキーにドラッグして配置する。
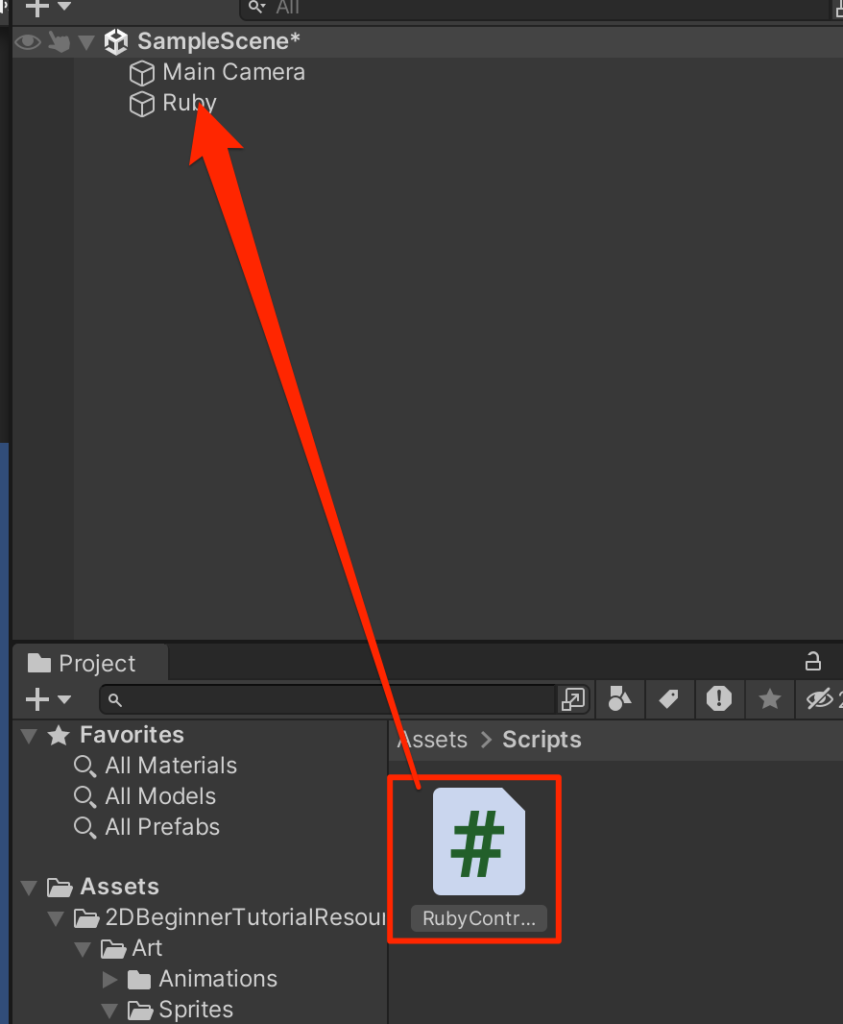
RubyControllerの作成
Assetsの直下にScriptsフォルダを作成し、その中に新規C#スクリプトから
以下のようにRubyControllerを作成し、Rubyにアタッチする。
using System.Collections;
using System.Collections.Generic;
using UnityEngine;

public class RubyController : MonoBehaviour
{
   void Start()
   {
   }
   void Update()
   {
       float horizontal = Input.GetAxis("Horizontal");
       float vertical = Input.GetAxis("Vertical");
       Vector2 position = transform.position;
       position.x = position.x + 3.0f * horizontal * Time.deltaTime;
       position.y = position.y + 3.0f * vertical * Time.deltaTime;
       transform.position = position;
   }
}
実行してみよう。上下左右キー(またはWASD)でキャラが押した方向に動けば成功だ。
世界の作成
キャラが動くようになったので世界を構築していこう。今回はTilemapを使って世界を構築していく。
まずはヒエラルキーから新規2D Object -> Tilemap -> Rectangularを選択する
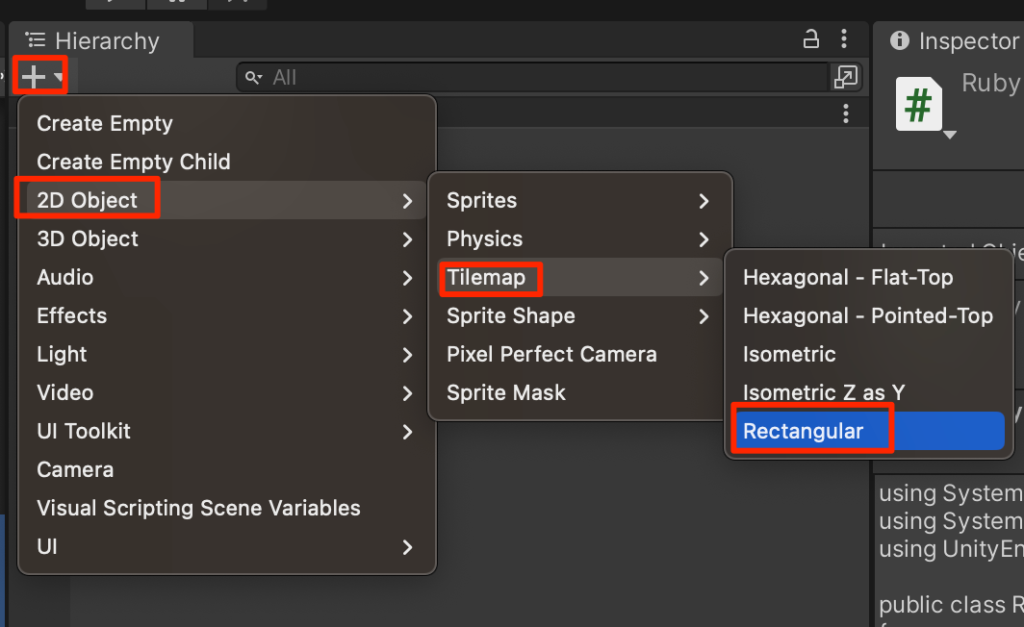
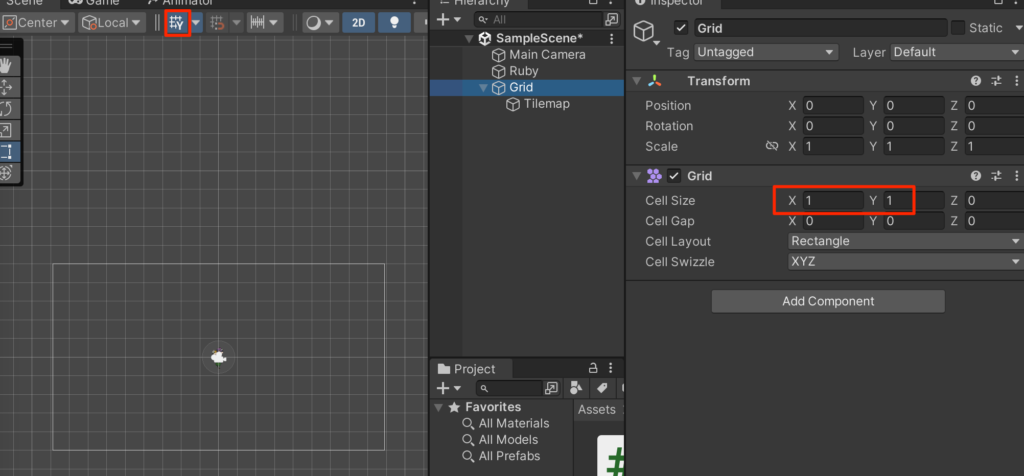
するとGridとTilemapというオブジェクトが生成され、Gridで定義してある縦横1の大きさのtimemapが作成される。シーンビュー上にあるグリッドボタンをオンにしておくと、常時グリッドが表示されるようになって便利。
タイルの作成
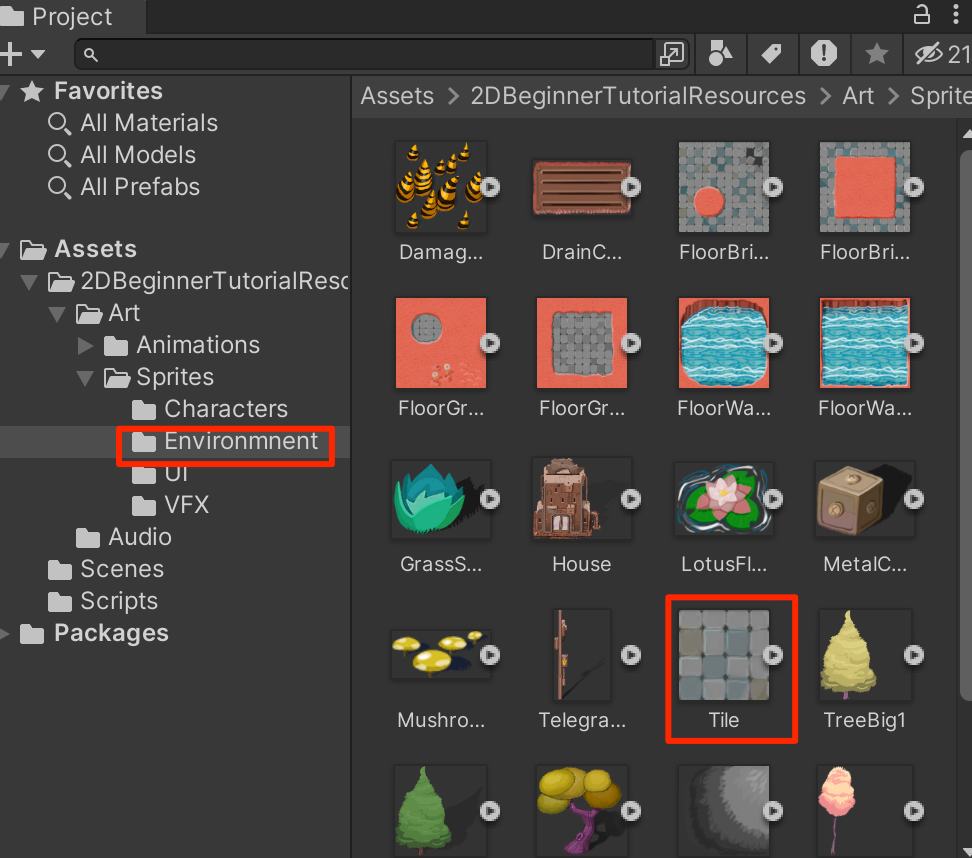
それではタイルを1種類作成してみよう。下の画像を右クリックからTile.pngとして保存する。

Assets->2DBeginner->Art->Sprites->Environmentの中にドラッグ&ドロップで配置する。
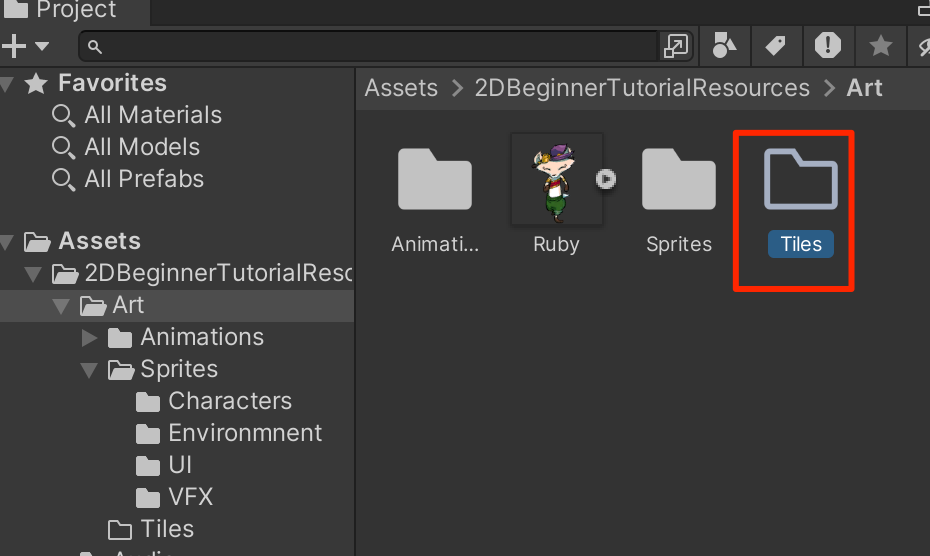
以下のように2DBiginner->Artの直下にTilesフォルダを作成する。
Tile Pallete
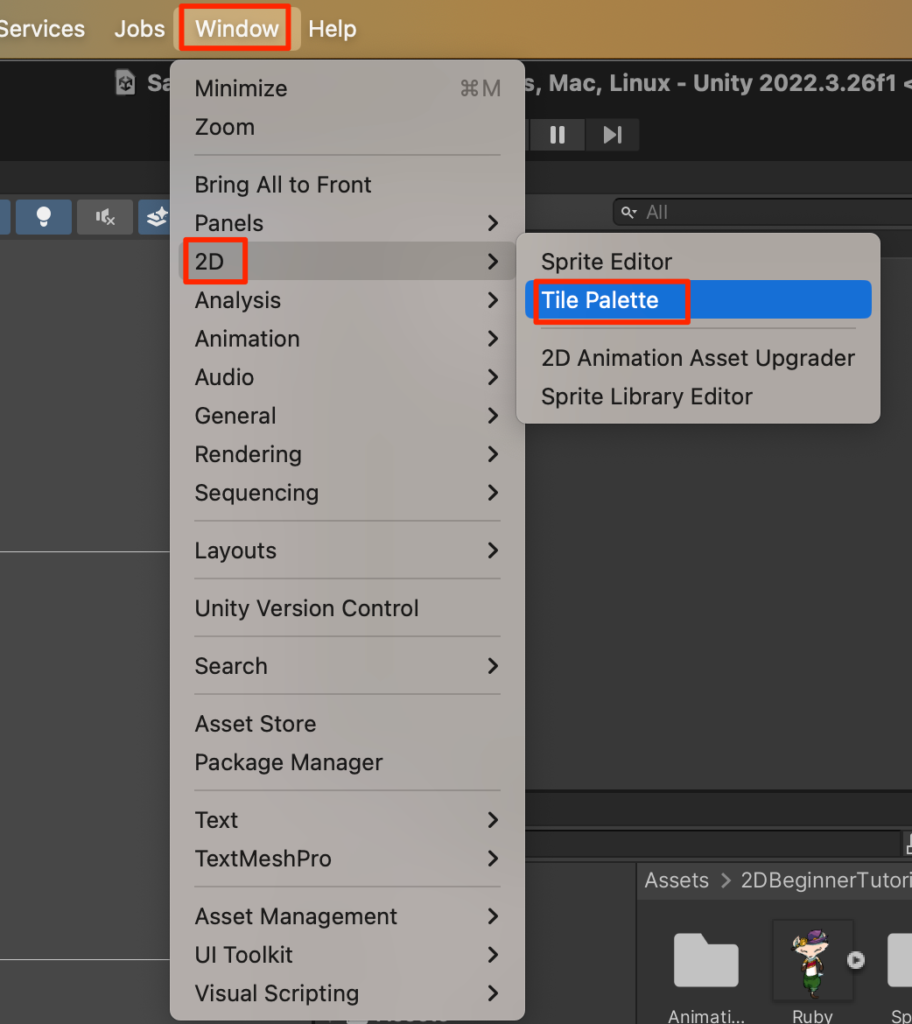
Window->2D->Tile Paletteとしてパレットを開く
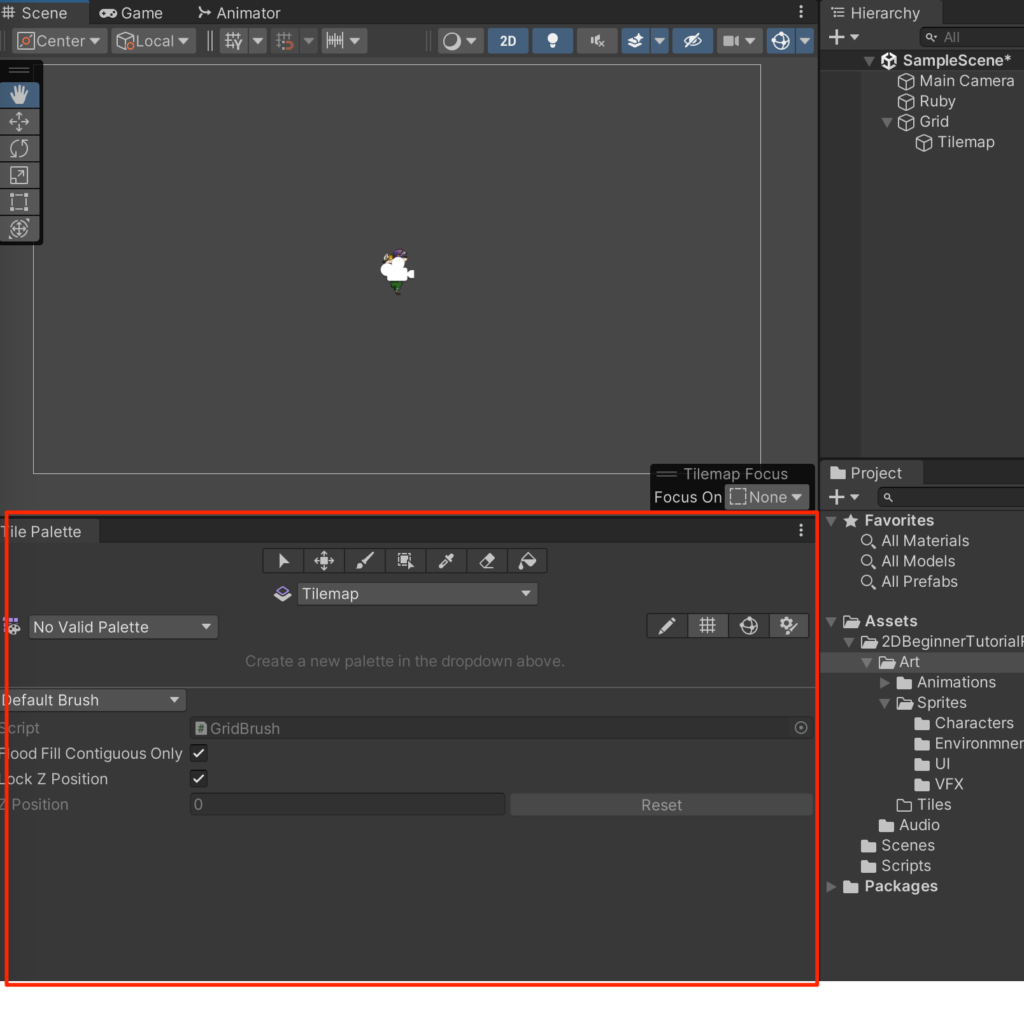
作業がし易いようにタブを移動する。
新しいパレット作成する。
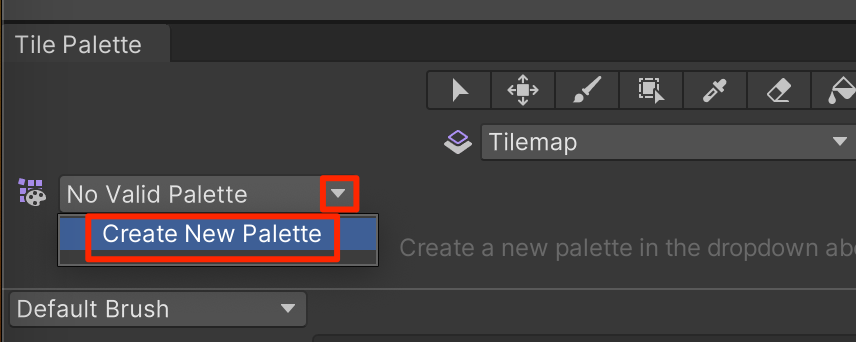
名前をGamePaletteとしてCreateを押す

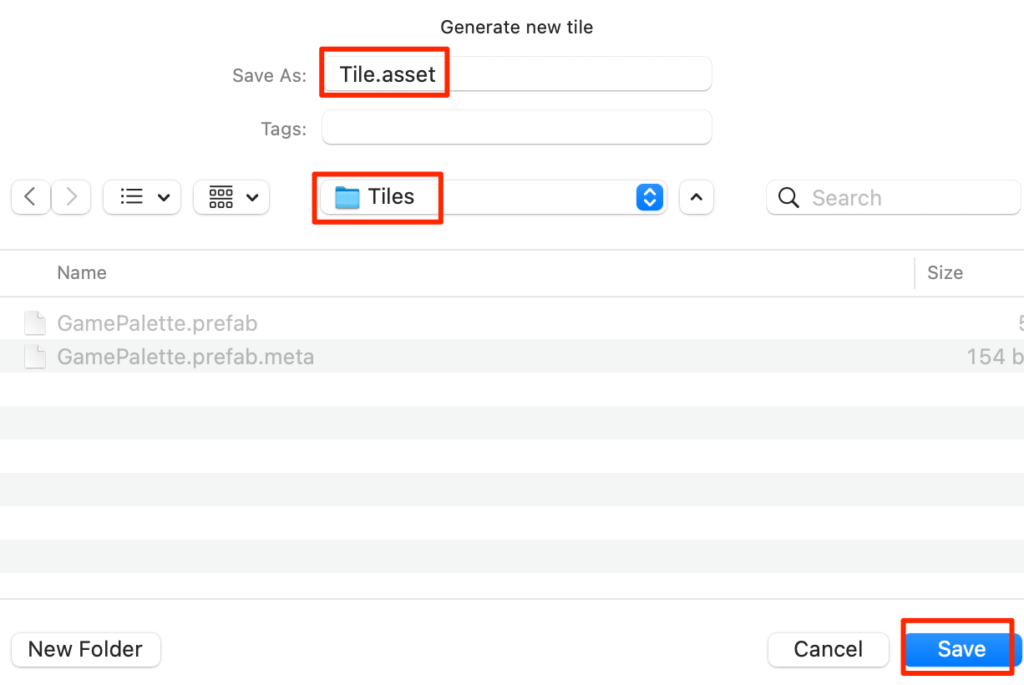
どこに保存するかと聞かれるので先ほど作成したTilesフォルダを指定する。
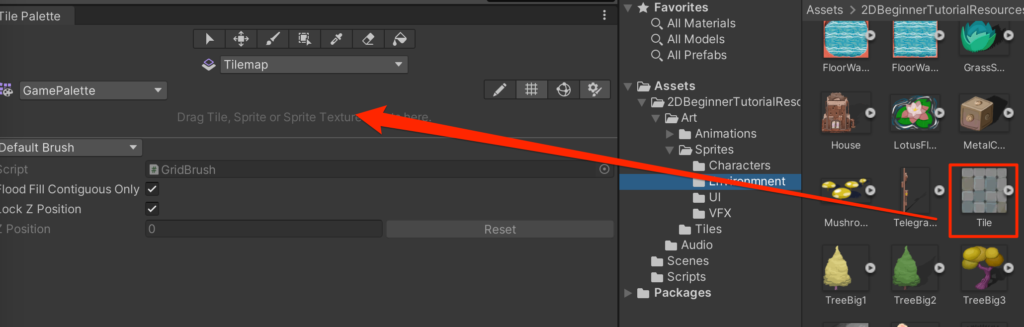
最初にダウンロードしたEnvironmentフォルダに入っているTileを以下矢印で示している場所にドラッグ&ドロップする。
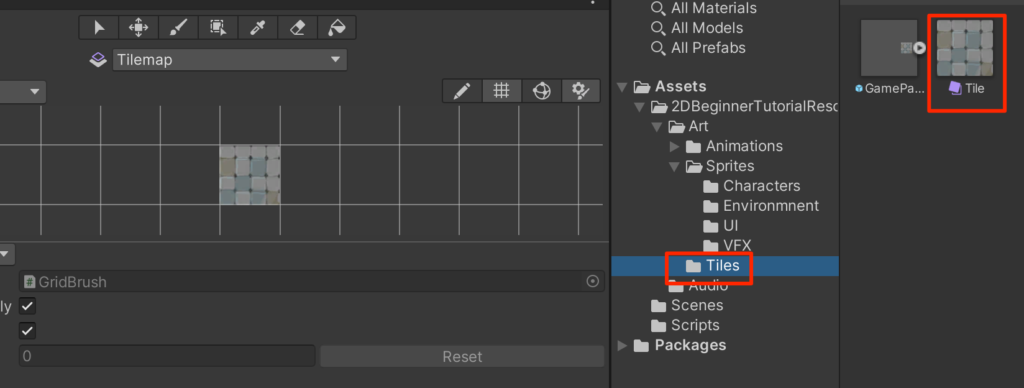
保存画面がでるのでTilesフォルダに保存する。
これでこの画像がタイルとして利用できるようになった。
左側のウインドウはスクロールで拡縮、alt+ドラッグで横移動ができる
タイルと筆を選択して、画面を塗っていこう。筆の動きに合わせてタイルが配置されていくことがわかる。
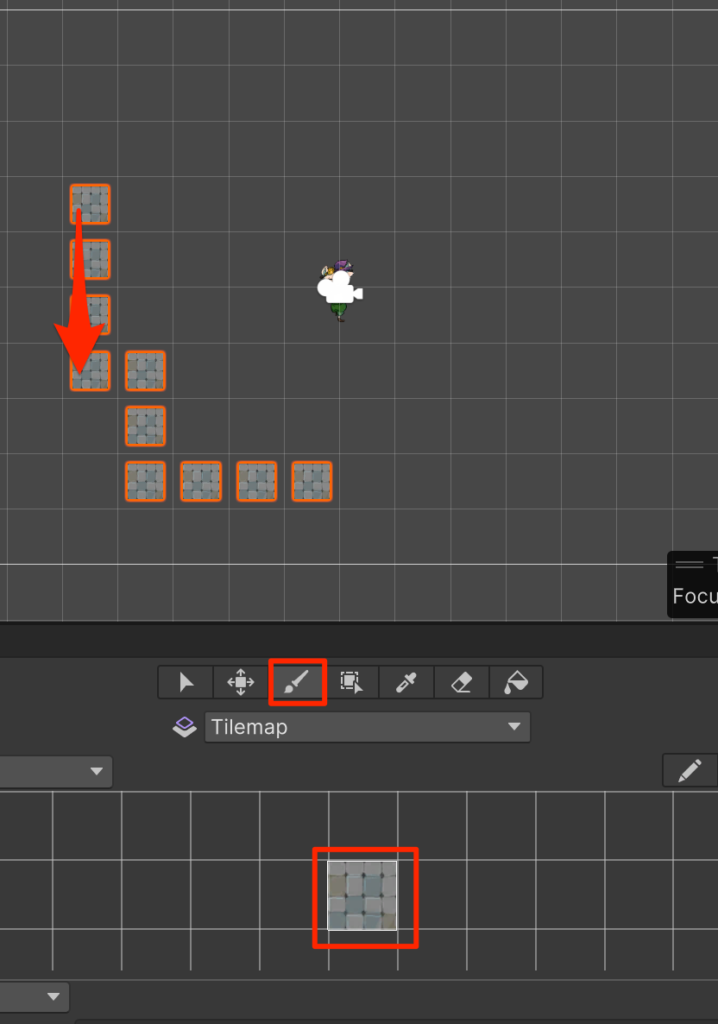
ただ、現状だとタイルとタイルの間に隙間ができてしまっている。なぜだろうか?
それは画像の定義に問題がある。現状は以下のようにもともと64*64の画像を1ユニットに対し100*100で表示するという設定になっている。
1ユニットに対し、本来の大きさである64を指定すれば良さそうだ。
以下のようにPPU(Pixels Per Unit)を64に設定し、下にあるApplyを押す。

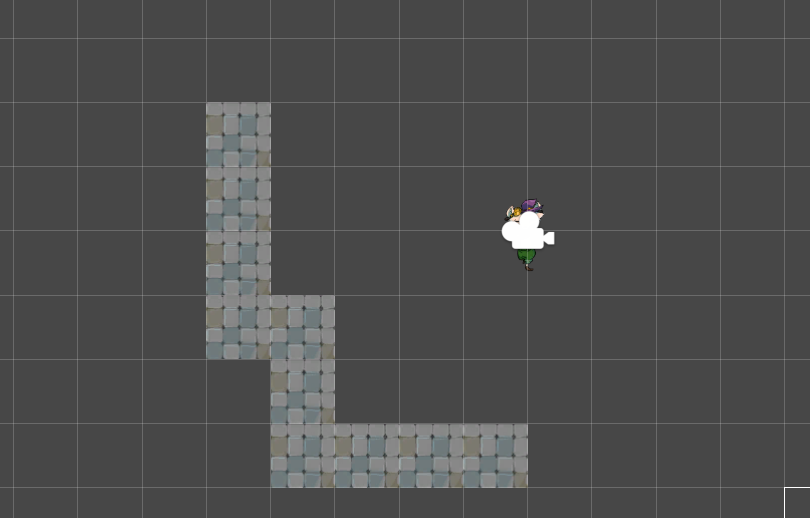
不要な隙間がなくなった!
効率的なタイル作成
先程は1枚の画像から1つのタイルを作成したが、タイルの種類が増えると結構な作業量になってしまう。こういった場合1枚の大きな画像から複数のタイルを作るのが一般的だ。やってみよう。
Environmentフォルダに入っている
Floor Bricks To Grass Corner
という画像(192*192)から縦横に3分割して9枚のタイルを作成したい。
なので、
SpriteModeをMultiple
PPU を 192 / 3 と入力しエンターを押す(64になる)
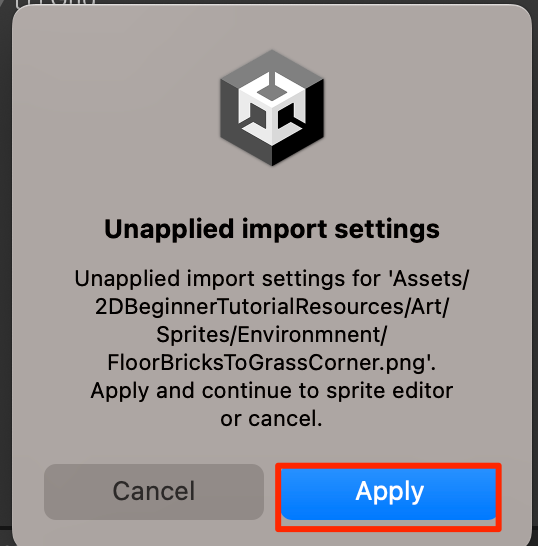
とし、SpriteEditorを開く
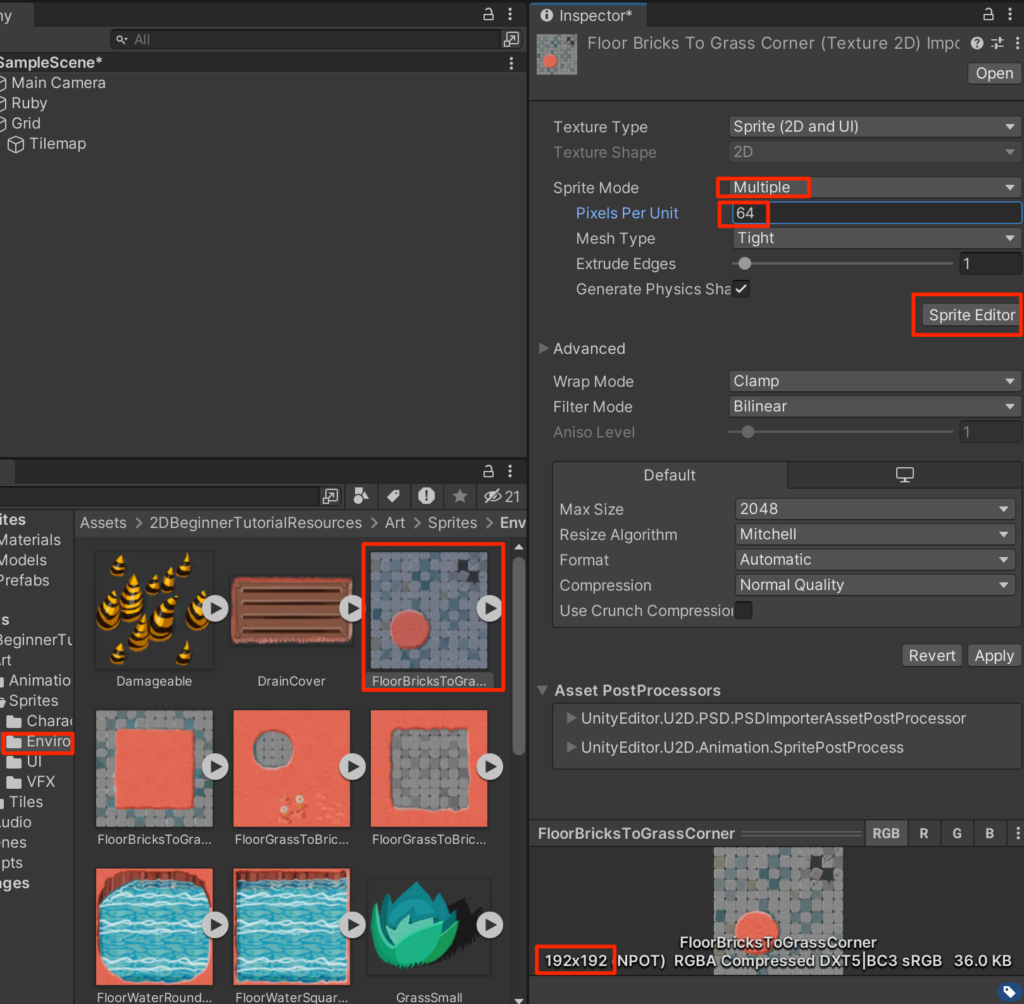
確認が出るのでApplyを押す
スプライトエディタが開くのでSliceから以下のように設定し、Sliceボタンを押したあと最後に右上にあるApplyを押す
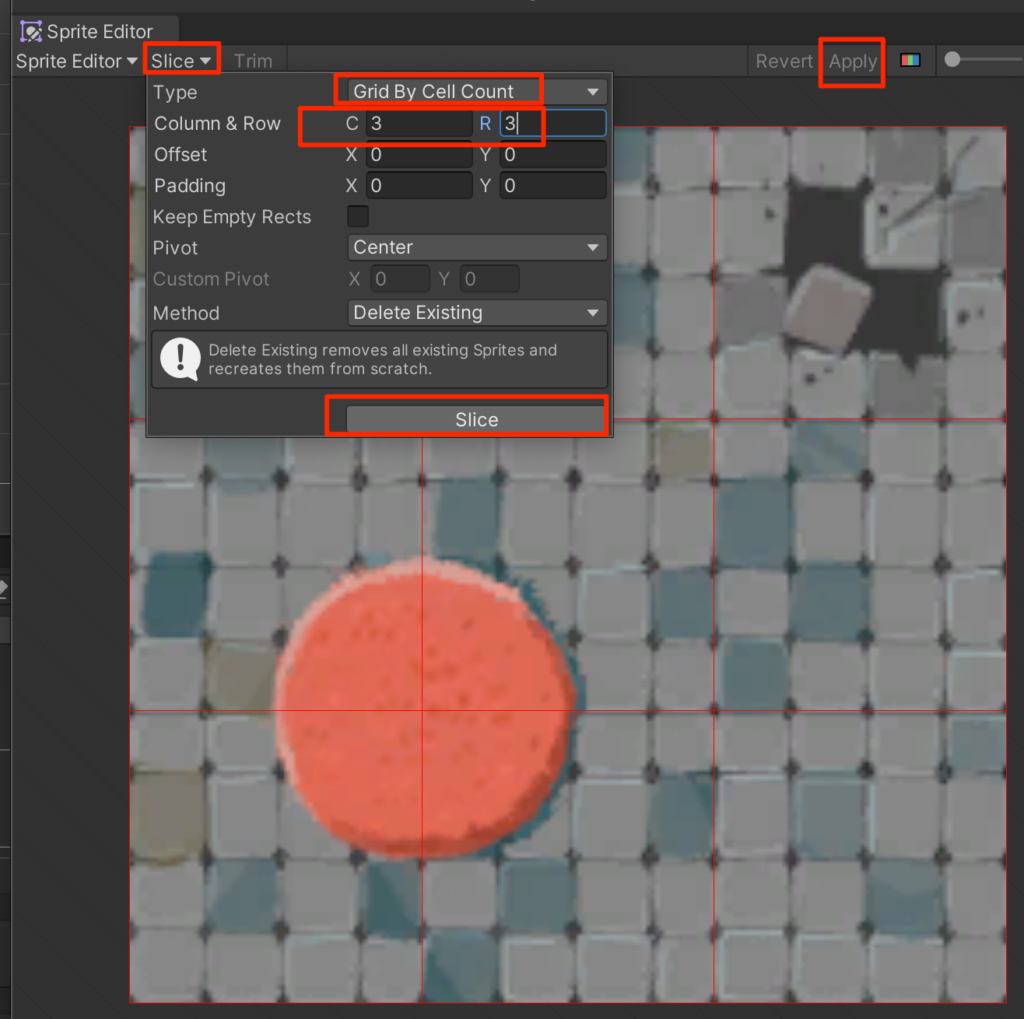
こうすることで、1枚の画像から9枚のスプライトを作成することができた。
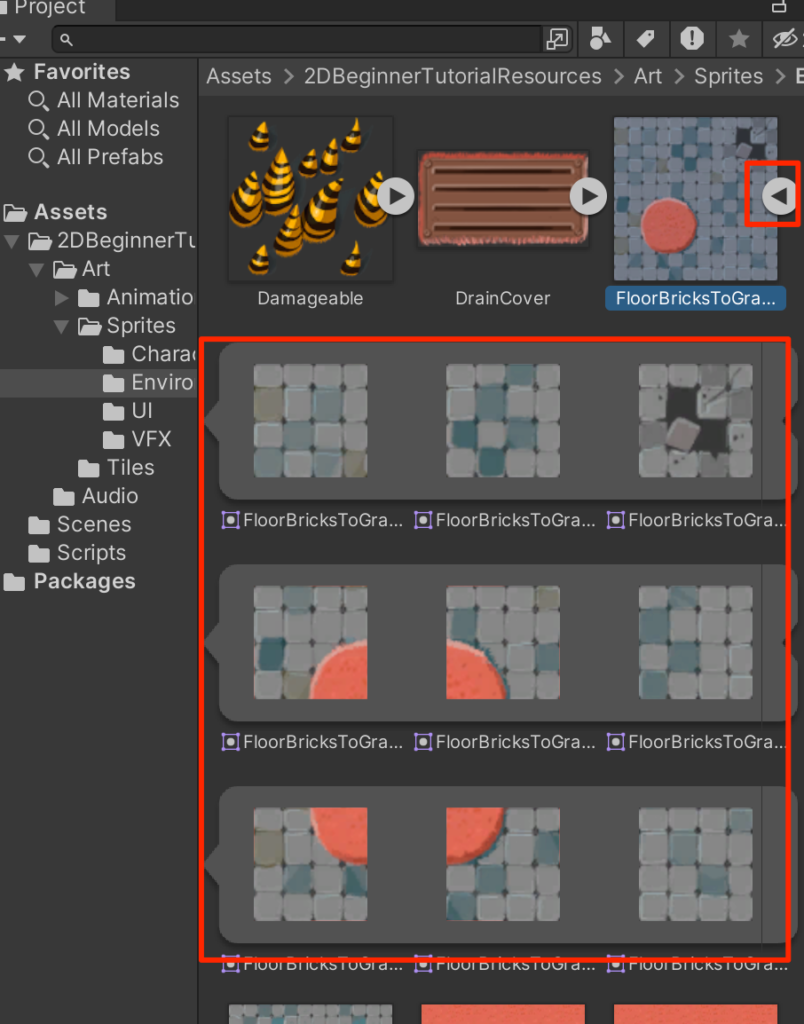
分割ができたので元絵をそのまま、パレットにドラッグ&ドロップで配置する。
すると9種類のタイルとして利用することができる。(保存画面が出るのでそのままエンター)

同じ作業を以下5枚の画像に対しても行ってパレットを充実させよう!
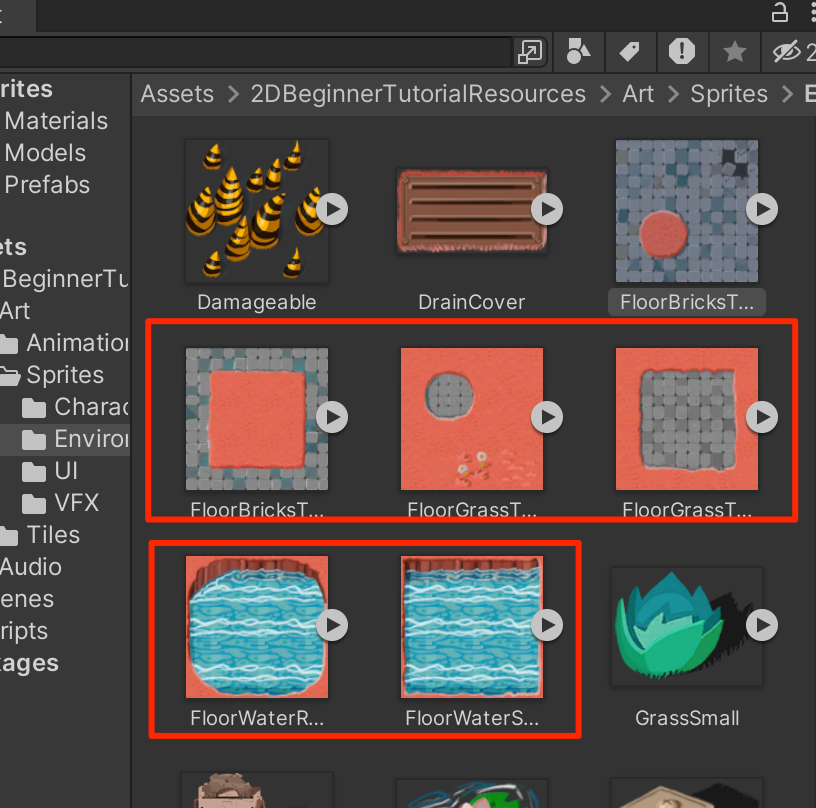
パレット完成!
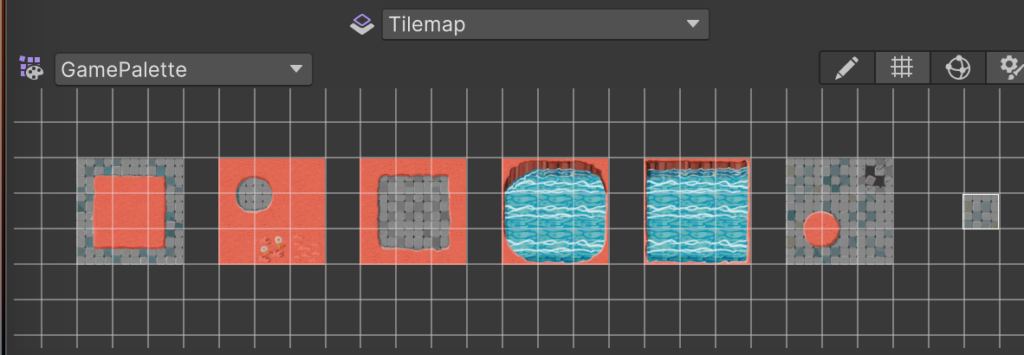
それでは塗り絵をしていこう。まずはオレンジ色の土ブロックを選択してフィルモードで範囲を選択し、一気に塗りつぶす。
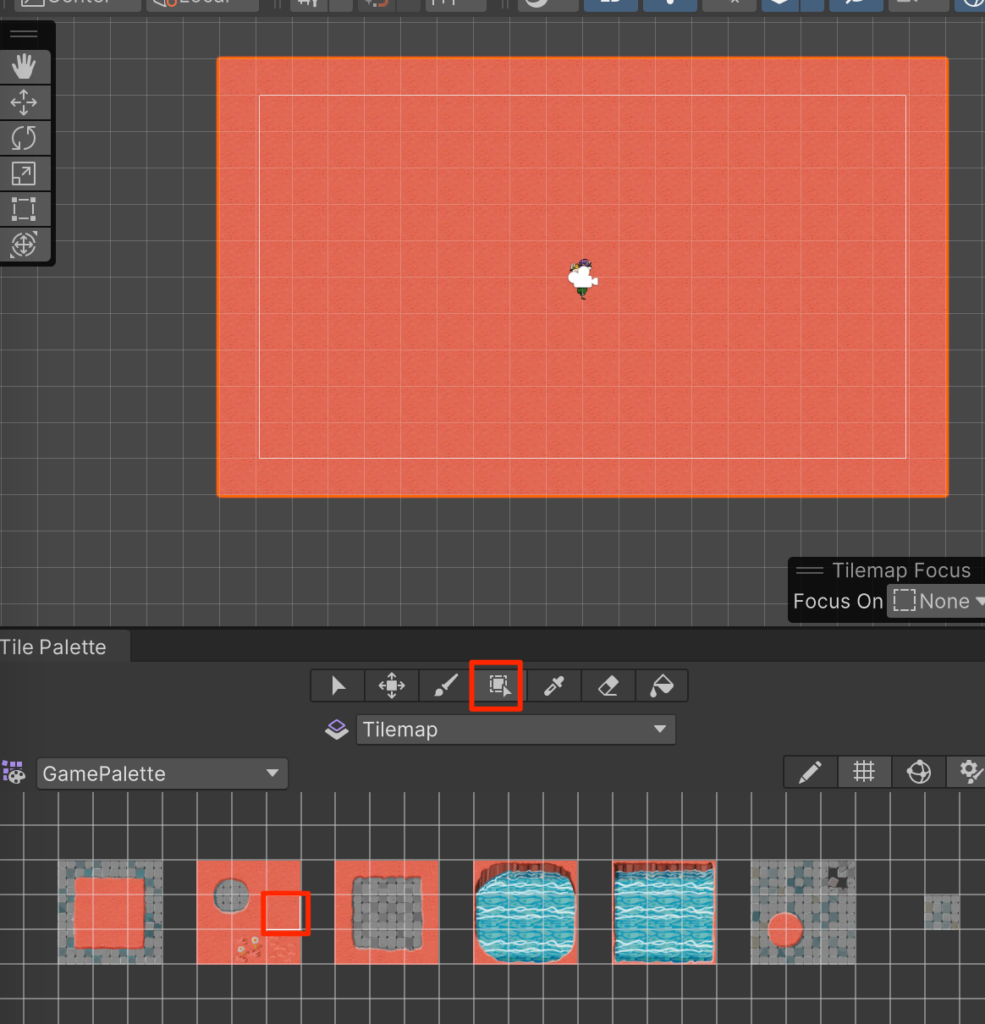
あとは自由に配置しよう。このあとの作業で水の中は入れなくなるのでそれだけを注意してもらいたい。
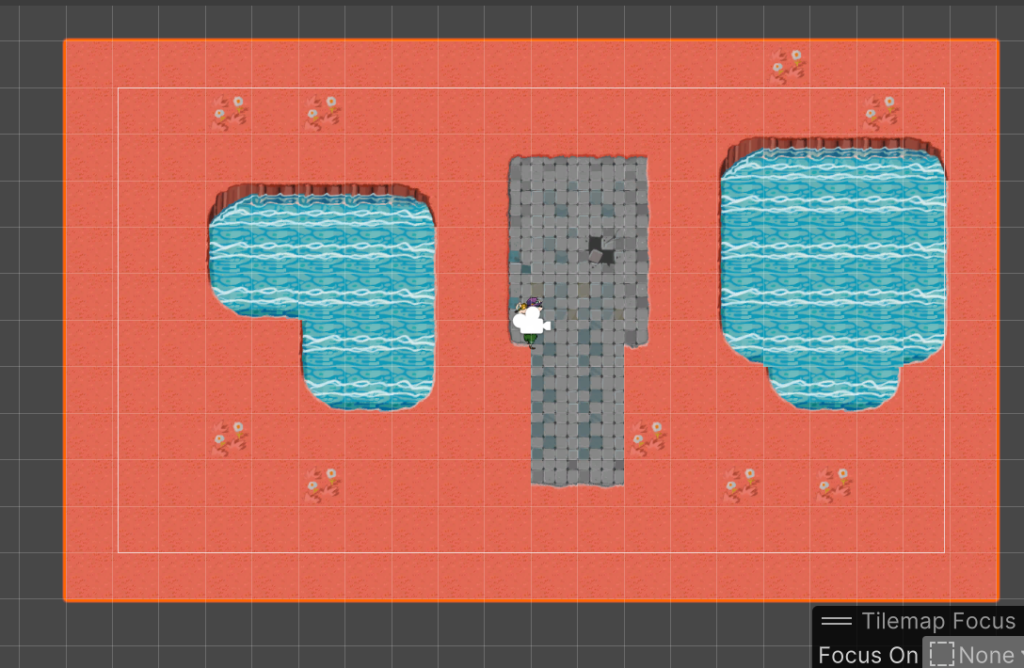
実行してみよう。世界ができてRubyが歩き回れるようになったが水上を歩いてしまうのは問題がある。次回はこれを改善していく。


コメント