
Shoot
UIにCanvasを使った新しい記事があります
[作成手順]
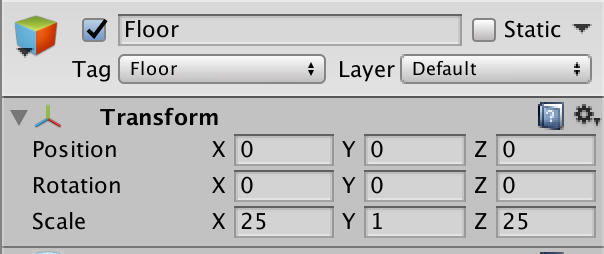
床の作成
1.CubeからFloorを作成する。
2.Floorというタグを作成し付与する。
3.transformは下図
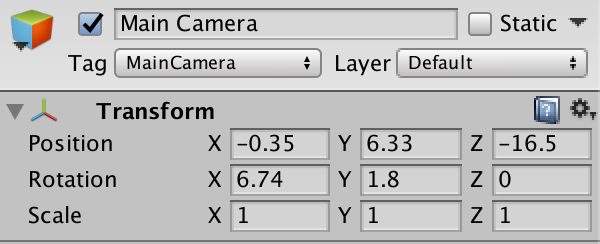
カメラの設定
4.transformを下図のように設定
弾丸の作成
5.SphereからBulletを作成する。
6.transformは下図(Floorに埋もれて見えないが気にしなくて良い)
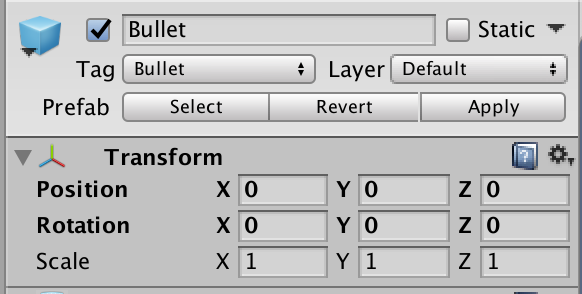
7.表面材質を赤に設定する。
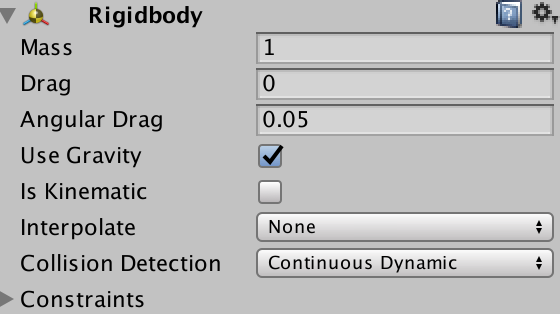
8.Rigidbodyを付与する。すり抜けが発生しないように下図のようにCollision DetectionをContinuous Dynamicに設定する。
9.Bulletというタグを作成し付与する。
10.BulletController.csの作成。以下のようにスクリプトを作成する。画面から見えなくなった時にデストロイする処理を入れている。作成できたらヒエラルキーのBulletに付与する
using System.Collections;
using System.Collections.Generic;
using UnityEngine;

public class BulletController : MonoBehaviour {

	void OnBecameInvisible(){
		Destroy (gameObject);
	}
}
11.プレファブ化する。(ヒエラルキーからは削除する)
Shooterの作成
11.今回はカメラにスクリプト付与する。Shooter.csを以下のように作成しカメラにアタッチする。
using System.Collections;
using System.Collections.Generic;
using UnityEngine;

public class Shooter : MonoBehaviour {
	public GameObject prefab;

	void Update () {
		if (Input.GetMouseButtonDown (0)) {
			//引数一つでInstantiate
			GameObject obj = Instantiate (prefab);
			//親要素設定(今回はカメラ)
			obj.transform.parent = transform;
			//親要素からのオフセットは0
			obj.transform.localPosition = Vector3.zero;
			//メインカメラからマウスクリックした地点にrayを飛ばす
			Ray ray = Camera.main.ScreenPointToRay (Input.mousePosition);
			//rayの方向を長さ1にして dirに代入
			Vector3 dir = ray.direction.normalized;
			//生成したObjのrigidbodyを取得し、速度をdir方向に与える
			obj.GetComponent<Rigidbody> ().velocity = dir * 100.0f;
		}

	}
}
12.Shooterスクリプトをカメラにアタッチしたら、インスペクターからBulletプレファブを登録する。

13.実行してマウスをクリックしてみよう。クリックした場所に弾丸が飛んでいけば成功だ。
GameManagerの作成
14.GUI関連やscoreなどを一元管理できるようにCreateEmptyからGameManagerを作成しGameManager.csスクリプトを以下のように作成する。
using System.Collections;
using System.Collections.Generic;
using UnityEngine;

public class GameManager : MonoBehaviour {
	public GUIStyle scoreStyle;
	public GUIStyle msgStyle;
	private int score = 0;
	private string msg="";

	void Update(){
		if (msg == "GameOver") {
			//動きを止める
			Time.timeScale = 0f;
		}
	}

	void OnGUI(){
		GUI.Label (new Rect (5, 5, 10, 10), score.ToString(), scoreStyle);
		GUI.Label (new Rect (Screen.width/2-150, Screen.height/2-25, 300, 50), msg, msgStyle);
	}
	public int GetScore(){
		return score;
	}
	public void SetScore(int score){
		this.score = score;
	}
	public string GetMsg(){
		return msg;
	}
	public void SetMsg(string msg){
		this.msg = msg;
	}
}
落下してくるCubeの作成
15.Cubeを作成する。トランスフォームは下図。(Floorに埋もれるが考慮しなくてよい)

16.Rigidbodyを付与し、Collision DetectionをContinuous Dynamicに設定する。
17.青の素材を付与する。
18.CubeController.csを下図のように作成し、アタッチする。プレファブには直接GameManagerの参照を渡せないので修飾子はprivateとし、setterを準備しておく。
using System.Collections;
using System.Collections.Generic;
using UnityEngine;

public class CubeController : MonoBehaviour {
	private GameManager gm;

	void OnCollisionEnter(Collision coll){
		if (coll.gameObject.tag == "Bullet") {
			gm.SetScore (gm.GetScore () + 1);
			Destroy (gameObject, 0.1f);

		}
		if (coll.gameObject.tag == "Floor") {
			gm.SetMsg ("GameOver");

		}

	}
	public void SetGameManager(GameManager gm){
		this.gm = gm;
	}

}
19.プレファブ化する。
CubeGeneratorの作成
20.CreateEmptyからCubeGeneratorを作成。
21.CubeGeneratorにCubeGenerator.csスクリプトを下図のように作成し付与する。
using System.Collections;
using System.Collections.Generic;
using UnityEngine;

public class CubeGenerator : MonoBehaviour {
	public GameObject prefab;
	public GameManager gm;

	void Start () {
		StartCoroutine (Create ());
	}
	//コルーチンで生成を行う
	IEnumerator Create(){
		//生成間隔の初期値
		float delta = 1.5f;
		while (true) {
			GameObject obj=Instantiate (
				prefab,
				new Vector3(Random.Range(-12.0f,12.0f),Random.Range(8.0f,12.0f),Random.Range(-3.0f,3.0f)),
				Quaternion.identity

			);
			//GameMangerをセットする。
			obj.GetComponent<CubeController> ().SetGameManager(gm);
			//生成間隔時間停止
			yield return new WaitForSeconds (delta);
			//徐々に生成間隔を早める
			if (delta > 0.5f) {
				delta -= 0.05f;
			}
		}
	}
}
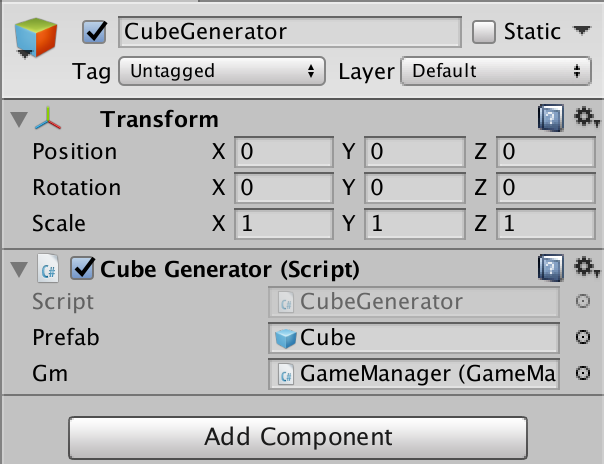
22.インスペクターからCubeプレファブとヒエラルキーにあるGameMangerオブジェクトを登録する。
実行
23.実行してみよう。最初の動画のように遊べれば成功だ。
[完成版]
以下から完成版をダウンロードできる。(Unity5.5.4)
コメント