
ワールド空間にキャンバスを配置してみよう。
手順
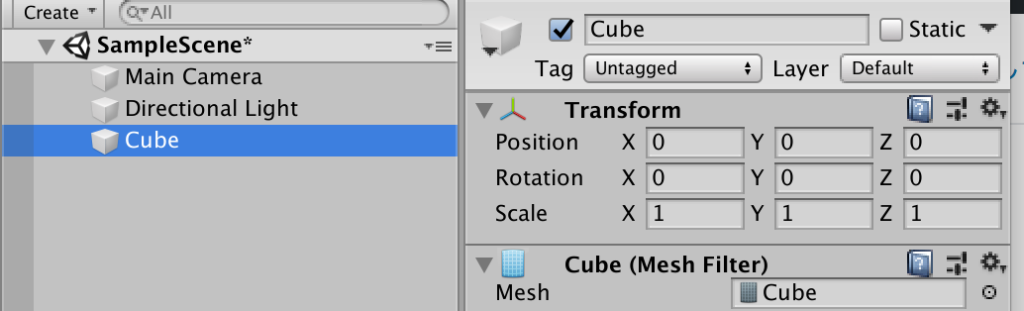
1.原点にキューブを作成する。
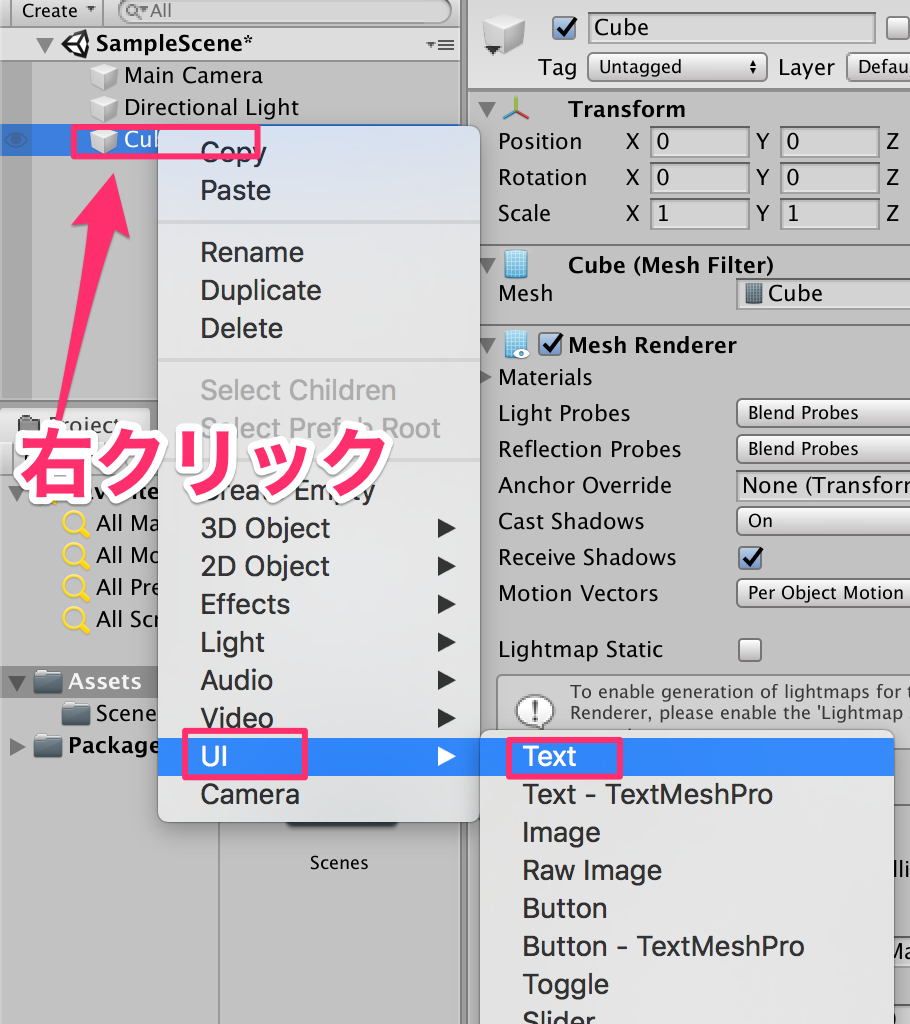
2.キューブを右クリックしてUI–>TEXTを作成する。
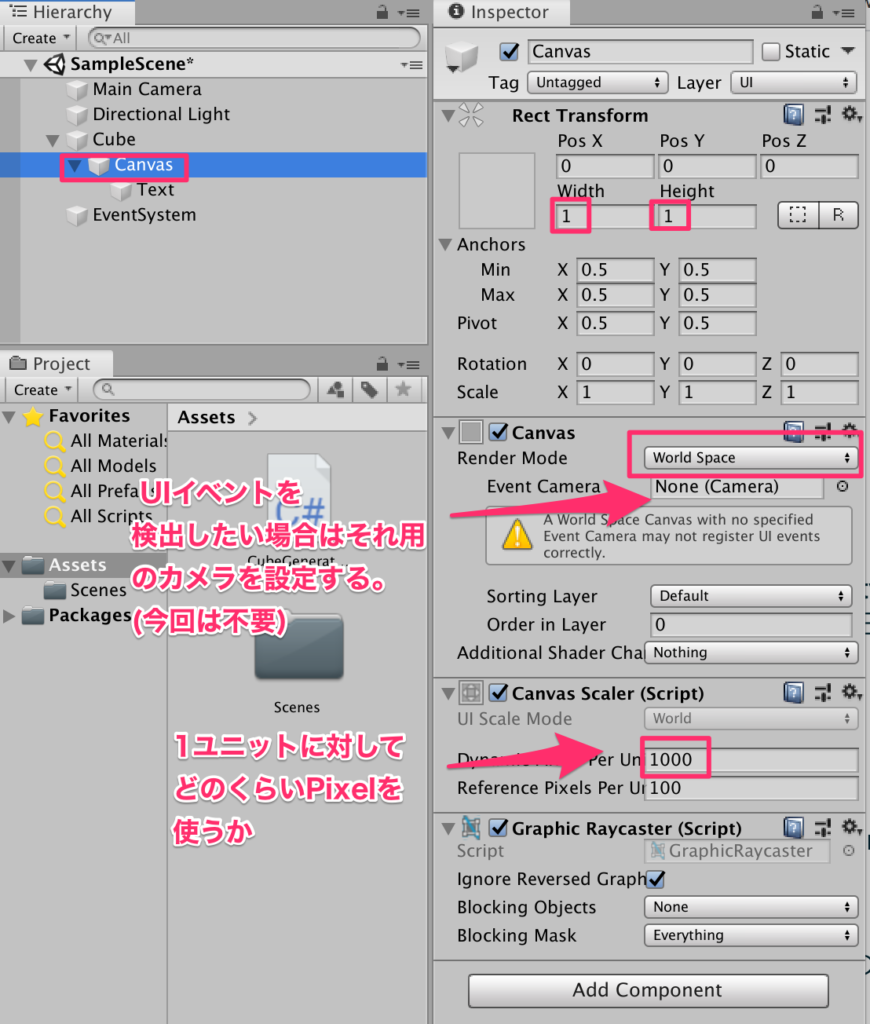
3.canvasの設定
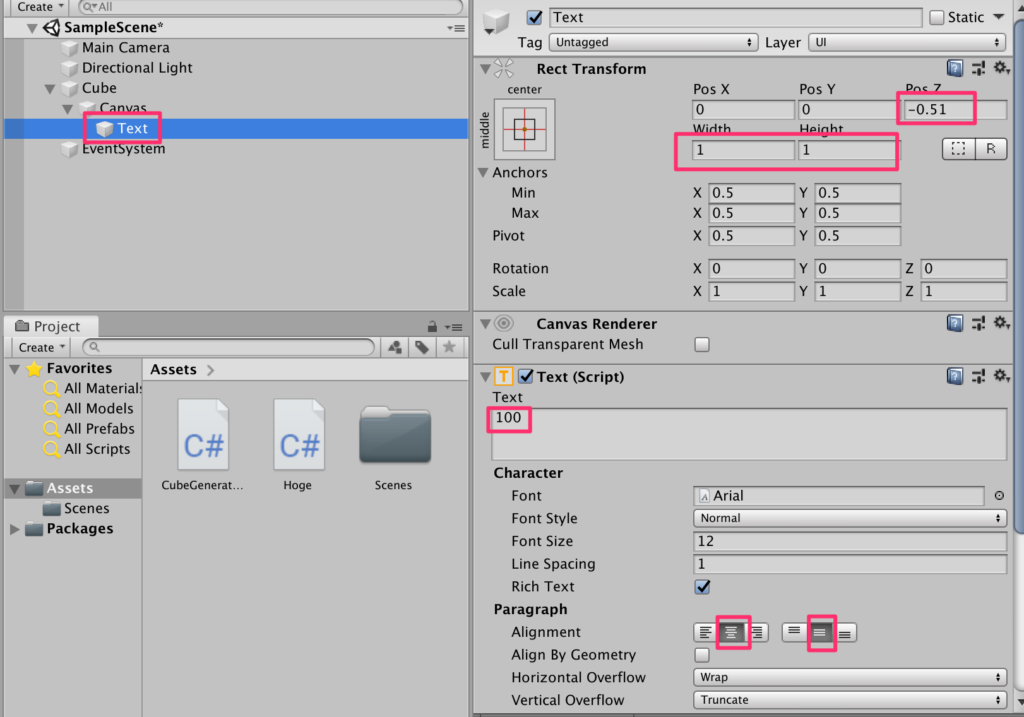
4.Textの設定
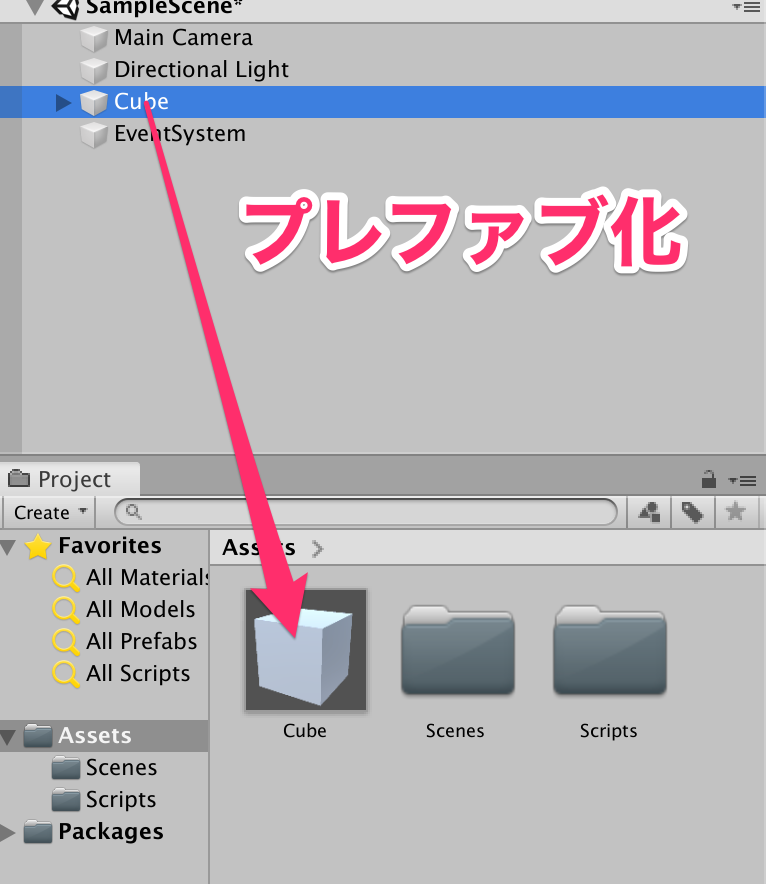
5.Cubeをプレファブ化し、ヒエラルキーからは削除する
6.CubeGeneratorスクリプトを以下のように作成
using System.Collections;
using System.Collections.Generic;
using UnityEngine;
using UnityEngine.UI;

public class CubeGenerator : MonoBehaviour
{
    public GameObject prefab;

    void Start()
    {
        for(int i = 1; i <= 9; i++) {
            for(int j = 1; j <=9; j++) {
                GameObject cube = Instantiate(
                   prefab,
                   new Vector3(j , 9- i, Random.Range(-10f, 10f)),
                   Quaternion.identity
                   );
                cube.GetComponent<Renderer>().material.color = Color.cyan;
                //子要素の検索GetChildにわたすインデックスはヒエラルキーの並び順の上から0,1,2...
                cube.transform.GetChild(0).GetChild(0).GetComponent<Text>().text = i*j + "";
            }
        }
    }
}
7.CreateEmptyから空オブジェクトを作成しCubeGeneratorとリネーム。
その後CubeGeneratorスクリプトをアタッチ。
最後にCubeプレファブを登録する。

8.カメラの調整。
以下のようにカメラのトランスフォームを調整する。

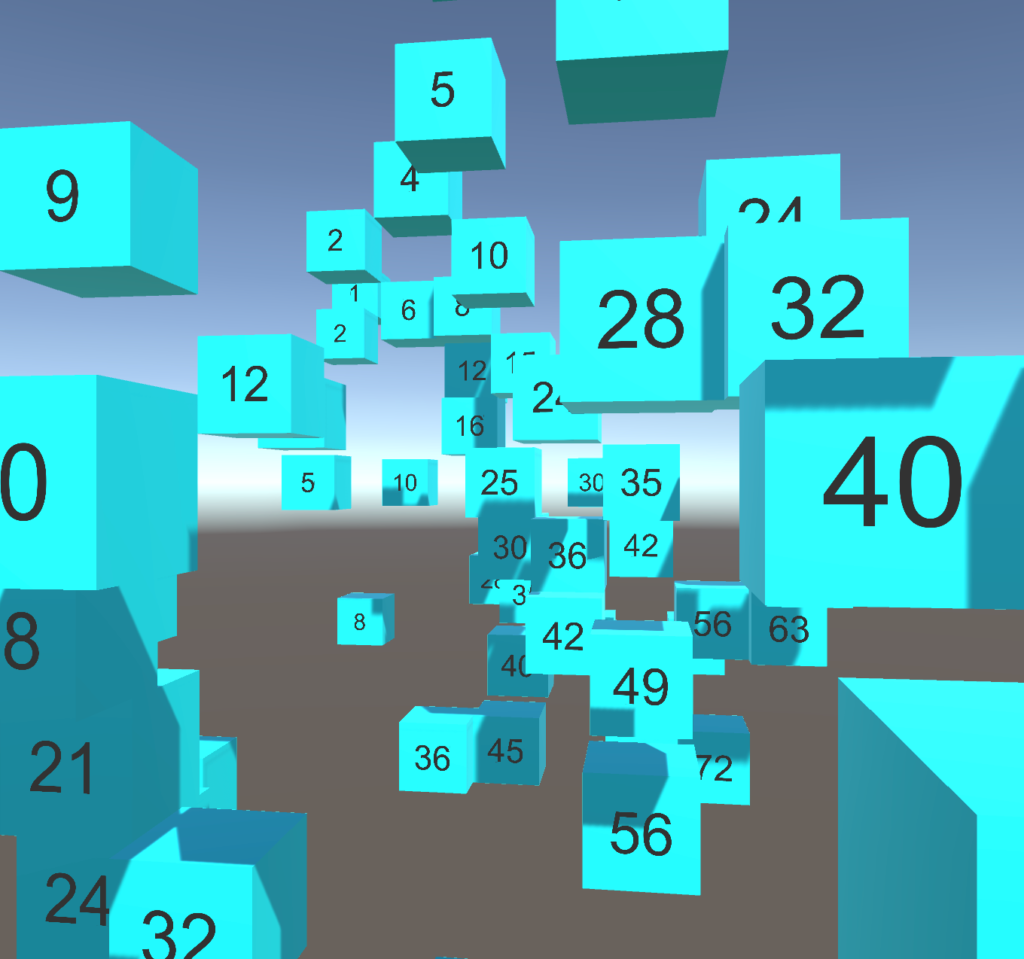
9.実行してみよう。Cubeがz軸のみランダムに配置されている。
10.CubeControllerスクリプトを以下のように作成する。
using System.Collections;
using System.Collections.Generic;
using UnityEngine;

public class CubeController : MonoBehaviour
{

    void Update()
    {
        Vector3 dist = transform.position;
        dist.z = 0;
        transform.position = Vector3.Lerp(transform.position, dist, 1.5f * Time.deltaTime);

        //transform.position = Vector3.MoveTowards(transform.position, dist, 4f * Time.deltaTime);
    }
}
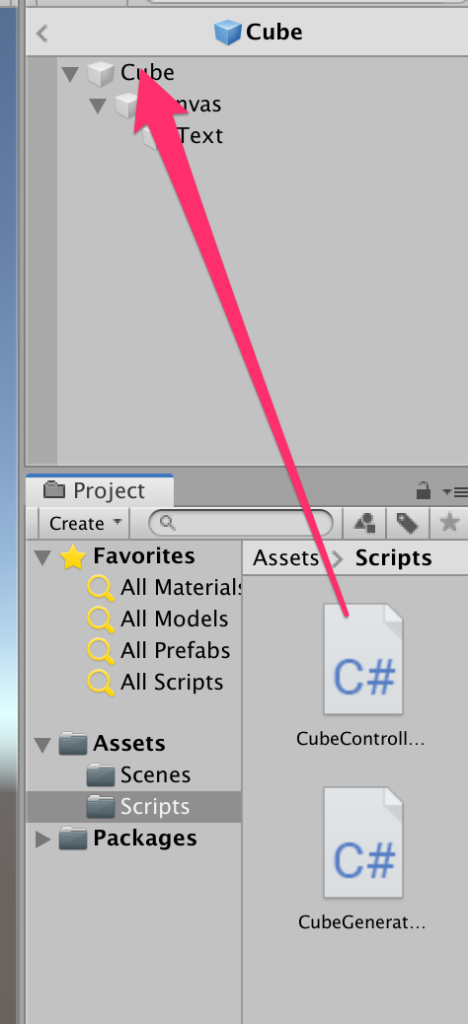
11.プレファブのCubeにアタッチ
12.実行してみよう。Lerpの効果によってキレイに所定の場所に収まるのがわかる。
13.コメントアウトされているVector3.MoveTowardsとの動きの違いも確認しておくこと。


コメント