前回、前々回とWheelコライダーを使って車を作成してきた。今回は同じくWheelコライダーを使ってバイクを作ってみよう。
作成
1.新規3DプロジェクトからBikeBasicを作成する。
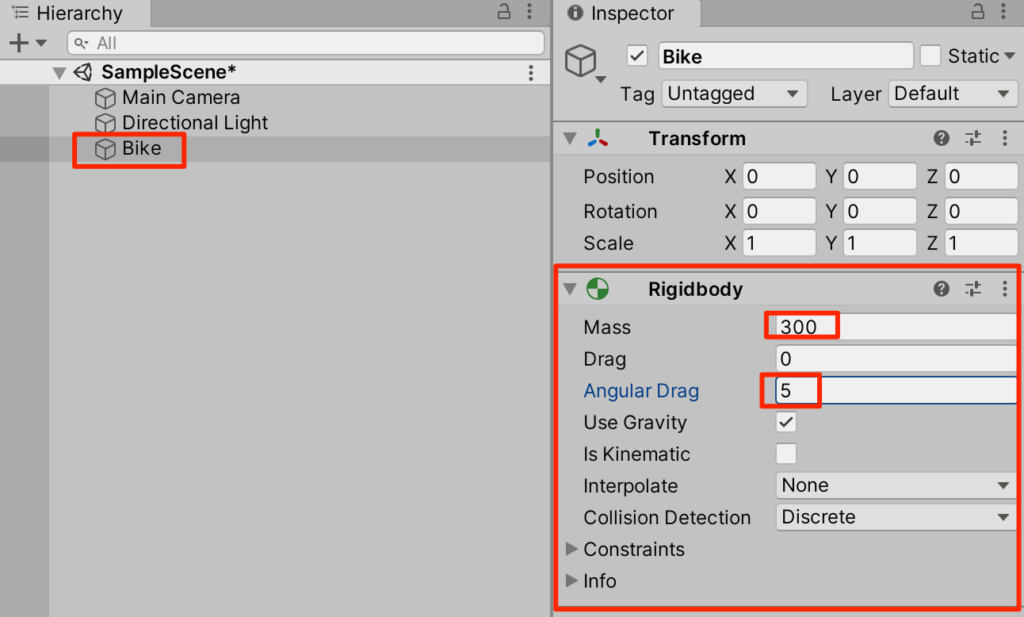
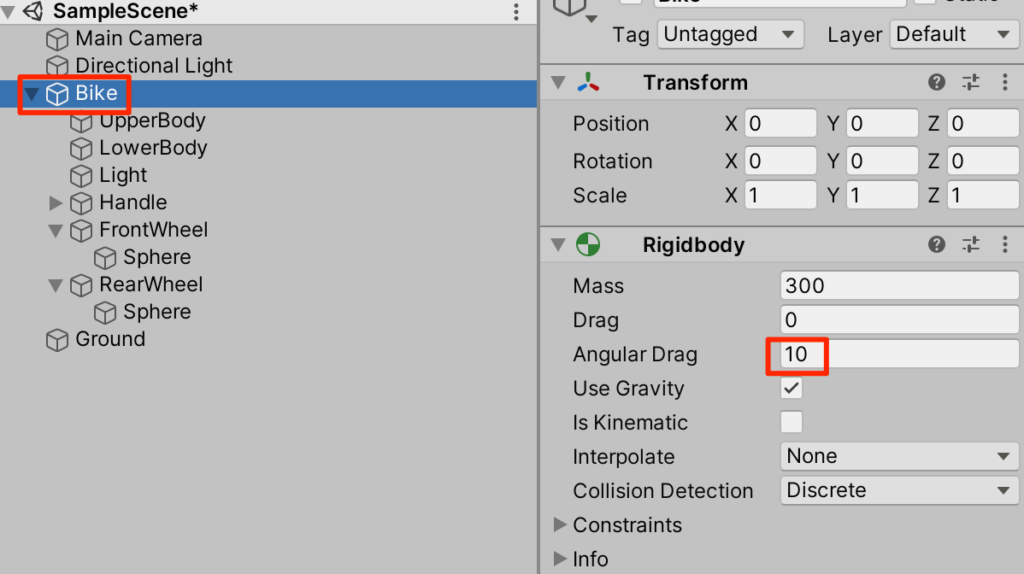
2.CreateEmptyをし、Bikeとリネーム。Rigidbodyを付与してMass(質量)を300
Angular Drag(回転抵抗)を5とする。300kgはバイクとしてはかなり重いが挙動の安定のため少し重くしている。Angular Dragを設定大きめに設定するのは直ぐに回転したりしてしまうのを防ぐためだ。2輪車は4輪車に比べると不安定なのでここらへんをシビアに設定していく必要がある。
車体の作成
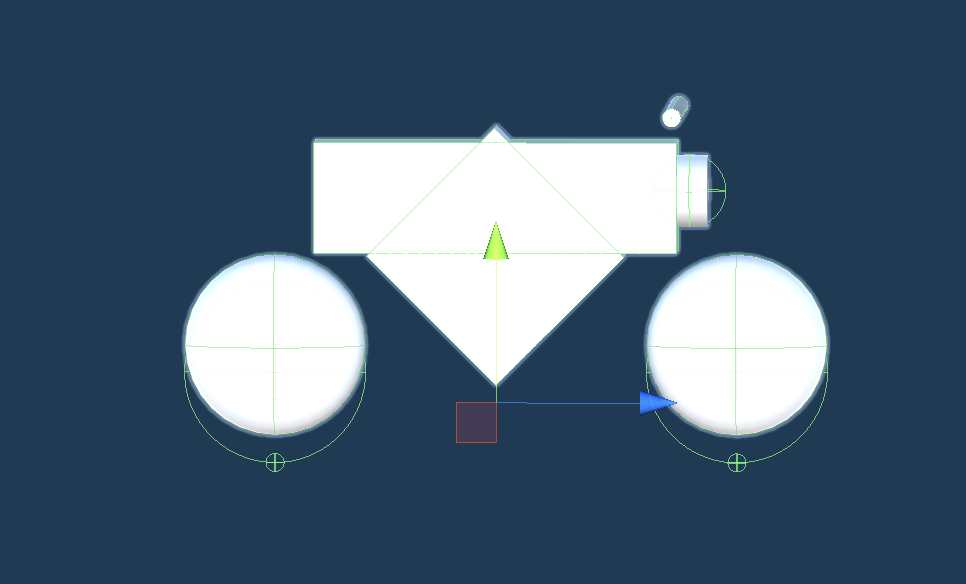
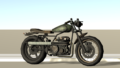
では実際に車体を作っていこう。以下が完成イメージだ。すべてプリミティブな素材で作成していく。ここでのポイントは必ずz軸(青軸)が前になるようにモデリングしていくことだ。
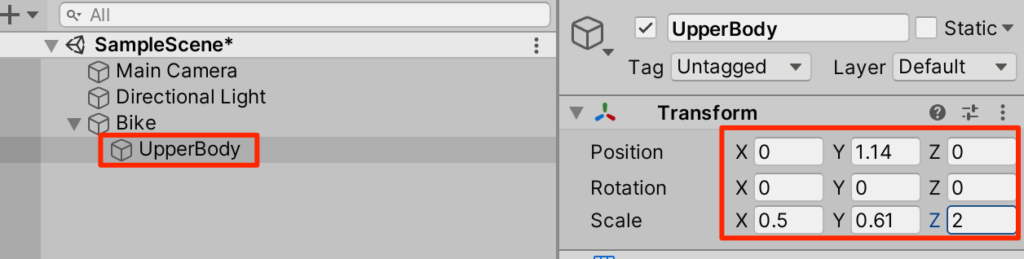
1.車体上部。Bikeを右クリックしてそこからCreate->CubeとしてUpperBodyとしてトランスフォームを以下のように設定
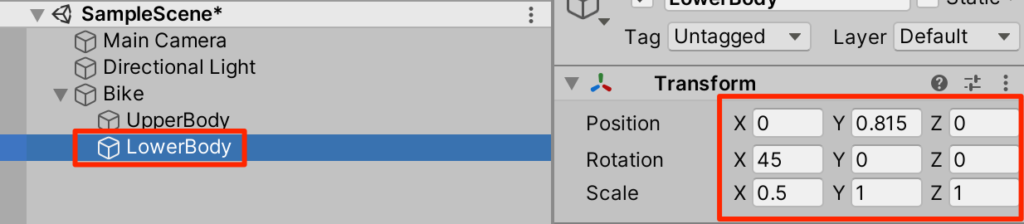
2.車体下部。同じく新規CubeからLowerBodyを作成。トランスフォームを調整する。
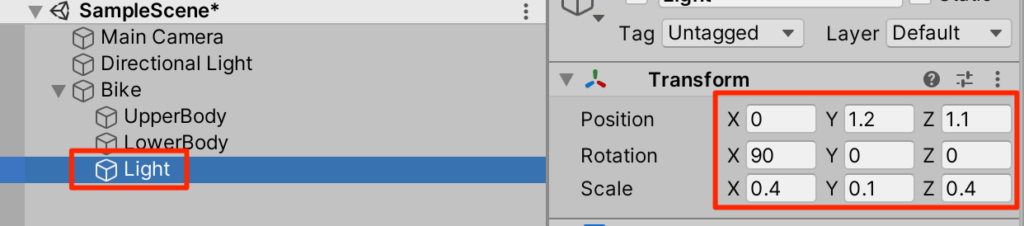
3.フロントライトの作成。Bikeを右クリックして新規3DオブジェクトからCylinderを選択。Lightとリネームして以下のように設定
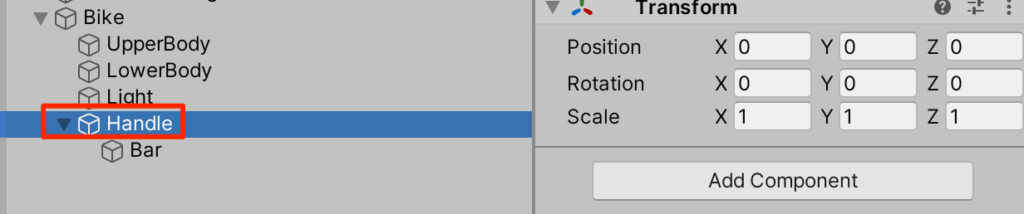
4.ハンドルの作成。同じくBikeを右クリックCylinderからBarを作成。以下のように調整する。
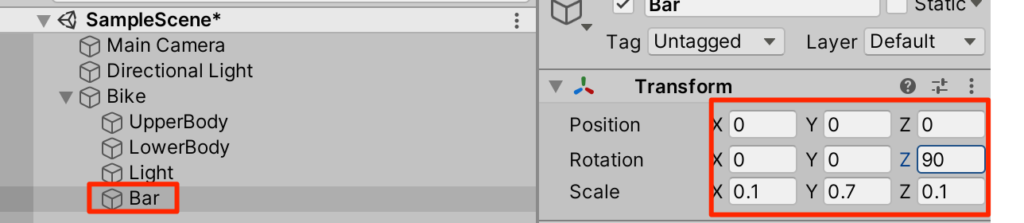
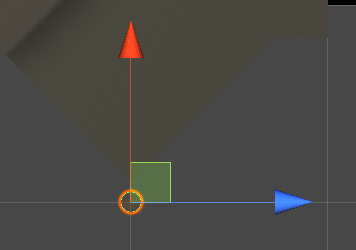
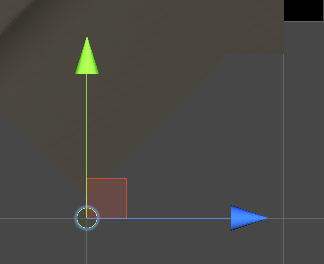
ただし、これは問題がある。z軸に90度回転させた為、この物体の上方向(y軸)が横を向いてしまった。後々ハンドルの角度を変えるときにy軸回転を行うのでこのままでは意図した挙動にならない。
5.軸変換。Unityで開発を行っているとこういった自体は頻繁に発生する。あわてず騒がずに以下のように対処する。まずはBikeを右クリックしてCreateEmptyをする。
transformがリセットされていることを確認してから、先程作ったBarをドラッグして子要素にする。
こうすることでHandleのy軸を上に向けることに成功した。この親子関係を使って軸を変換する方法はUnityにおいてとても大切なので覚えておこう。
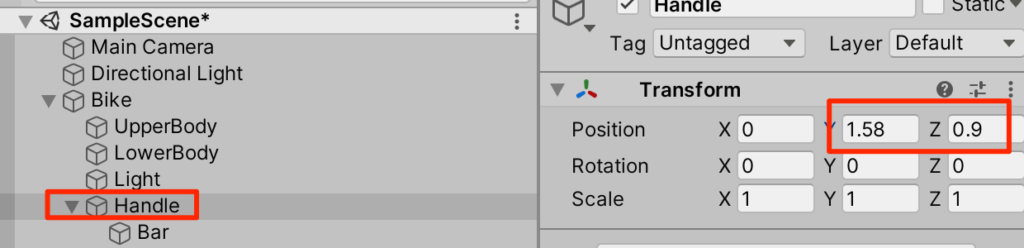
6.ハンドル位置合わせ。軸が修正できたので所定の位置にハンドルを移動しよう。
ハンドルのトランスフォームを以下のように修正する。
WheelColliderの設定
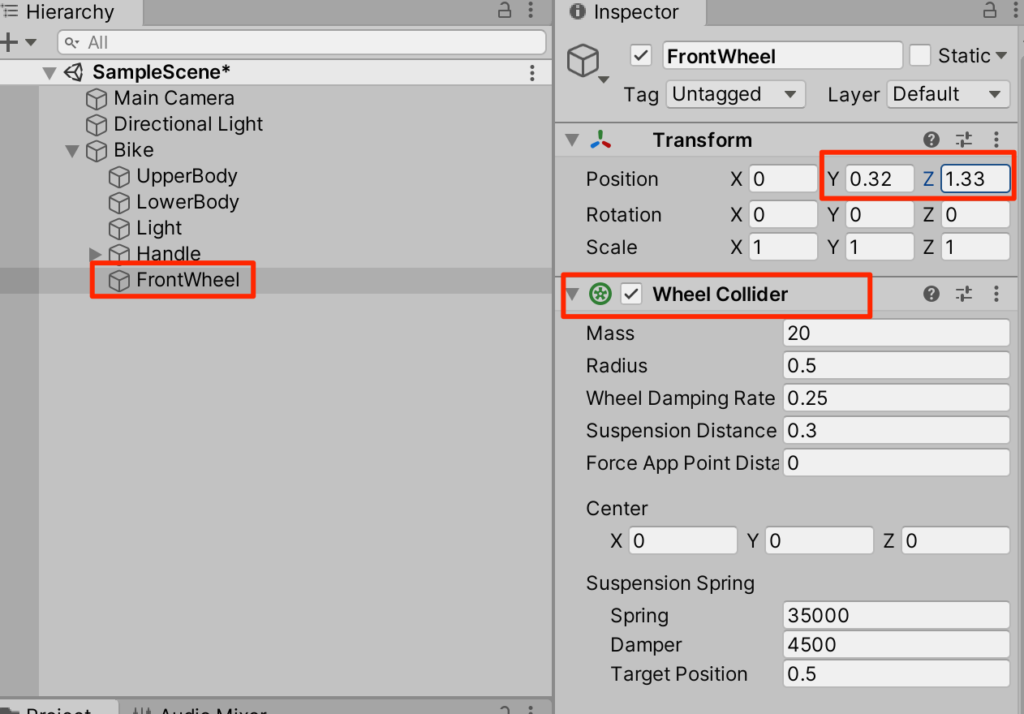
いよいよ車輪を作っていこう。車の時と同様にまずはWheelColliderを作成する。
1.Bikeを右クリックしてCreateEmpty。FrontWheelとリネームし、WheelColliderをアタッチ。トランスフォームを調整する。
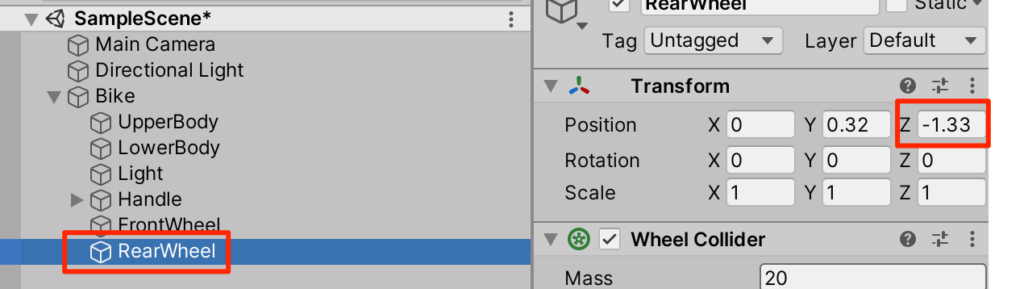
2.FrontWheelを複製してRearWheelとリネーム後トランスフォームを調整する。
地面の作成
バイクが出来てきたので地面を作成しよう。
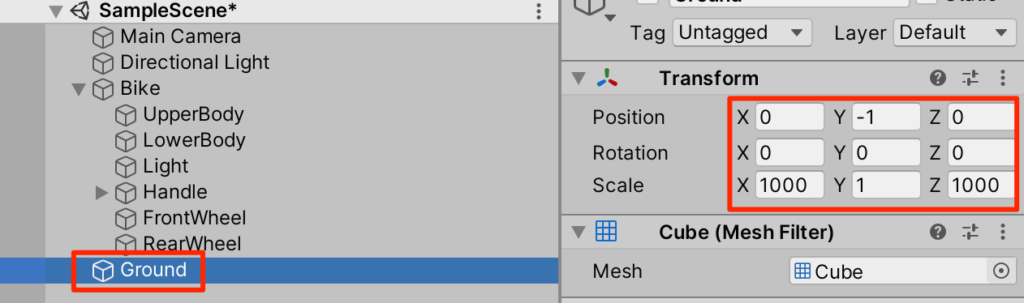
1.新規Cubeを作成し、Groundとリネーム。トランスフォームを調整する。(この際誤ってBikeの子要素にしないこと)
Bikeスクリプトの作成
1.新規C#スクリプトからBikeを作成。以下のように記述する。
using System.Collections;
using System.Collections.Generic;
using UnityEngine;

public class Bike : MonoBehaviour {
    public Transform handle;
    public List<AxleInfo> axleInfos;
    public float maxMotorTorque;
    public float maxSteeringAngle;
   public void ApplyLocalPositionToVisuals(WheelCollider collider) {
        if(collider.transform.childCount == 0){
            return;
        }
        Transform visualWheel = collider.transform.GetChild(0);
        Vector3 position;
        Quaternion rotation;
        collider.GetWorldPose(out position, out rotation);
        visualWheel.transform.position = position;
        visualWheel.transform.rotation = rotation;
    }
    public void FixedUpdate() {
        float motor = maxMotorTorque * Input.GetAxis("Vertical");
        float steering = maxSteeringAngle * Input.GetAxis("Horizontal");
        foreach (AxleInfo axleInfo in axleInfos) {
            if (axleInfo.steering) {
                axleInfo.Wheel.steerAngle=steering;
                handle.localEulerAngles=new Vector3(0,steering,0);
            }
            if (axleInfo.motor) {
                axleInfo.Wheel.motorTorque = motor;
            }
            ApplyLocalPositionToVisuals(axleInfo.Wheel);
        }
    }
}
[System.Serializable]
public class AxleInfo {
    public WheelCollider Wheel;
    public bool motor; //駆動輪か?
    public bool steering; //ハンドル操作をしたときに角度が変わるか?
}
2.作ったスクリプトをBikeにアタッチして、インスペクターを以下のように設定する。
いざ実行!
では実行してみよう。
ああ、転倒してしまった!!
重心の設定
あっけなく転倒してしまった。これはバイクの重心が高すぎるからだ。重心を下げよう。Bikeスクリプトを以下のように修正する。
using System.Collections;
using System.Collections.Generic;
using UnityEngine;

public class Bike : MonoBehaviour {
    public Transform handle;
    public List<AxleInfo> axleInfos;
    public float maxMotorTorque;
    public float maxSteeringAngle;
    void Start(){
        GetComponent<Rigidbody>().centerOfMass=new Vector3(0,-0.5f,-0.2f);
    }

   public void ApplyLocalPositionToVisuals(WheelCollider collider) {
        if(collider.transform.childCount == 0){
            return;
        }
        Transform visualWheel = collider.transform.GetChild(0);
        Vector3 position;
        Quaternion rotation;
        collider.GetWorldPose(out position, out rotation);
        visualWheel.transform.position = position;
        visualWheel.transform.rotation = rotation;
    }
    public void FixedUpdate() {
        float motor = maxMotorTorque * Input.GetAxis("Vertical");
        float steering = maxSteeringAngle * Input.GetAxis("Horizontal");
        foreach (AxleInfo axleInfo in axleInfos) {
            if (axleInfo.steering) {
                axleInfo.Wheel.steerAngle=steering;
                handle.localEulerAngles=new Vector3(0,steering,0);
            }
            if (axleInfo.motor) {
                axleInfo.Wheel.motorTorque = motor;
            }
            ApplyLocalPositionToVisuals(axleInfo.Wheel);
        }
    }
}
[System.Serializable]
public class AxleInfo {
    public WheelCollider Wheel;
    public bool motor; //駆動輪か?
    public bool steering; //ハンドル操作をしたときに角度が変わるか?
}
(解説)rigidbodyのcenterOfMassを設定することで重心を設定できる。今回は地面すれすれ&やや後方に設定した。
実行してみよう。
おお、倒れない!!
タイヤの見た目の作成
このようにWheelコライダーされあれば車輪の挙動を実現できるだがタイヤがないのは寂しい。作成していこう。
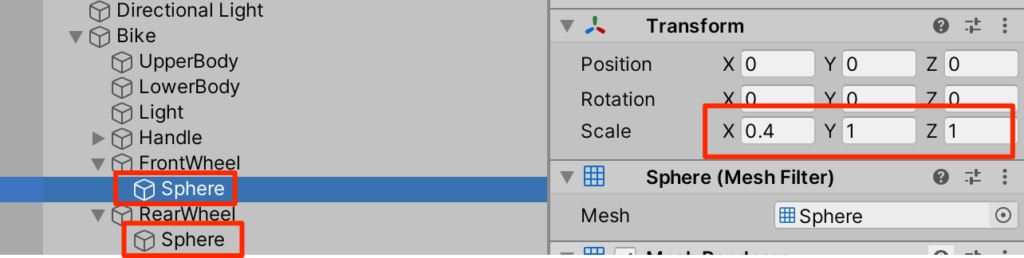
1.FrontWheelを右クリックしてSphereを作成。トランスフォームを調整。これをRearWheelにも行う。この際、Sphereコライダーはリムーブコンポーネントをしておく
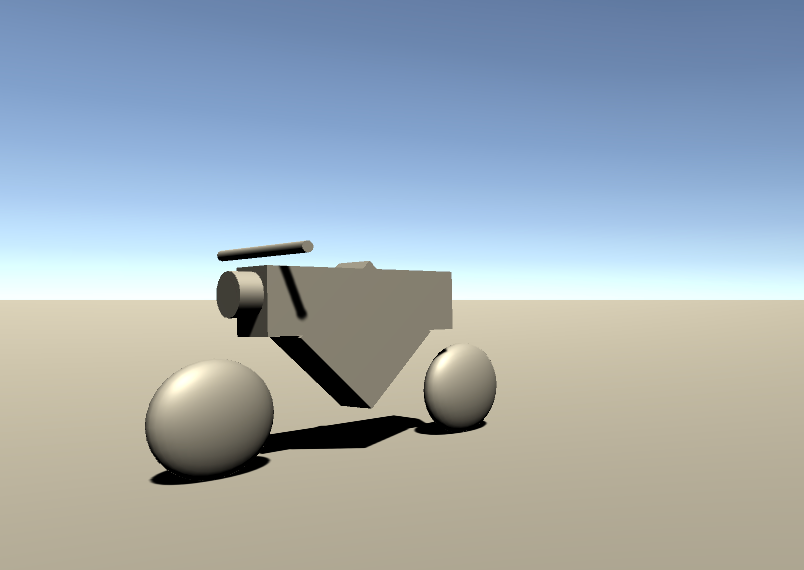
試走
試してみよう。車輪がついたことによってバイクっぽくなった。
セッティング
走ってみるとまだスリップしやすいことがわかる。RigidbodyのAngularの値を更に大きくしてみよう。
安定感は上がったが今度は旋回性が落ちてしまった。リアタイヤのグリップを少し弱めてみよう。
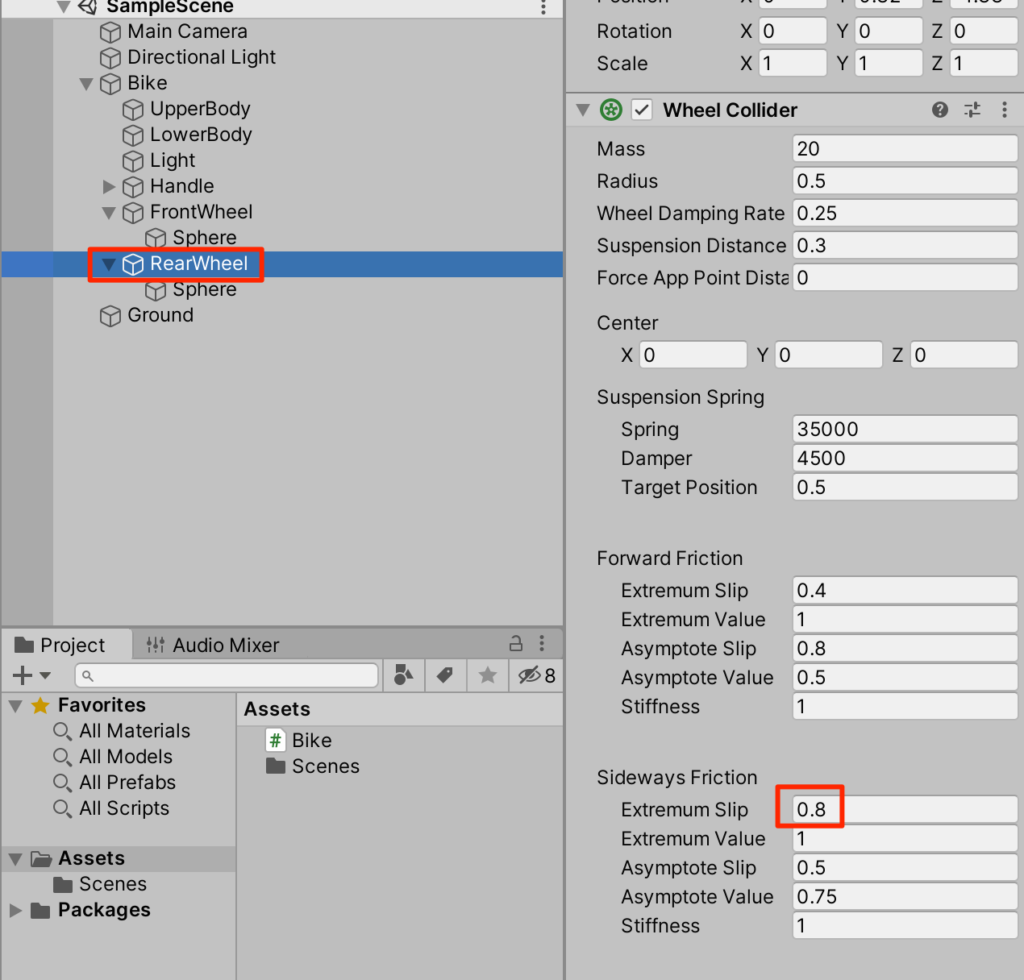
Extermum Slipを1に近づけることでスリップしやすくなる。この横滑りによって旋回性をあげた。ここらへんの調整はゲームに合わせて行っていく必要があるだろう。
障害物の設置
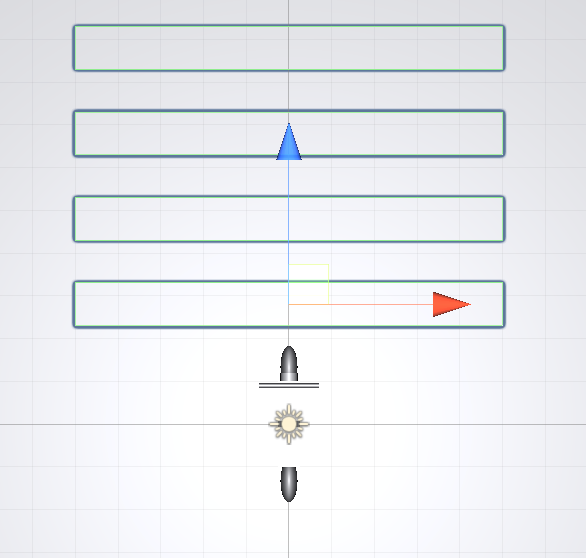
障害物を置いて挙動を見てみよう。
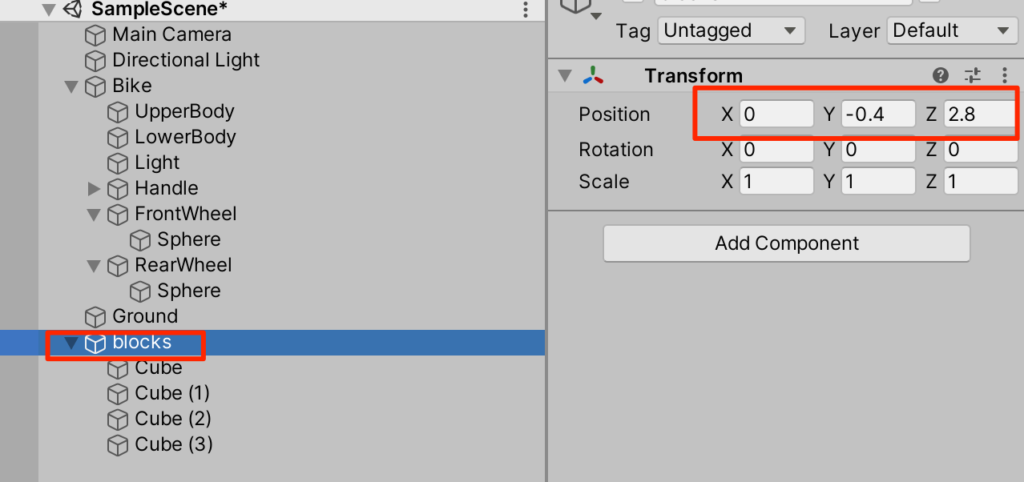
1.CreateEmpytしてBlocksとリネーム。トランスフォームを以下のように設定
2.子要素としてCubeを4つ作成。1つ目のトランスフォームは以下
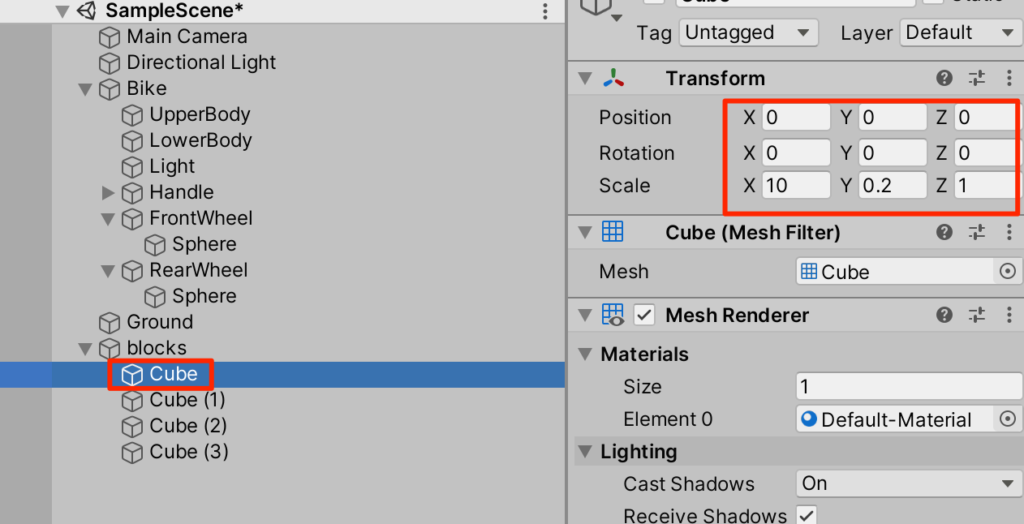
3.2つ目のトランスフォームは以下。
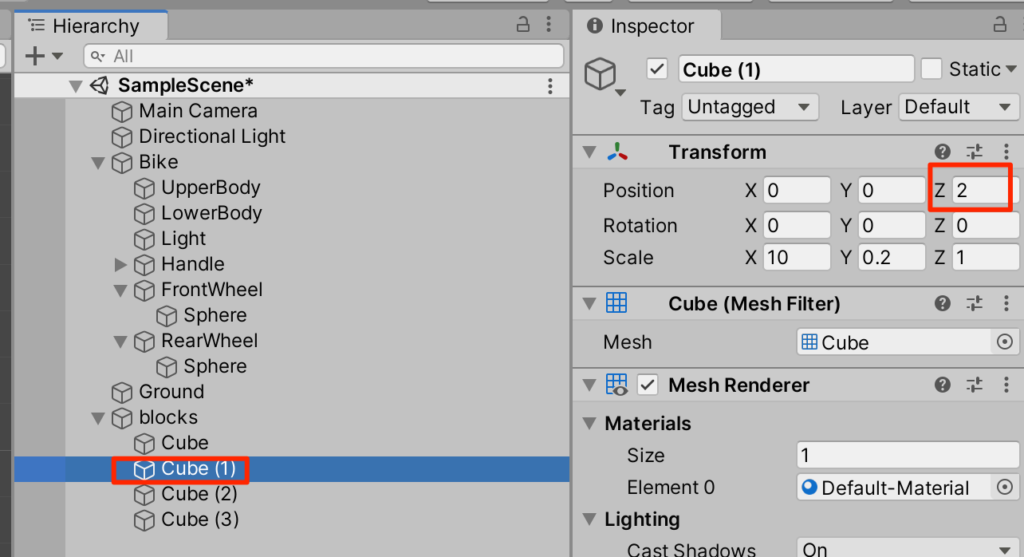
4.以降同様に2ずつオフセットさせる。
試走
実行してみよう。少し突き上げ感が強い感じだ。サスペンションを修正しよう。
1.FrontとRearのWheelColliderを選択してサスペンションのスプリングとダンパーの強さを1/10にする。
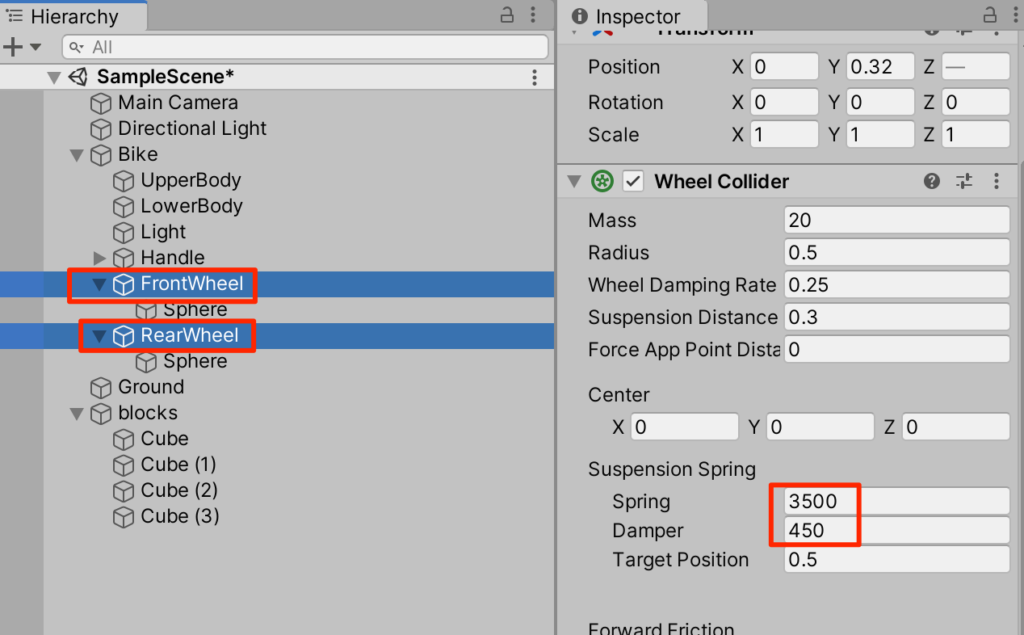
実行してみよう。ウルトラスムーズに障害を乗り越えられるようになった!
完成
以上で完成だ。サスの硬さ、馬力、回転抵抗やタイヤのグリップを調整してお好みのバイクに仕上げよう!。
コメント