
Unityには強力な地形生成機能が備わっている今回はそれの使い方を学ぼう
プロジェクトの作成
terrainappという名前で3Dプロジェクトを新規に作成する。
Standard Assetsのインポート
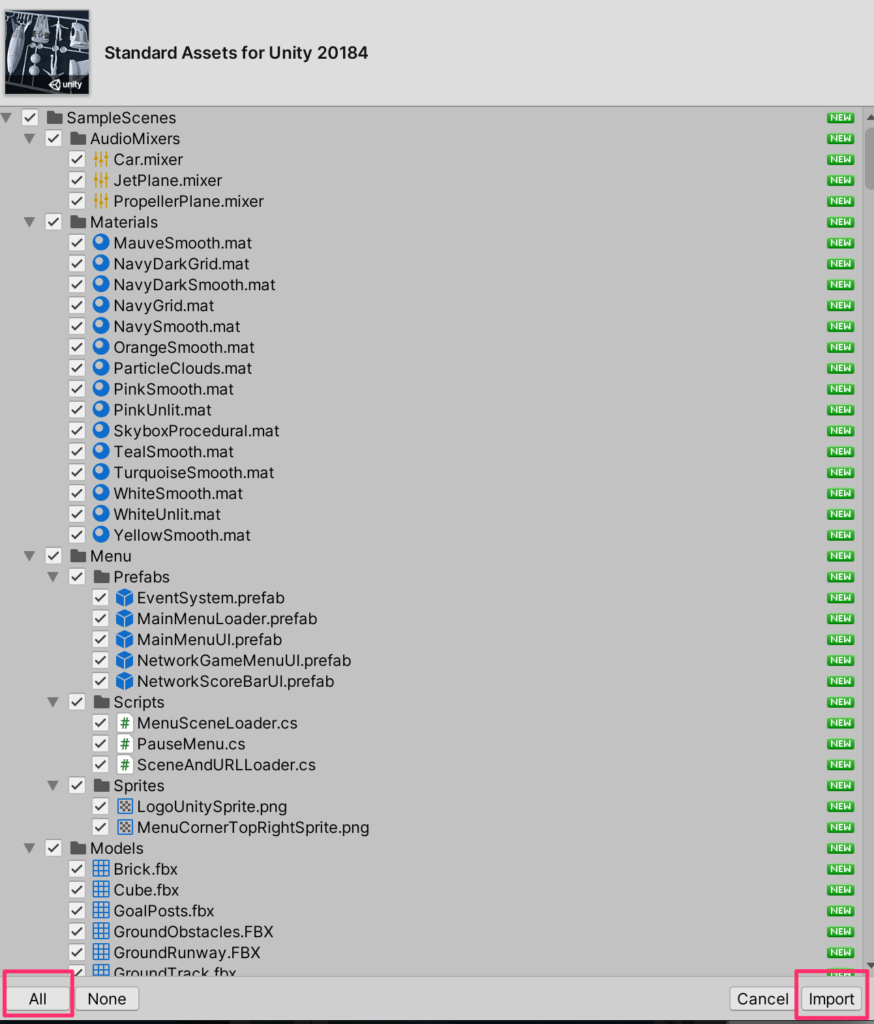
TerrainはStandard Assetsをインポートすると使えるようになる。まずはアセットストアを開いてStandard Assetsをすべてインポートしよう。
現在(2023)アセットストアからダウンロードできないようです。
以下からダウンロードしてください。
joytas.net/downloads/standard.unitypackage

バージョンによるエラーの修正
実行するUnityのバージョンによってはスクリプトエラーがでることがある。
もし、SimpleActivatorMenu.csにエラーが発生した場合には以下のように修正する。
using System;
using UnityEngine;
using UnityEngine.UI;

#pragma warning disable 618
namespace UnityStandardAssets.Utility
{
    public class SimpleActivatorMenu : MonoBehaviour
    {
        // An incredibly simple menu which, when given references
        // to gameobjects in the scene
        public Text camSwitchButton;
        public GameObject[] objects;


        private int m_CurrentActiveObject;
//略
}
Terrainの作成
新規から3DオブジェクトからTerrainを作成する

Terrainの初期設定
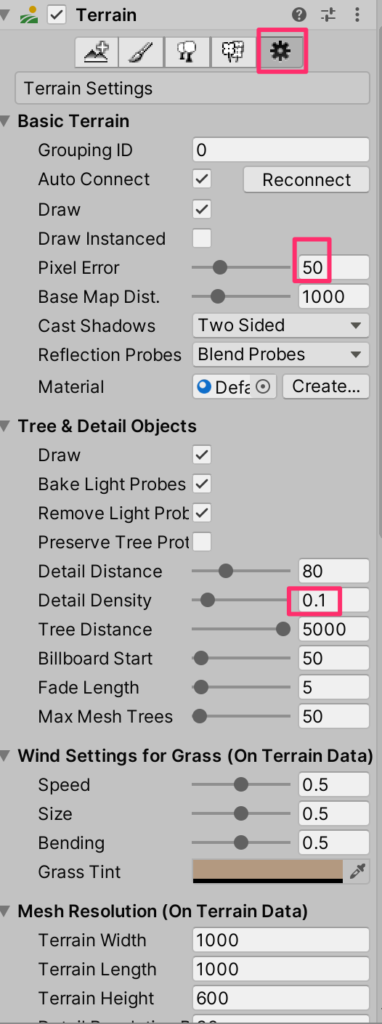
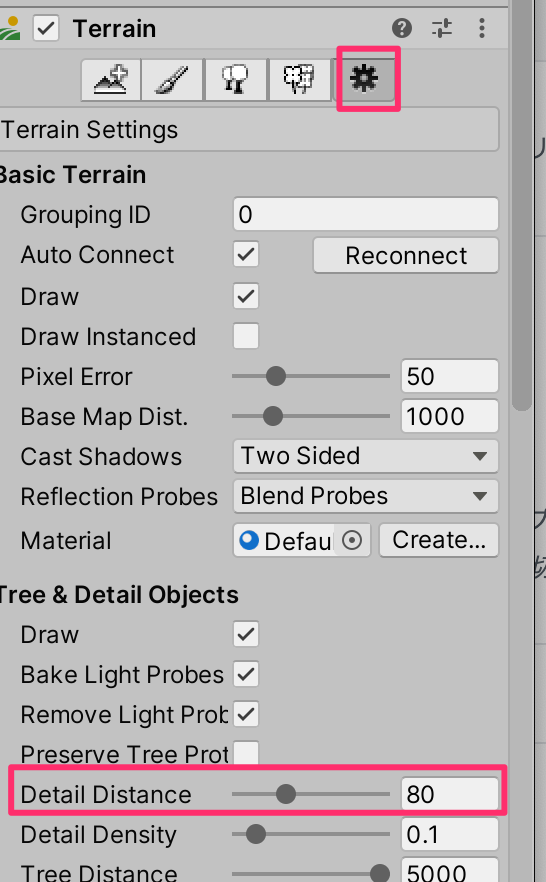
Terrainは処理が重いので以下のように設定する。(ハイスペックパソコンの場合不要)
Pixel Error -> 50
マッピング精度の設定。この値が大きいほど精度が低くなる。
Detai Density->0.1
Terrainに配置される草などの密度に影響する。低いと草木がまばらに表示される。
地面の設定
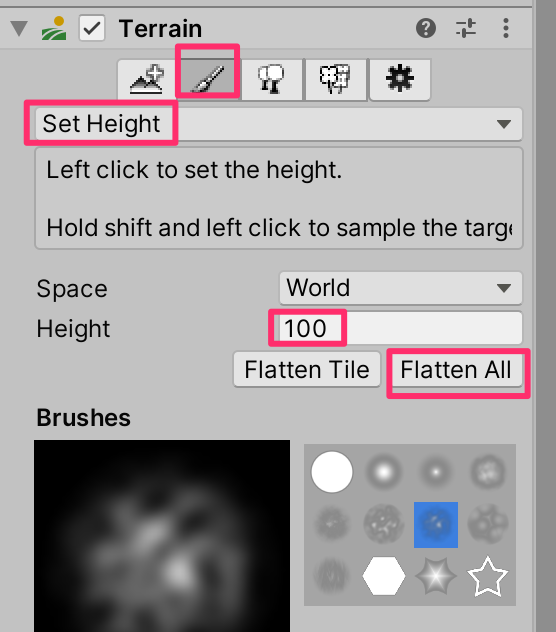
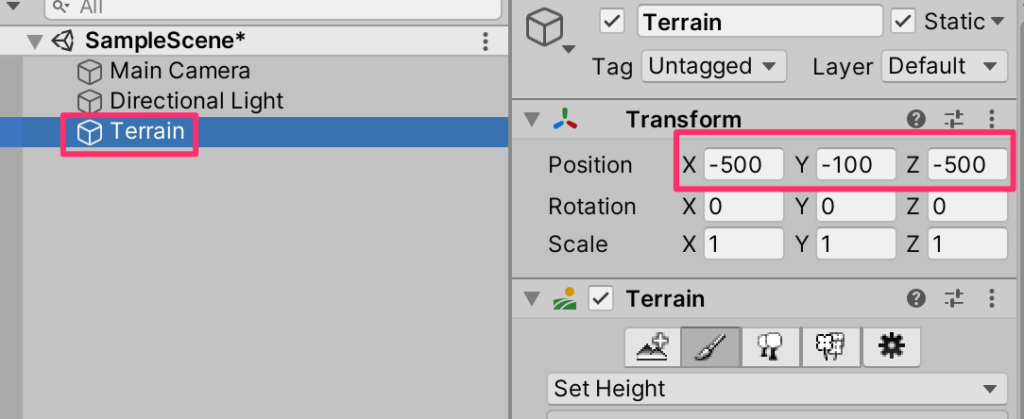
Terrainの地面の初期状態の高さは0である。これだと掘り下げることができないのでまずは全体の高さを100に設定しFlatten Allを押す
これでTerrainの標高が100mになった。Trerrainがグローバル空間の原点に配置されるようにtransformを調整する。(terrainの大きさは初期値1000*1000)
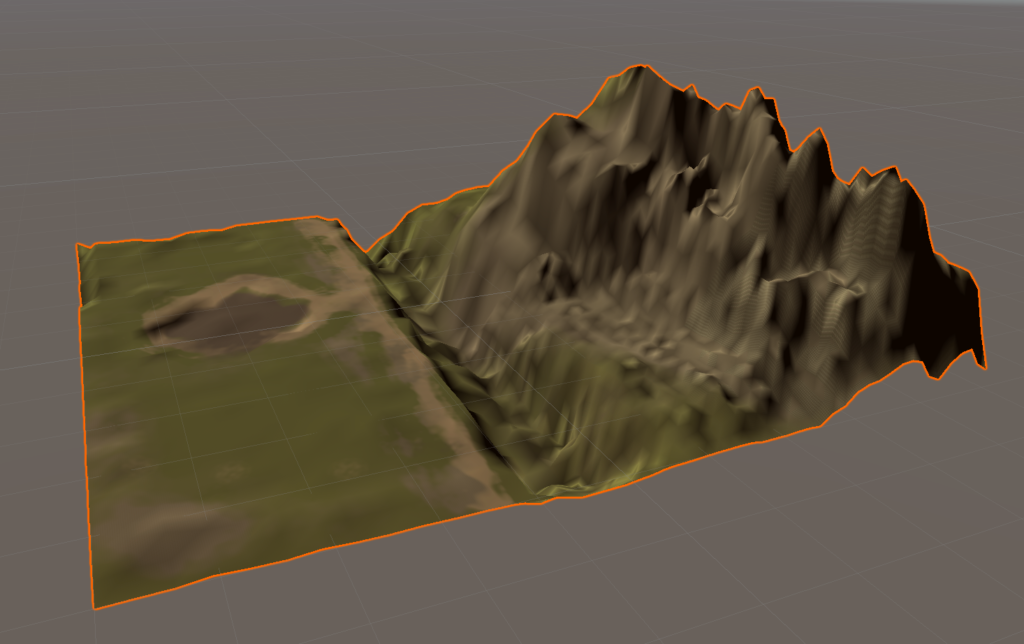
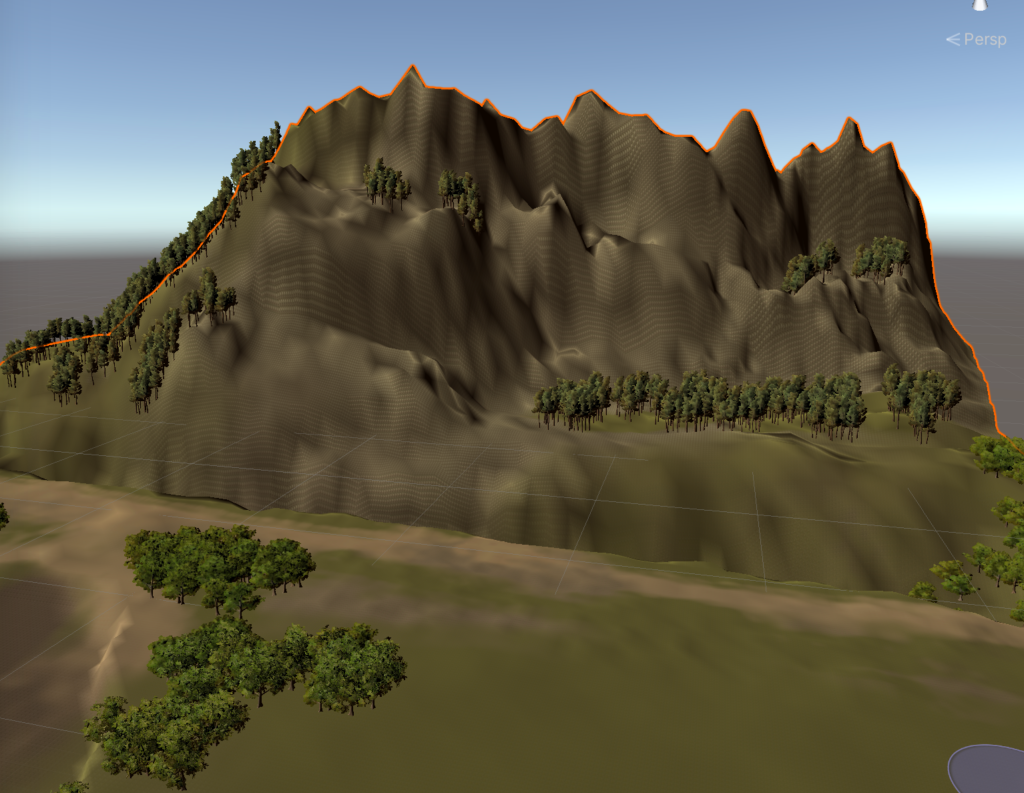
地形の作成
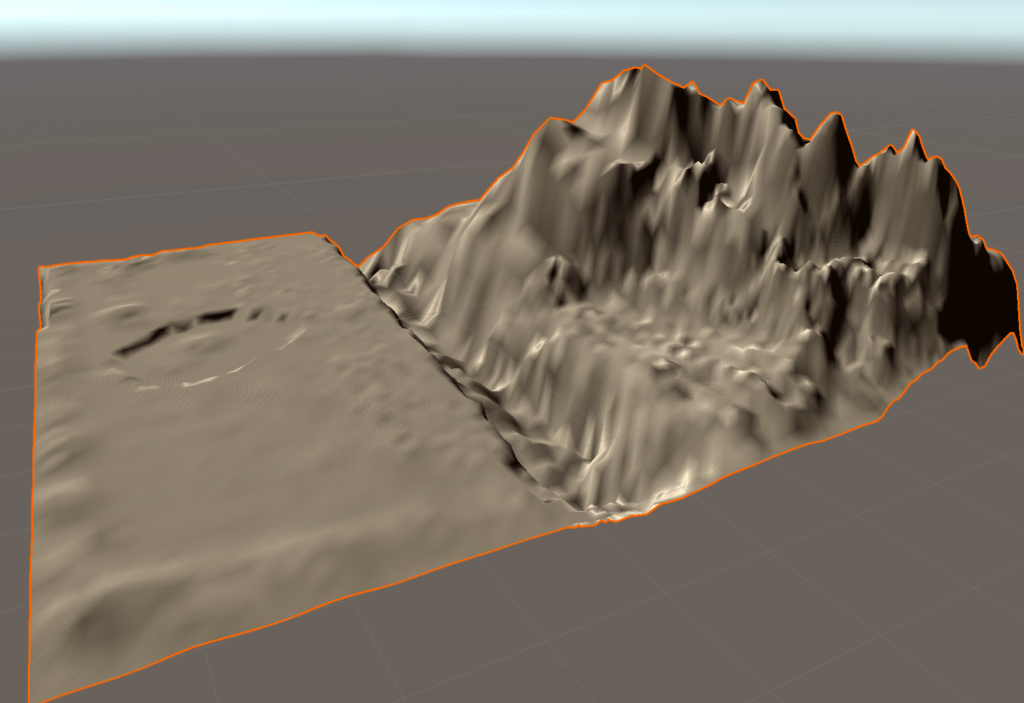
それでは実際に地面を作成していこう。
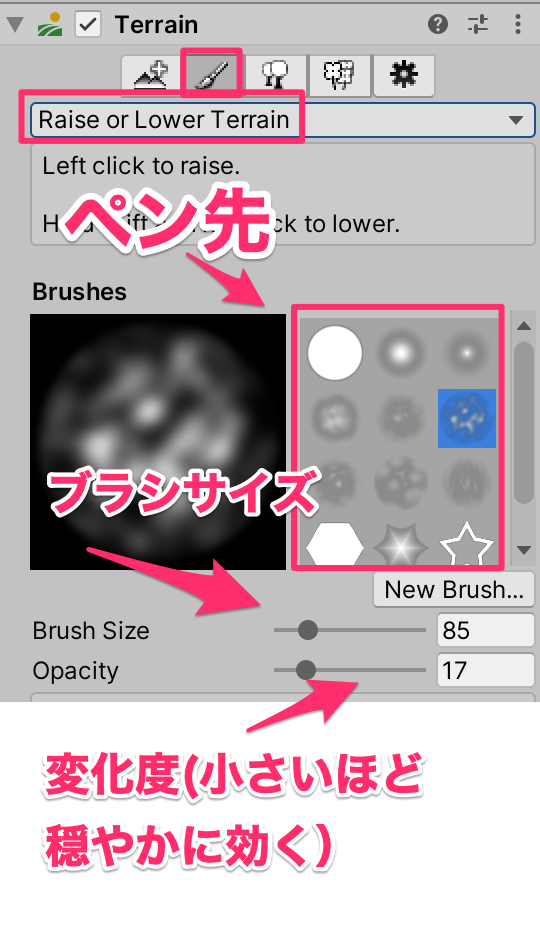
Raise or Lower Terrain
一番基本となる作業がRaise or Lower ツールだ。
これはペン先形状を選び、ブラシサイズと変化度を調整しながらお絵かきをするようにTerrainの形状を変更していく。クリックすることで地形が盛り上がり、shiftを押しながらクリックすることで下げることができる。
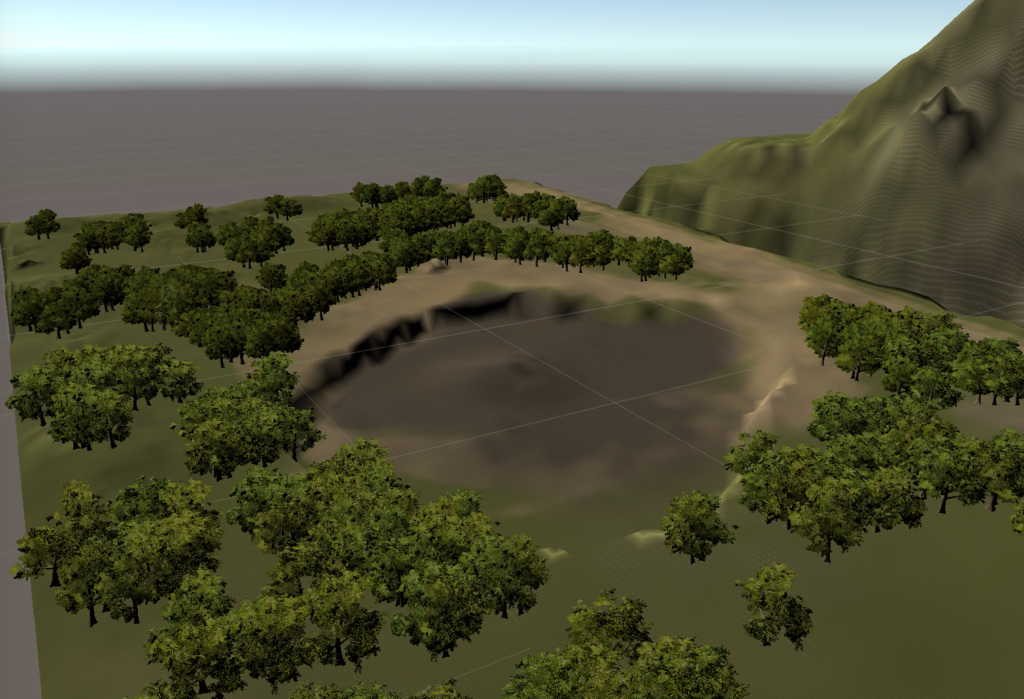
このあと、川や池なども配置するのでそれを考慮しながら作成するとよい。
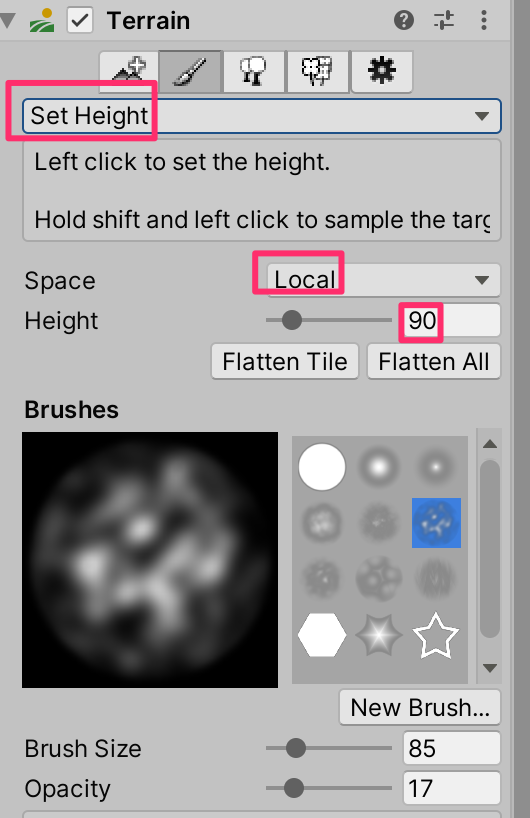
Set Height
ある程度共通の高さの部分を作りたい場合はSet Heighツールが便利だ。
基準となる高さを選択し、その高さにしたい部分をドラッグして塗っていく。
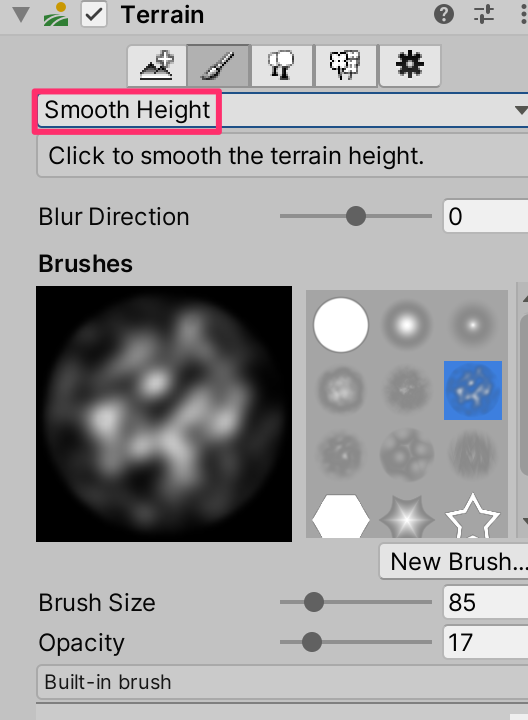
Smooth Height
凸凹になりすぎた部分があった場合はSmooth Heightを選択し、なぞっていくことで平均化することができる。
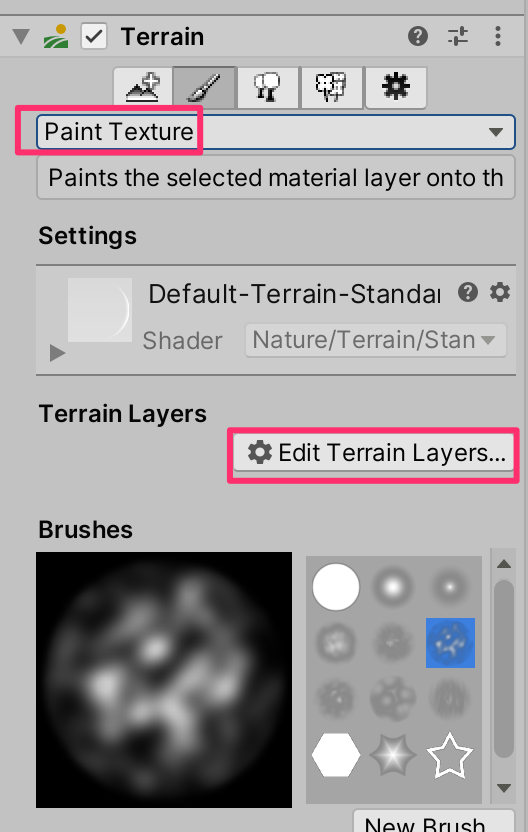
地面の着色
地面に着色をしていく、まずはPaintTextureからEditTerrainLayersをクリック
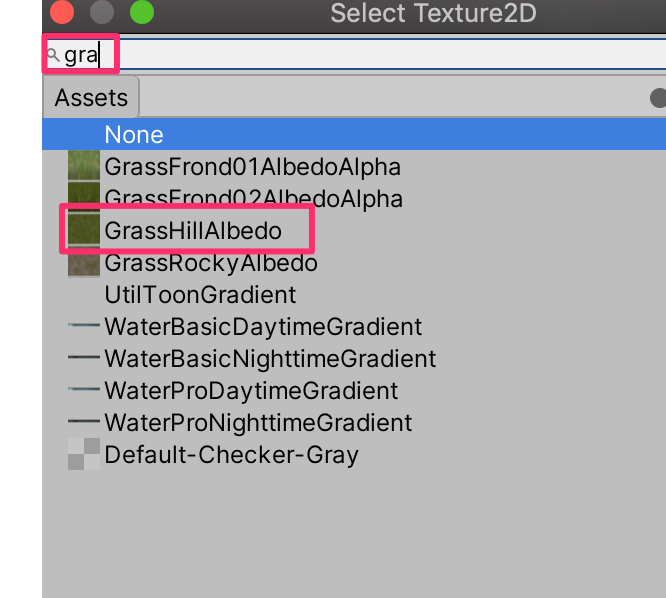
プルダウンが開くのでCreate Layerをクリック。
検索窓にgraと入力して、GrassHillAlbedoを選択する
grassで全体がペイントされた!
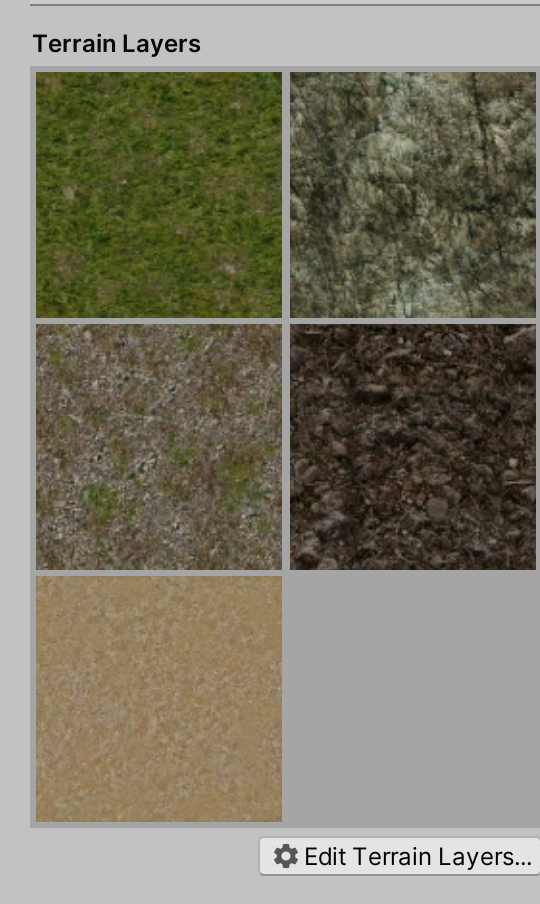
同じ手順で以下のテクスチャをCreateLayerから追加しよう。
○CliffAlbedoSpecular
○GrassRockyAlbedo
○MudRockyAlbedoSpecular
○SandAlbedo
あとは先程と同じようにLayerを選択して、ペン先や太さなどを調整しながらペイントしていく。
木を植える
木のアイコンを選びEditTreesを押す

プルダウンからAdd Treeを選ぶとWindowが開くので以下のようにBroadleaf_Desktopを選択
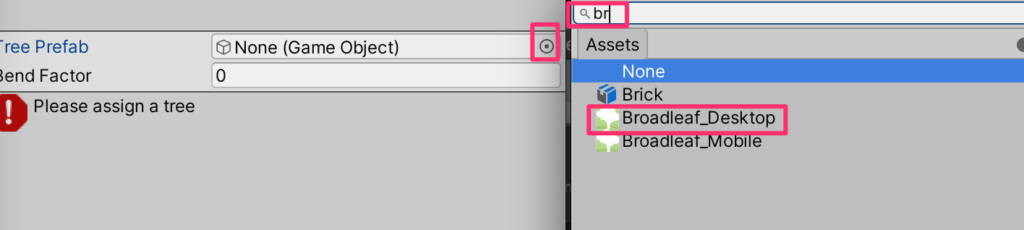
選択ができたらAddを押す
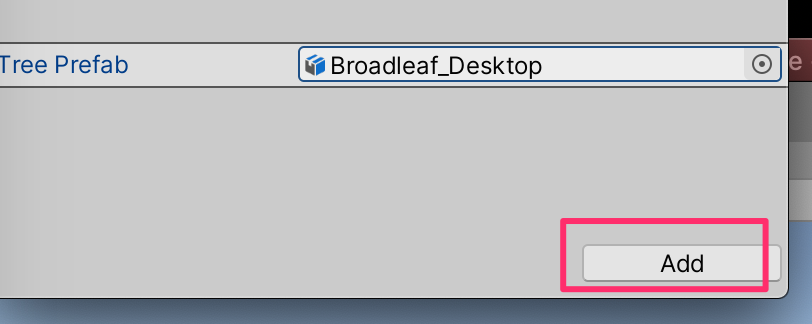
ペイント
ブラシのサイズ、木を生やす密度、木の高さなどを設定しながらペイントしていく。shiftを押すことによって生やしすぎた場所などから消去することができる
木の種類を増やす
先程と同じ手順を踏んで、以下の木も登録しよう。
○Conifer_Desktop
○Palm_Desktop

木の種類を選択しながらTerrainをペイントしていく
草を生やす
草のアイコンを選択し、EditDetailsを押してまずは素材を作成する
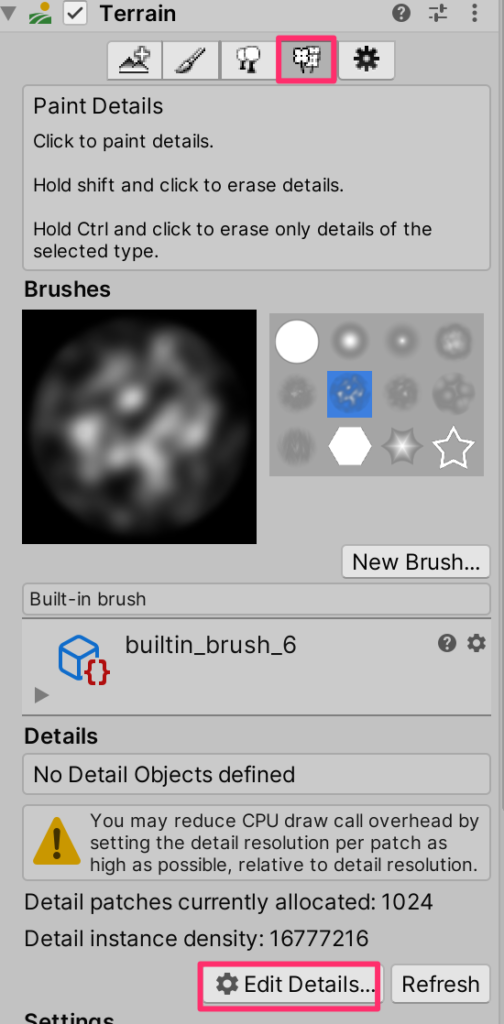
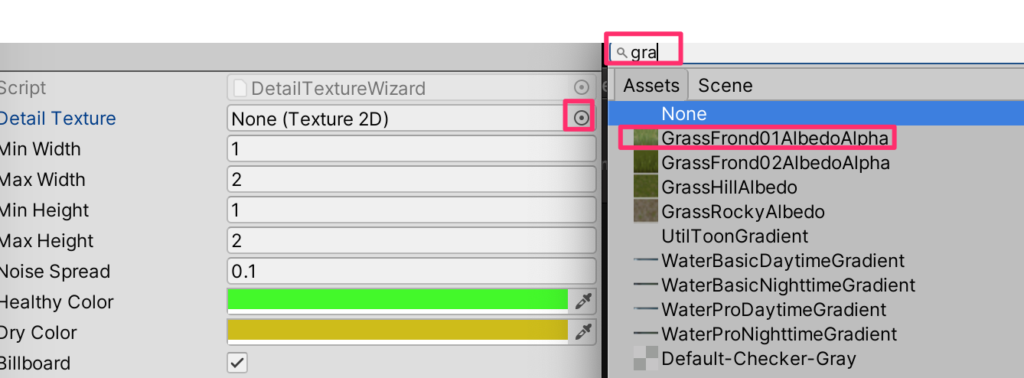
プルダウンからAdd Grass Textureを選択すると画面が開くので
GrassFrond01AlbedoAlphaを選択し、Addする
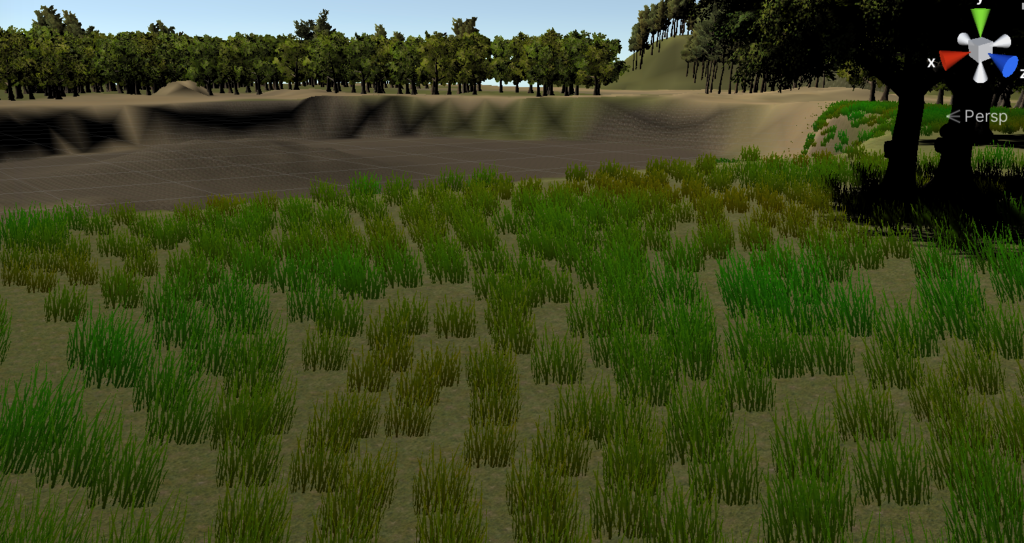
あとは木と同様にペイントしていこう。ただし、草は非常に負荷が高いのでかなり近づかなければ見ることができない。この距離はセッティングのDetailDistanceから調整できる。長く設定すると遠くから見えるようになるが、ここらへんはマシンスペックと相談しながら行なうとよいだろう。
根気がいる作業だが、じっくりと行おう。
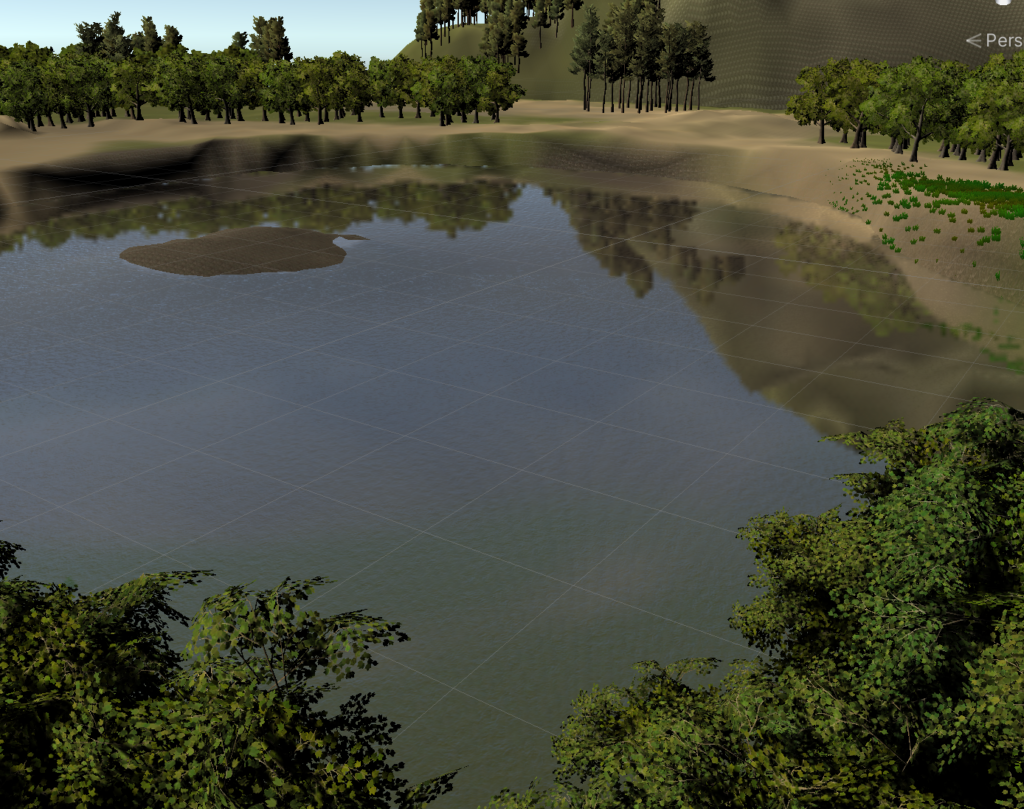
水の配置
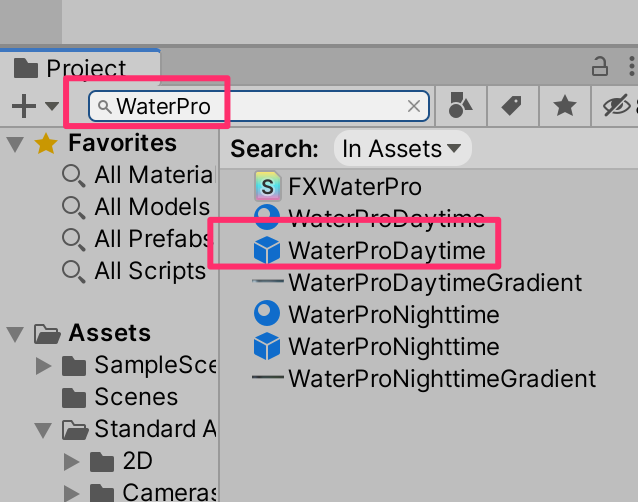
水を配置していこう。Projectビューの検索まどに
WaterPro
と入力して
WaterProDaytime
プレファブをヒエラルキーにドラッグする
Scaleを1000*1000にして海面の高さ(PositionのY)を地形に合わせて調整する。
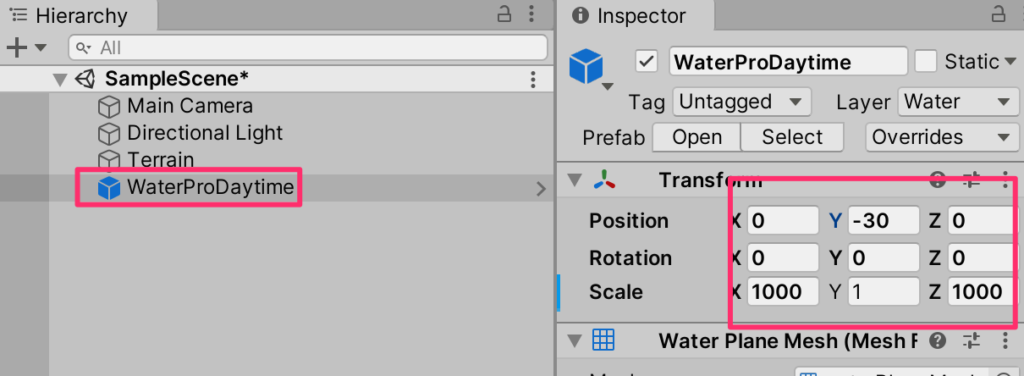
必要であれば、複数プレファブを配置する。(このMapでは川と池の2つを配置した)
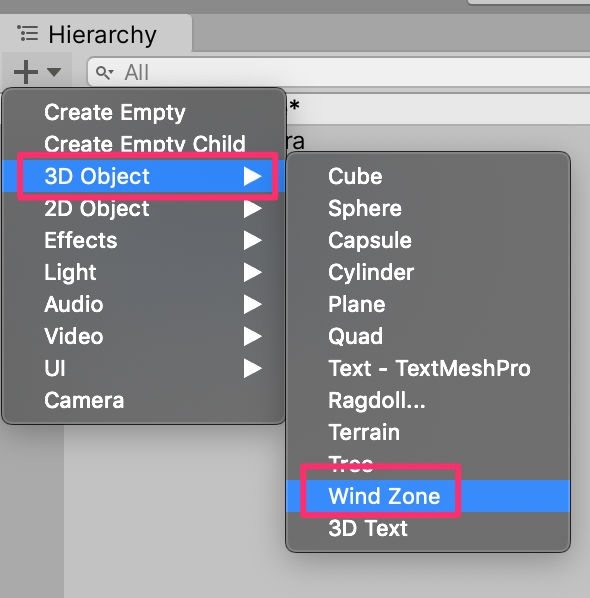
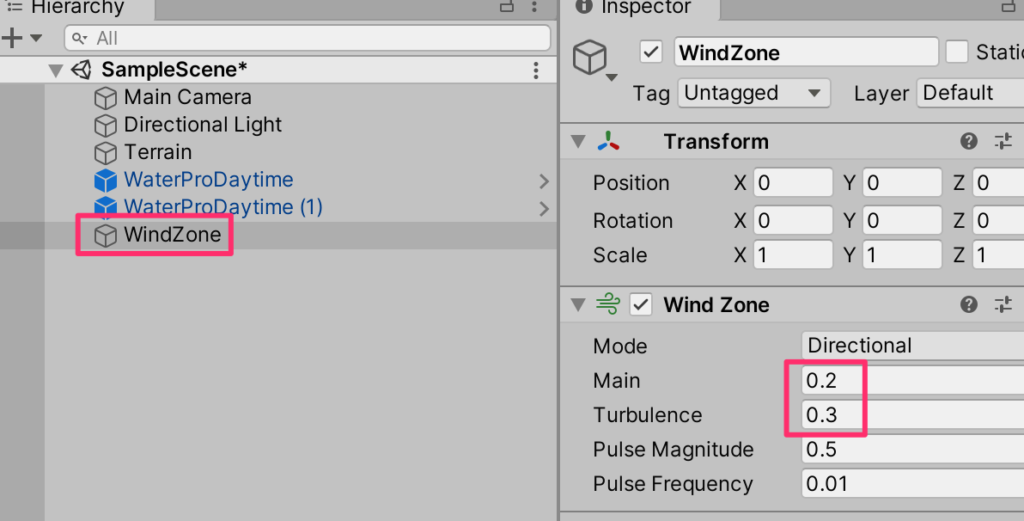
風を吹かせる
ヒエラルキーから3DObject->Wind Zoneを作成する
風の強さであるMainを0.2,ランダム性を与えるTurbulenceを0.3に設定しよう。
ゲームを再生していみると風で木や草が揺れることがわかる。
空を追加
Asset Storeにアクセスし
Wispy Skybox
をダウンロード&インポートする(すべて)
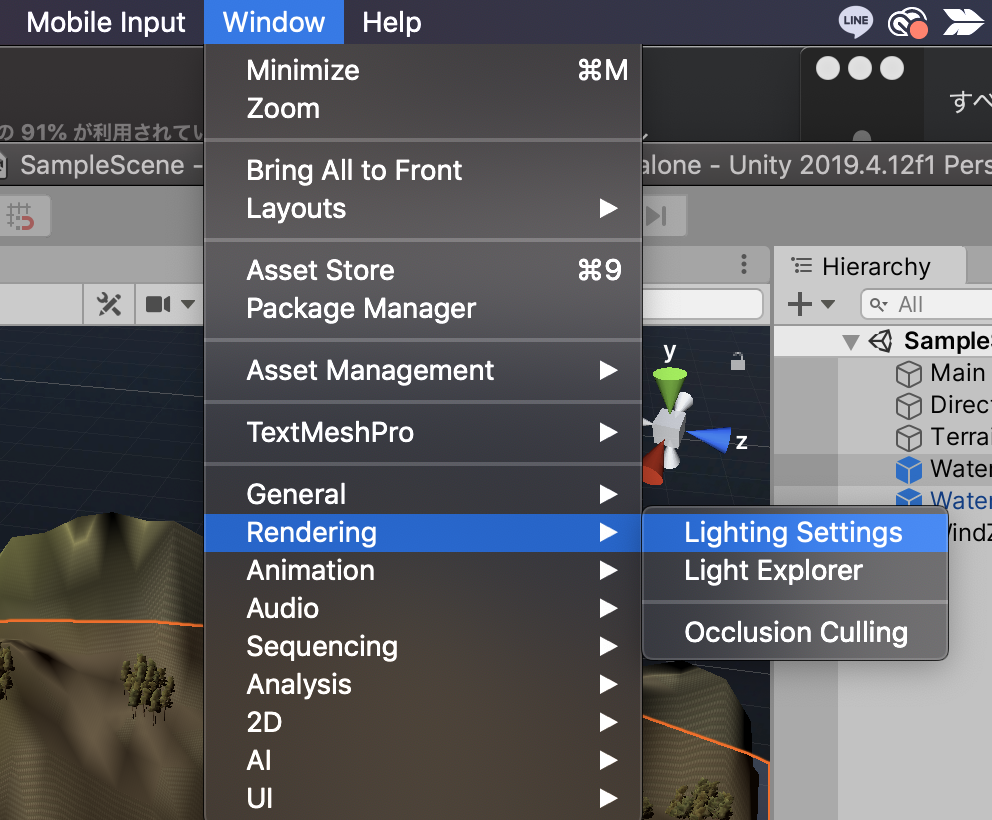
Window->Rendering->Lighting Settingsを選ぶ
Skybox Materialに
WispySkyboxMat
を設定する
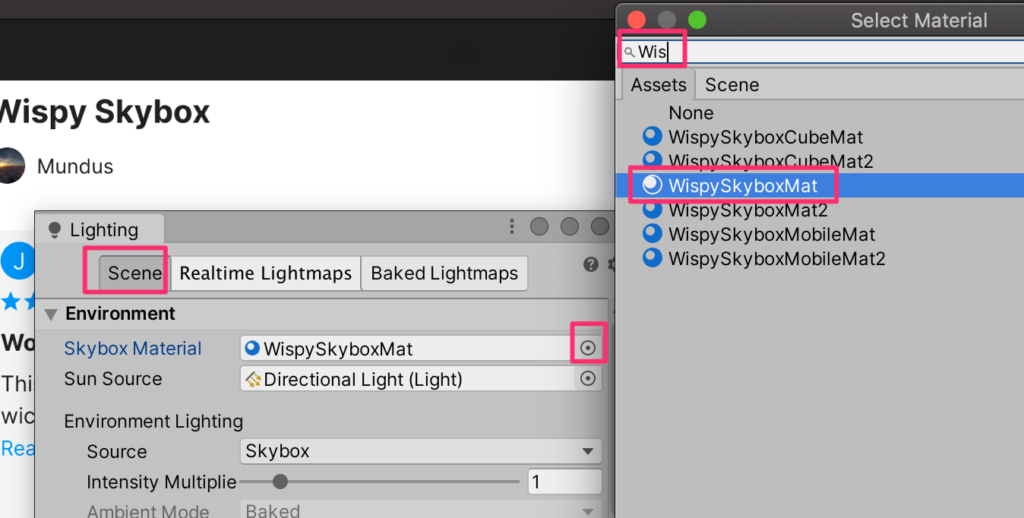
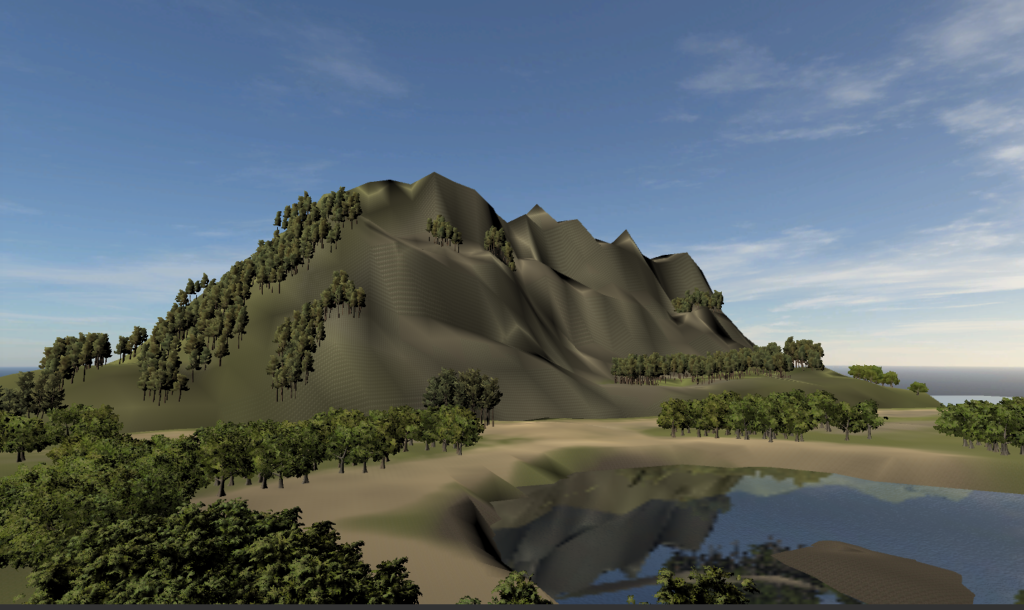
空がリアルになった!
skyboxで昼夜を表現する
Projectビューから新規materialを選択し、名前をMySkyboxとして、シェーダーを
Skybox->procedural
にする
再び
Window->Rendering->Lighting Settings
を開いてSkybox MaterialをMySkyboxにする
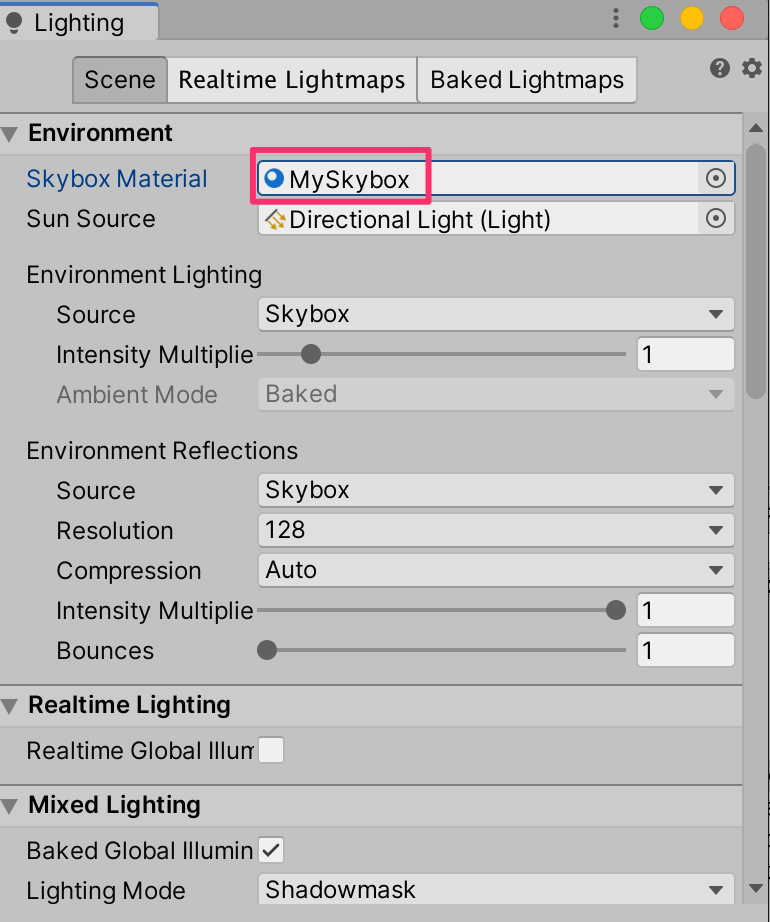
おお、空が変わった!

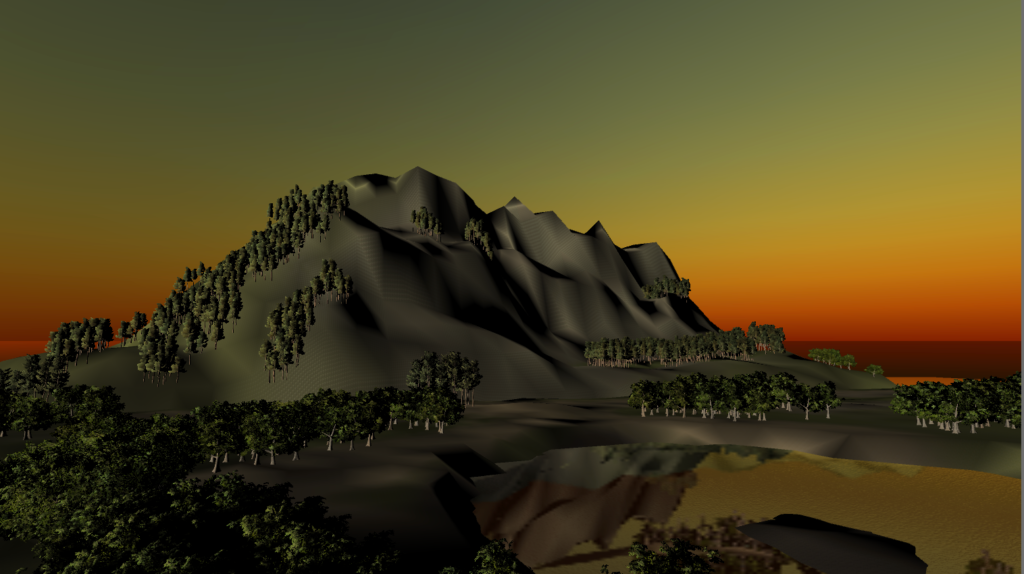
SkyboxProceduralシェーダーはdirectionalLight(太陽)の角度によって描画が変わる
Directional Lightを選択してRotationのxを動かしてみよう。
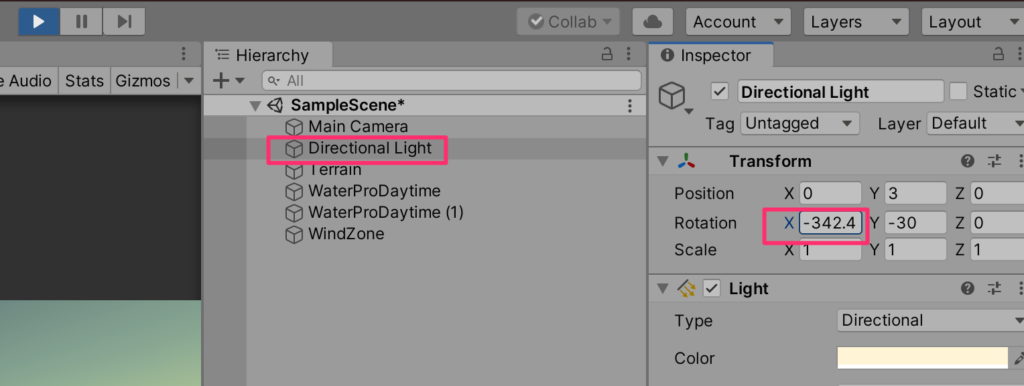
太陽の向きによって昼夜が再現される
スクリプトサンプル
以下のようなSkyControllerスクリプトを作成し、DirectionalLightに付与すると自動的に昼夜が入れ替わる。(この作例ではわかりやすいように30秒で1日間を表している)
using System.Collections;
using System.Collections.Generic;
using UnityEngine;

public class SkyController : MonoBehaviour
{

    // Update is called once per frame
    void Update()
    {
        transform.Rotate(new Vector3(-12f * Time.deltaTime,0f,0));
    }
}

コメント