前回、HPの回復アイテムを実装したので、今回はダメージ処理を作成していく。
ダメージの種類としては、ダメージゾーンに足を踏み入れた場合と敵キャラと接触した場合だ。
順番に実装していこう。
ダメージゾーン
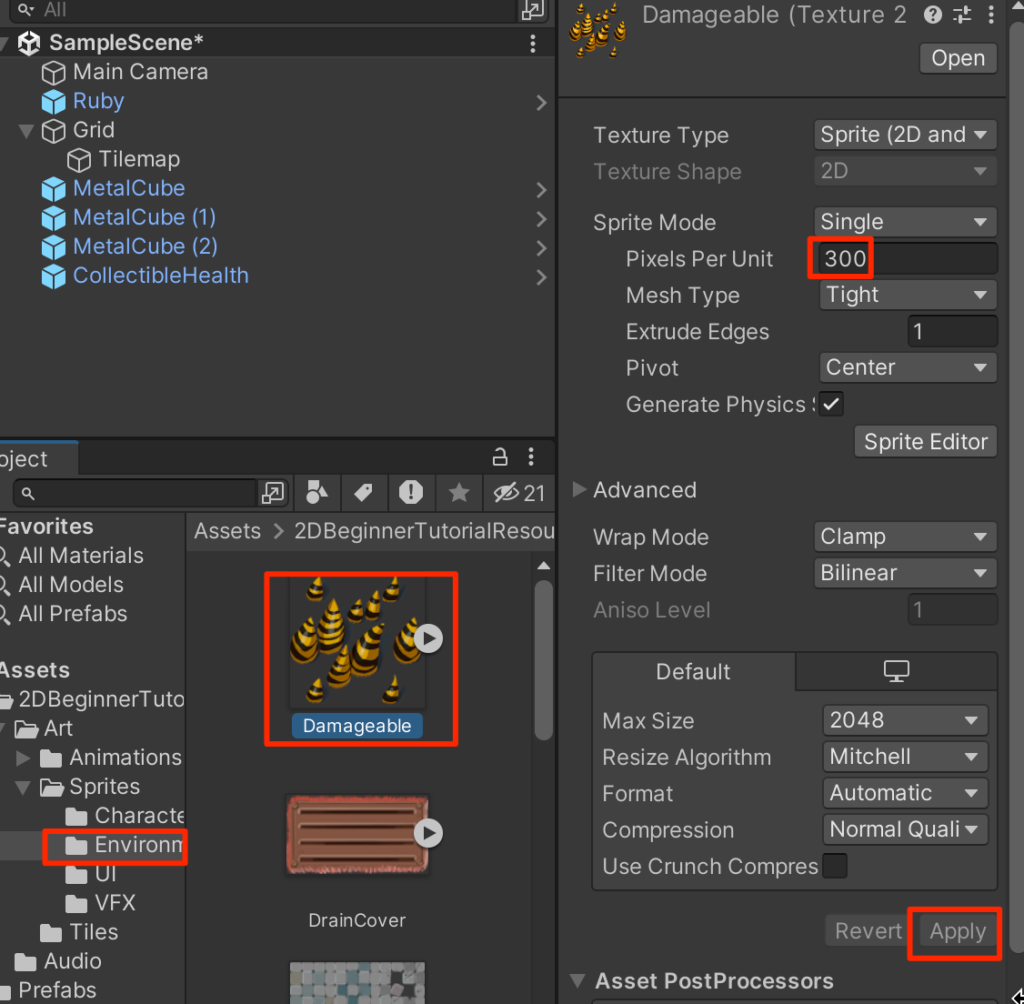
Art->Sprites->Environmentフォルダに入っているDamageableを選択してPPUを300に設定Applyを押す
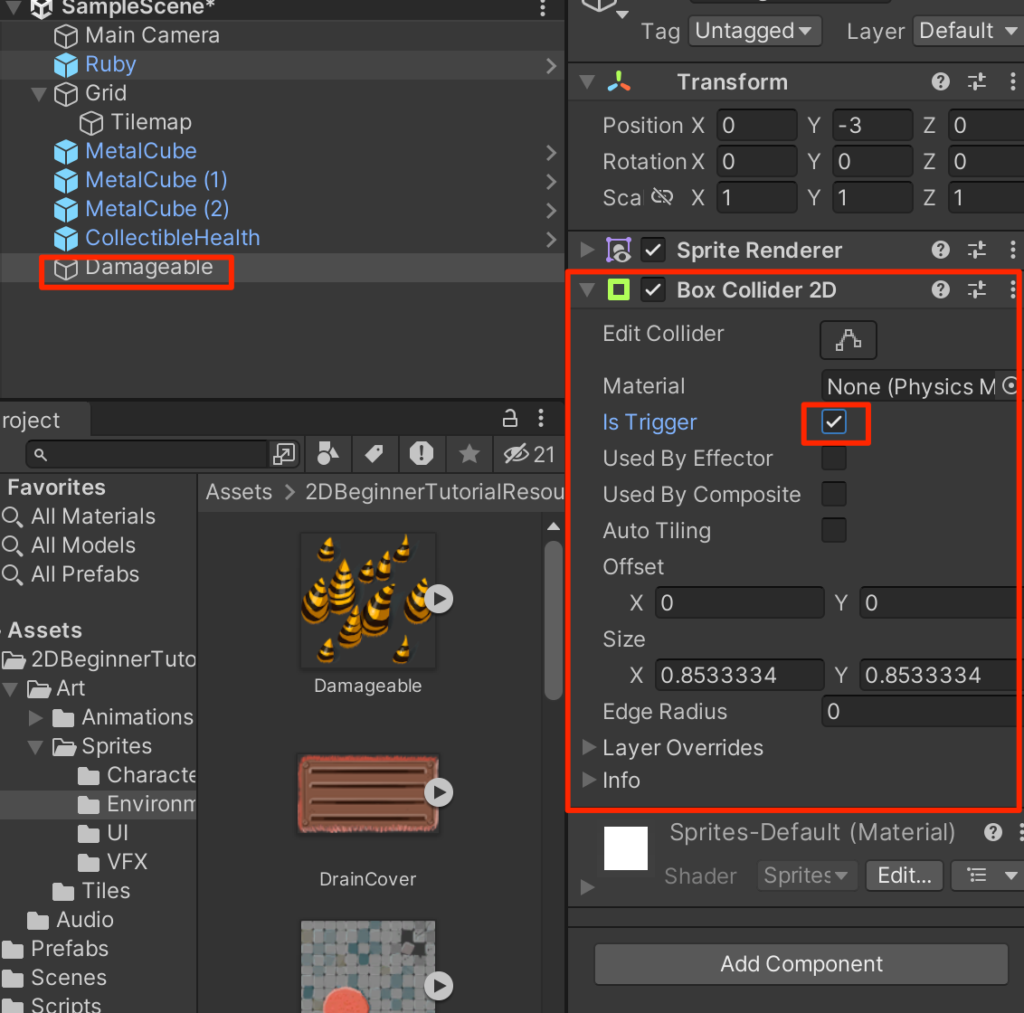
ヒエラルキーに配置し、適当にpositionを調整する。

Damageableを選択した状態で、AddCompnentからBoxCollider2Dを付与して、
IsTriggerにチェックを入れる。
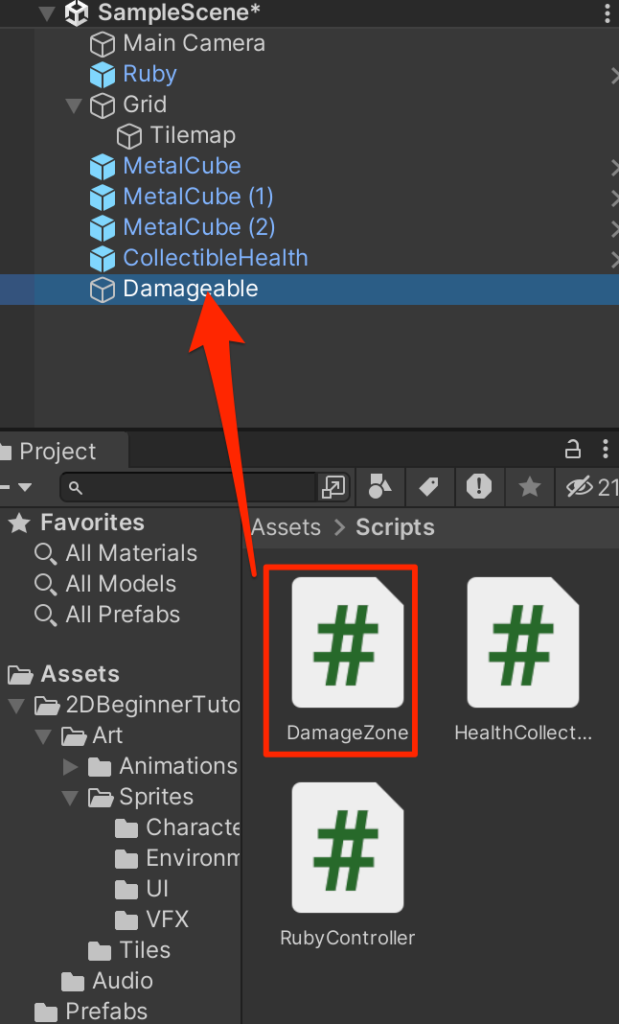
Assets->ScriptsフォルダにDamageZoneスクリプトを作成し、以下のように記述する。
using System.Collections;
using System.Collections.Generic;
using UnityEngine;

public class DamageZone : MonoBehaviour
{
    void OnTriggerEnter2D(Collider2D other) {
        RubyController rubyCon = other.GetComponent<RubyController>();
        if(rubyCon != null){
            rubyCon.ChangeHealth(-1);
        }
    }
}
スクリプトをDamageableに付与して実行してみよう。
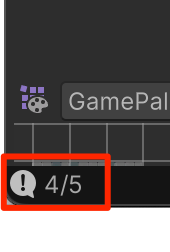
触れるたびにHPが1ずつ減ることがわかる。(画面左下に注目)
ダメージゾーンにいる間徐々に減っていく
現在は一度ダメージゾーンに入ったあと、一回外にでなければ次にダメージを喰らわない。そうではなくダメージゾーンにいる間(たとえ立ち止まっていても)徐々にHPが減っていく処理を作成しよう。
まずはDamageZoneスクリプトをOnTriggerEnterからOnTriggerStayに変更する。
こうすることで触れている間(1秒間に約60回)呼ばれることになる。
using System.Collections;
using System.Collections.Generic;
using UnityEngine;

public class DamageZone : MonoBehaviour
{
    void OnTriggerStay2D(Collider2D other) {
        RubyController rubyCon = other.GetComponent<RubyController>();
        if(rubyCon != null){
            rubyCon.ChangeHealth(-1);
        }
    }
}
ただ、これだとRubyが即死してしまうので無敵時間を作ろう。
RubyControllerを以下のように変更する。
using System.Collections;
using System.Collections.Generic;
using UnityEngine;

public class RubyController : MonoBehaviour
{
    public float speed=3.0f;

    public int maxHealth=5;
    int currentHealth;
    public int health{get{return currentHealth;}}
    public float timeInvincible=2.0f;
    bool isInvincible;
    float invincibleTimer;

    Rigidbody2D rb;
    void Start()
    {
        rb=GetComponent<Rigidbody2D>();
        currentHealth=maxHealth;
    }
    void Update()
    {
        float horizontal = Input.GetAxis("Horizontal");
        float vertical = Input.GetAxis("Vertical");
        Vector2 position = rb.position;
        position.x = position.x + speed * horizontal * Time.deltaTime;
        position.y = position.y + speed * vertical * Time.deltaTime;
        rb.MovePosition(position);

        if(isInvincible){
            invincibleTimer -= Time.deltaTime;
            if(invincibleTimer < 0){
                isInvincible = false;
            }
        }
    }
    public void ChangeHealth(int amount){
        if(amount < 0){
            if(isInvincible) return;
            isInvincible = true;
            invincibleTimer = timeInvincible;
        }
        currentHealth = Mathf.Clamp(currentHealth + amount,0,maxHealth);
        Debug.Log(currentHealth + "/" + maxHealth);
    }
}
一度ダメージを受けたら2秒間の無敵状態となり、その間はいかなるダメージを受けない設定だ。一度ダメージくらうと連続でダメージを受けてしまうといった不条理なゲームを体験したことはないだろうか?そういったことが起こらないようにダメージを受けた際の無敵時間の設定は大事だ。
ダメージゾーンを広げる
現在1マスしかないダメージゾーンを広げるにはどうすればよいだろうか?
そのままダメージゾーンの大きさを変えたらSpirteが拡大表示されてしまう。
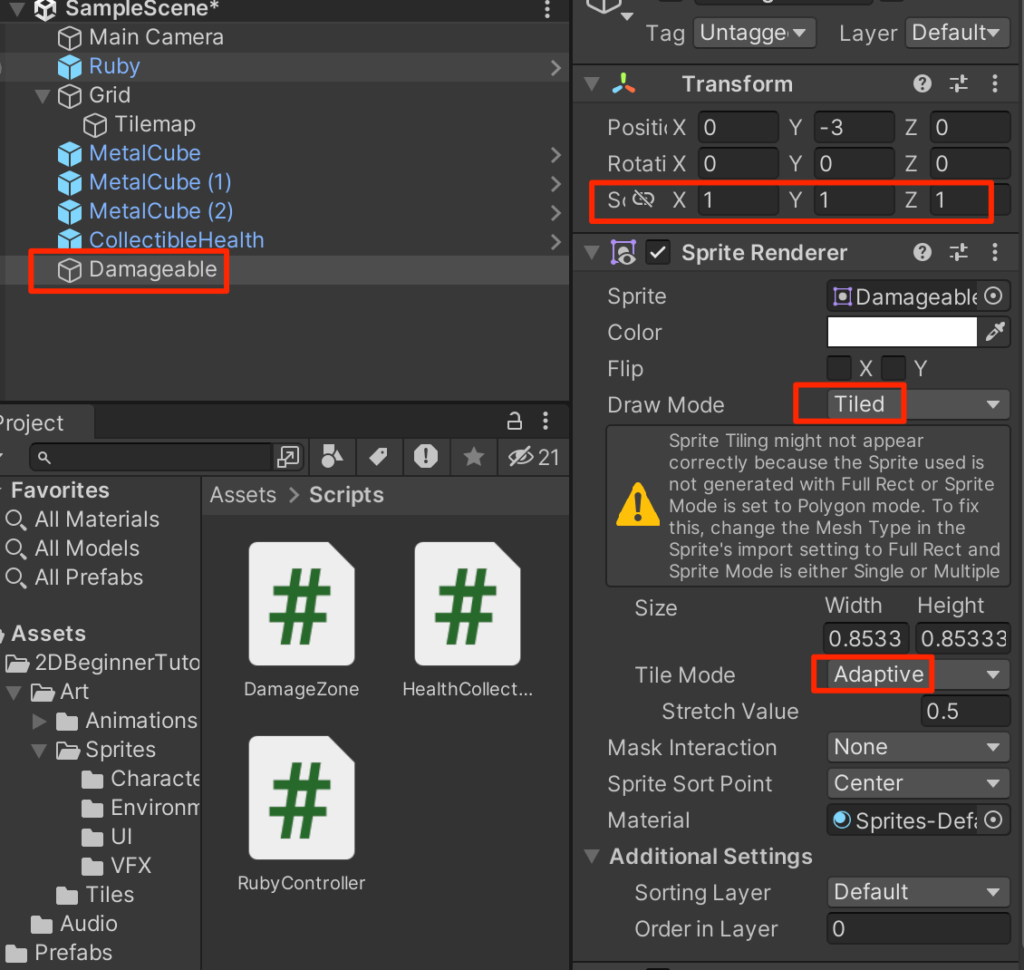
まず、Damageableを選択してtransformのスケールが1,1,1であることを確認する。
次にDrawModeをTiledにTileModeをAdaptiveに変更する。
ただ、spriteのMeshTypeをFullRectにせよという警告が出てしまっている。
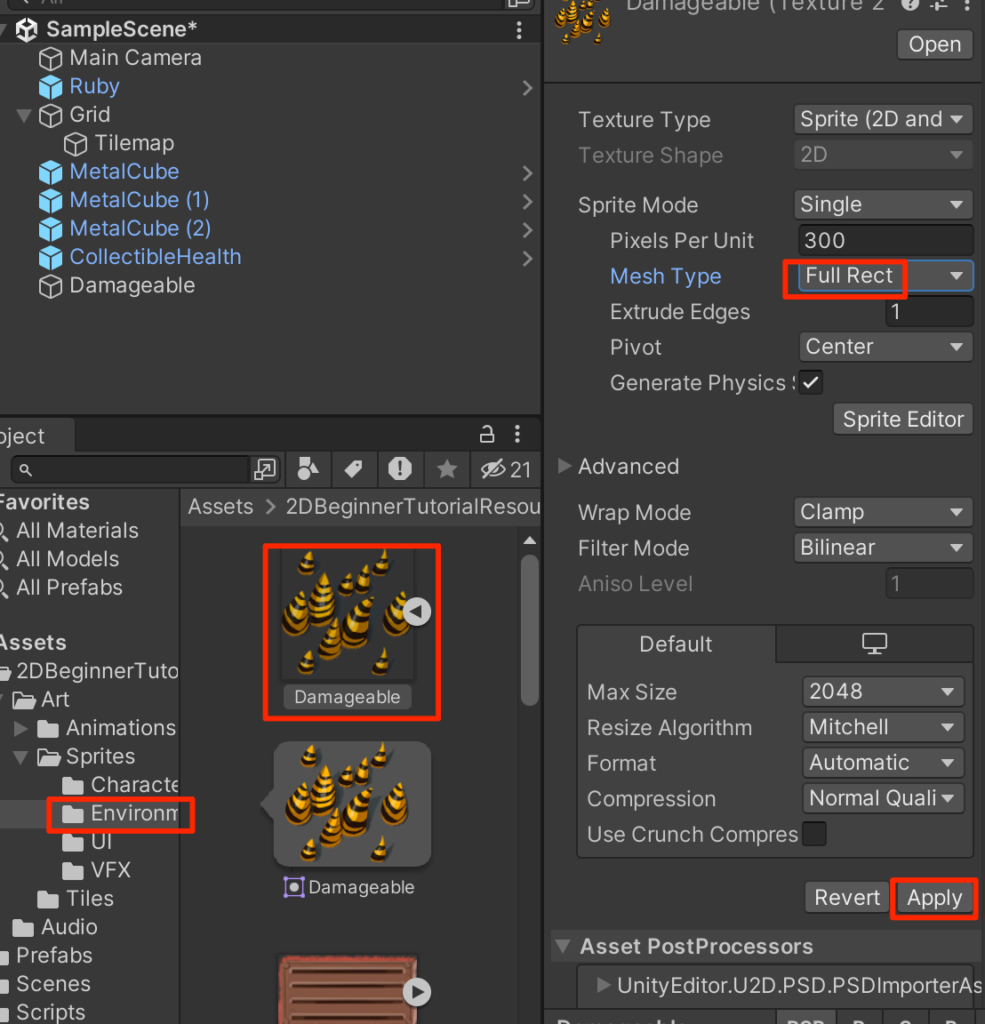
Environmentの中のDamageableスプライトを選択し、MeshTypeをFullRectに変更し、Applyをする。(Tightは画像の不要部分カットして使う。FullRectはそのまま使う)
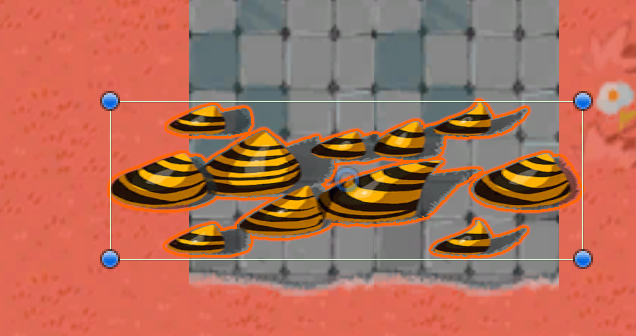
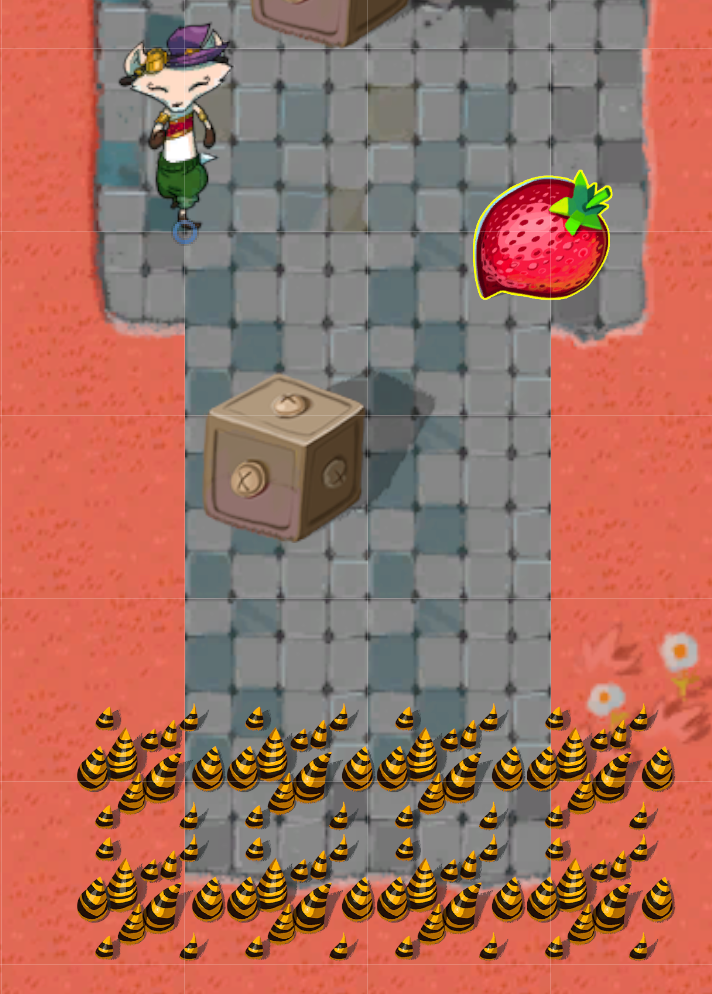
これで準備OKだ。画像エリアを拡大してみよう。
タイル状に並べられることがわかる。TileModeをAdaptiveに設定したがContinuousにした場合も確認しておくこと。

実行してみよう。ダメージゾーンの範囲は広がったが判定がおかしい。
これはコライダーが連携していないことに起因する。最後にBoxCollider2DのAutoTilingにチェックを入れる。
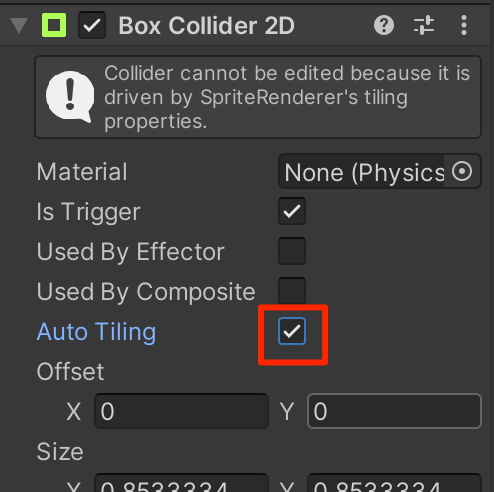
以上でダメージゾーンの設定は完了だ。
敵キャラ
敵キャラを配置していこう。敵キャラといっても今回は故障して暴走してしまったロボを直してあげるという設定だ。暴走中のロボに接触するとダメージとなる。
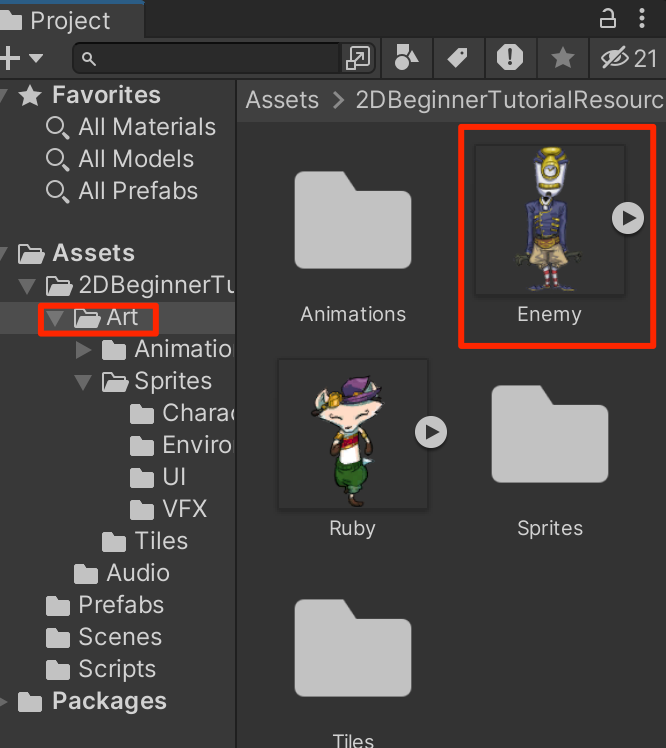
まずは以下の画像をダウンロードする。

Artフォルダにドラッグ&ドロップで配置する。
PPUを150に設定して、Apply。
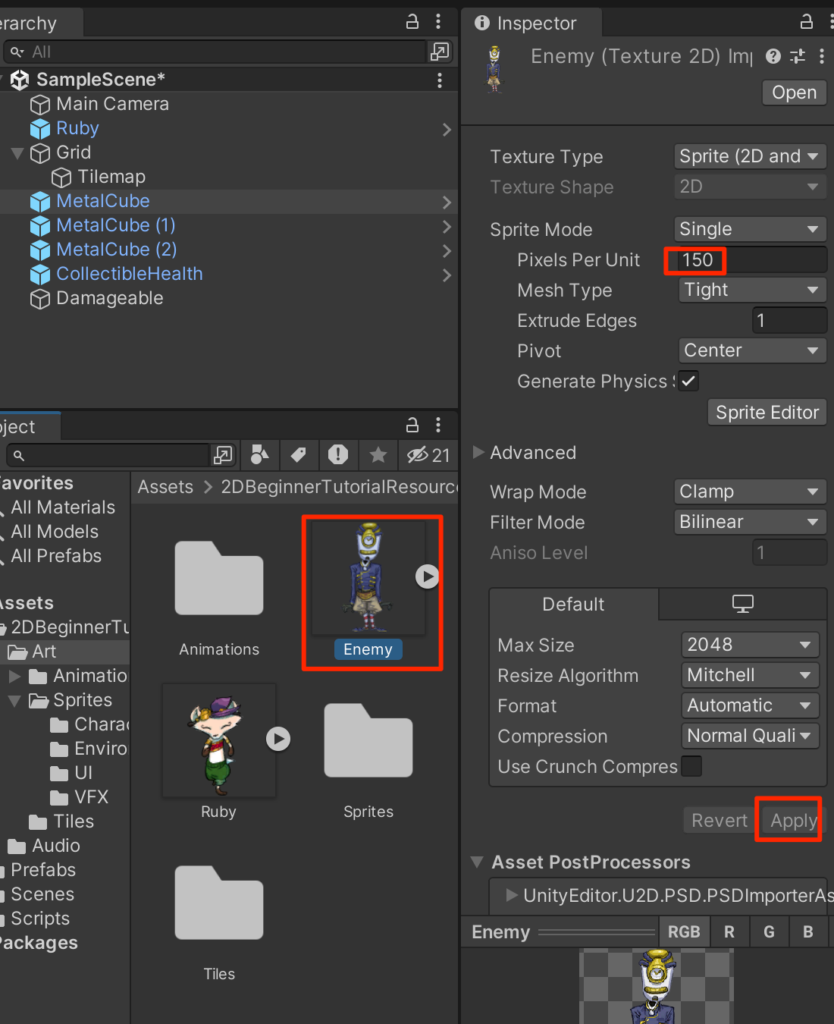
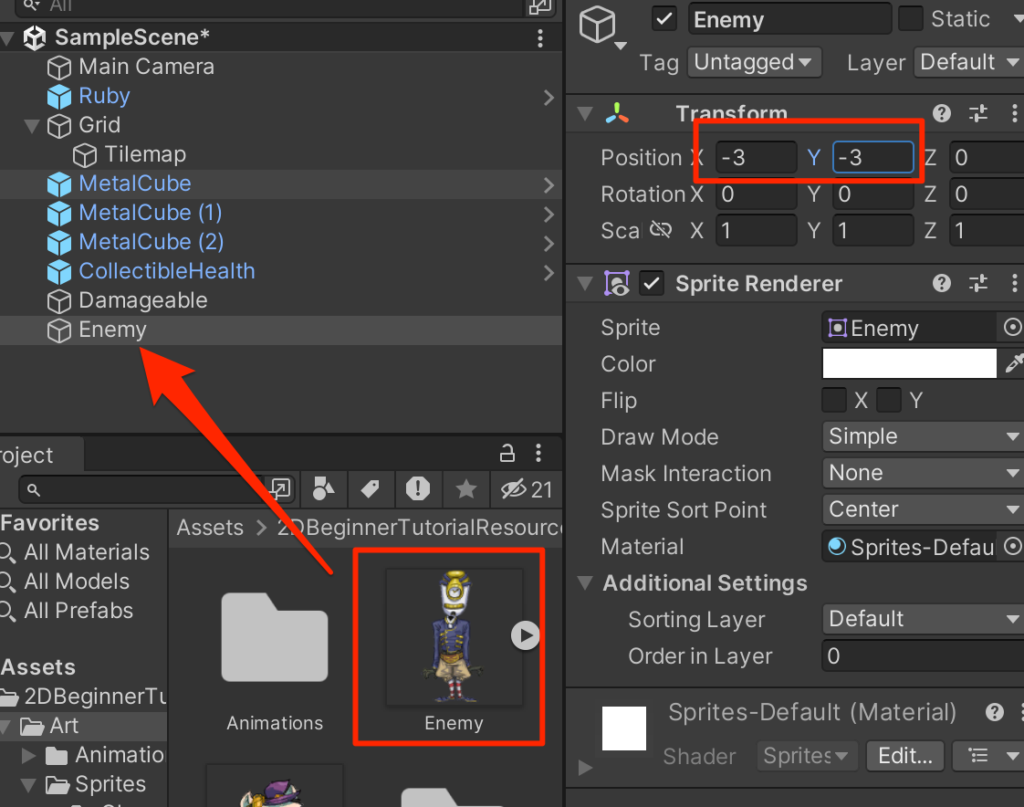
エネミーをヒエラルキーに配置して、positionを適当に調整する
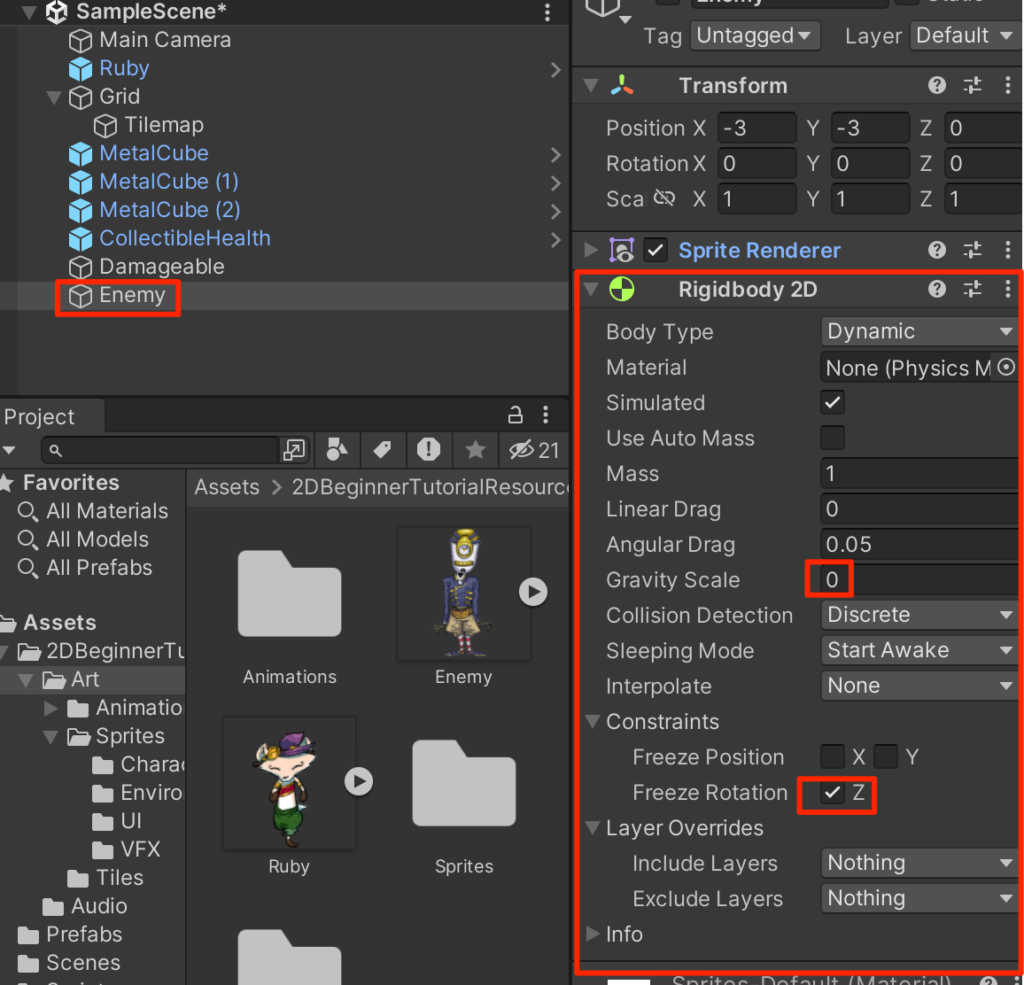
Rigidbody2Dを付与し、GravityScaleを0 FreezeRotationのzにチェックを入れる
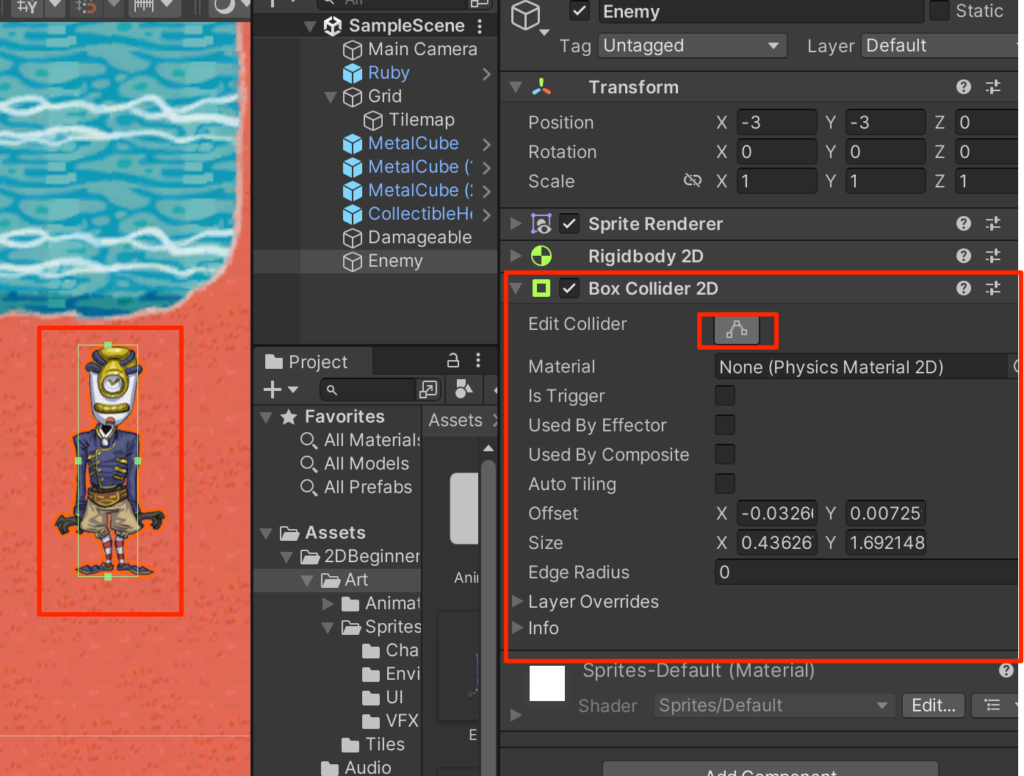
BoxCollider2Dを付与し、EditColliderボタンを押して、コライダーがキャラを覆うように調整する。
Assets -> Scriptsフォルダ内にEnemyControllerスクリプトを以下のように作成する。
using System.Collections;
using System.Collections.Generic;
using UnityEngine;

public class EnemyController : MonoBehaviour
{
    public float speed = 1.0f;
    public bool isVertical;
    public float changeTime = 2.0f;

    Rigidbody2D rb;
    float timer;
    int direction = 1;

    void Start()
    {
        rb=GetComponent<Rigidbody2D>();
        timer = changeTime;
    }

    void Update()
    {
        timer -= Time.deltaTime;

        if(timer < 0){
            direction = -direction;
            timer = changeTime;
        }
        Vector2 pos = rb.position;

        if(isVertical){
            pos.y=pos.y + Time.deltaTime * speed * direction;

        }else{
            pos.x=pos.x + Time.deltaTime * speed * direction;
        }
        rb.MovePosition(pos);
    }
}
作成ができたらEnemyにアタッチして実行する。
敵が左右の移動を繰り返せば成功だ。
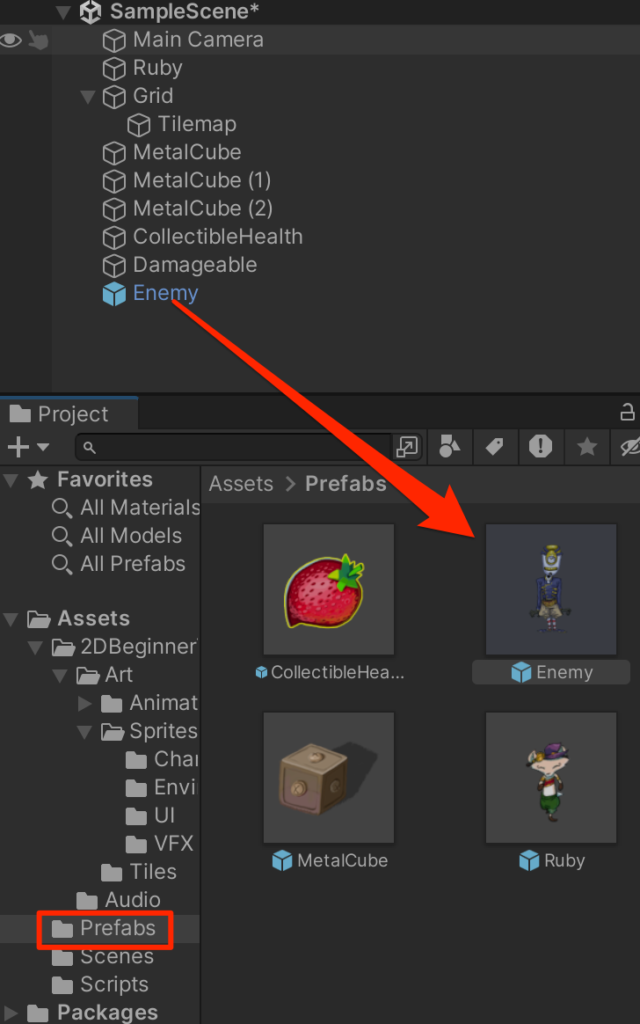
敵の設定ができたのでプレファブ化する。
もう一体、配置してこちらはisVerticalのチェックをOnにする
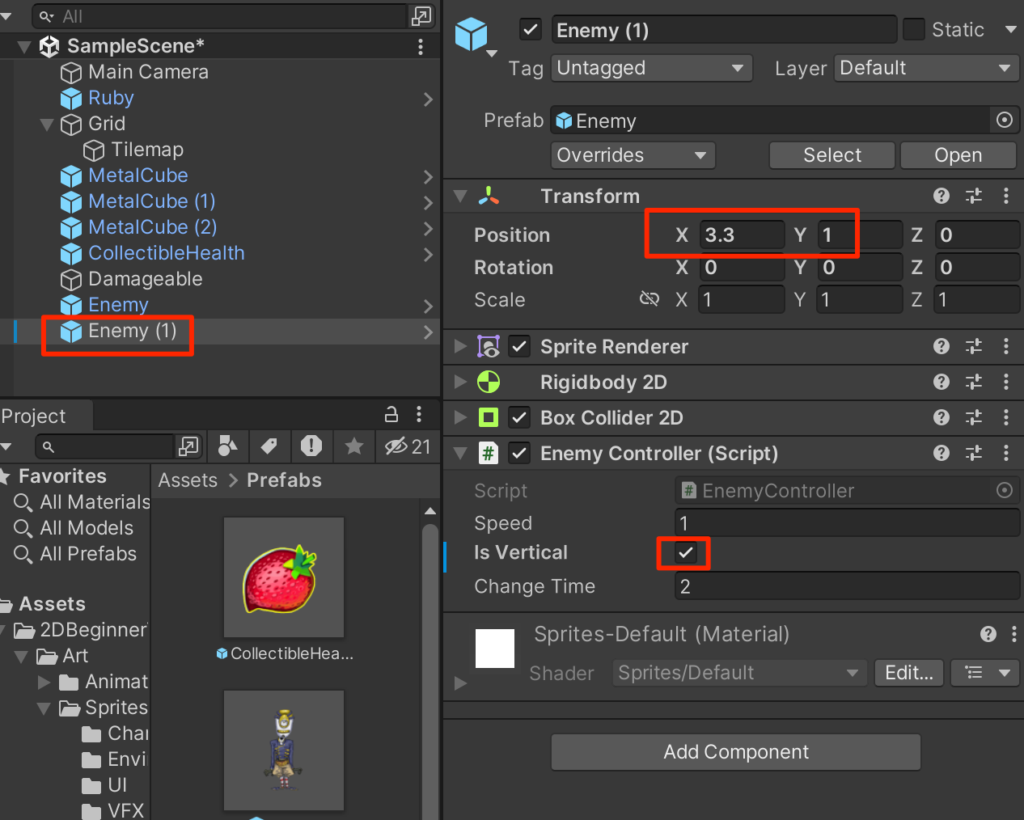
実行してみよう。isVerticalにチェックを入れた方は縦に移動する。
衝突判定
Rubyと接触したときにHPを減らす処理を作成しよう。
EnemyControllerを以下のように修正する。
using System.Collections;
using System.Collections.Generic;
using UnityEngine;

public class EnemyController : MonoBehaviour
{
    public float speed = 1.0f;
    public bool isVertical;
    public float changeTime = 2.0f;

    Rigidbody2D rb;
    float timer;
    int direction = 1;

    void Start()
    {
        rb=GetComponent<Rigidbody2D>();
        timer = changeTime;
    }

    void Update()
    {
        timer -= Time.deltaTime;

        if(timer < 0){
            direction = -direction;
            timer = changeTime;
        }
        Vector2 pos = rb.position;

        if(isVertical){
            pos.y=pos.y + Time.deltaTime * speed * direction;

        }else{
            pos.x=pos.x + Time.deltaTime * speed * direction;
        }
        rb.MovePosition(pos);
    }
    void OnCollisionEnter2D(Collision2D other) {
        RubyController rubyCon = other.gameObject.GetComponent<RubyController>();
        if(rubyCon != null){
            rubyCon.ChangeHealth(-1);
        }
    }
}
実行してみて、Rubyと敵が接触したときにHPが減ることを確認する。
次回はキャラの動きにアニメーションをつけていく。


コメント