
BallCatch
[作成手順]
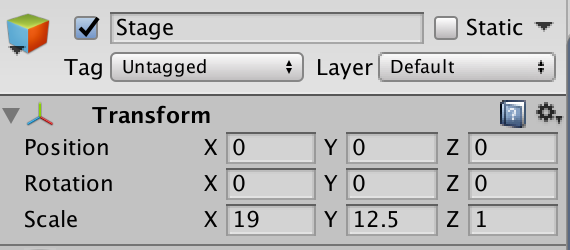
1.CubeでStageを作成する。
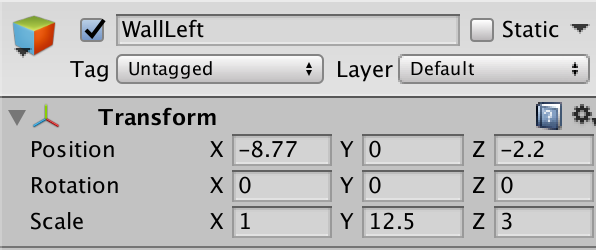
2.左と右に壁を作成する。(右は複製してxの-をとる)
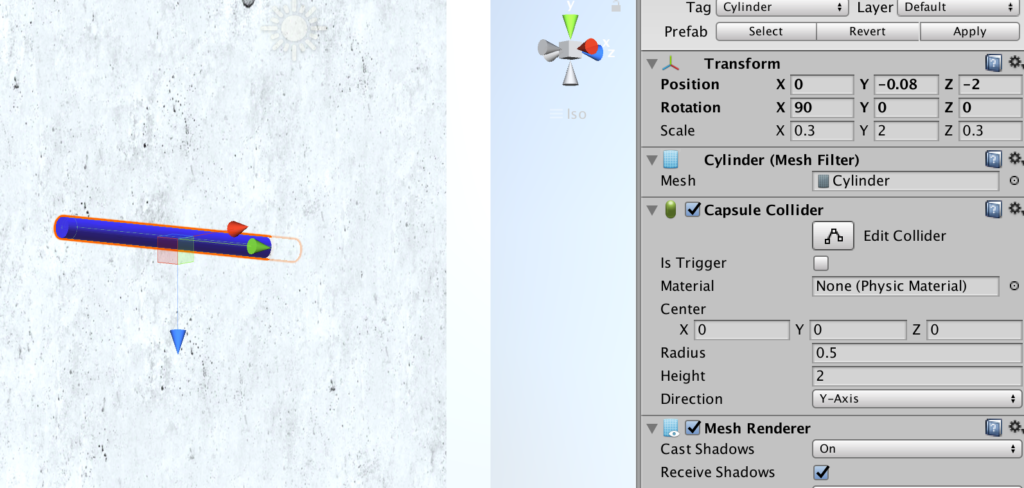
3.新規3DオブジェクトからCylinderを作成し、表面材質を設定、Cylinderというタグを設定した後プレファブ化する。
4.CreateEmptyからCylinderGeneratorを作成し、CylinderGenerator.csを以下のように作成する。
using System.Collections;
using System.Collections.Generic;
using UnityEngine;

public class CylinderGenerator : MonoBehaviour {
	public GameObject prefab;

	void Start () {
		for (int i = 0; i < 300; i++) {
			Instantiate (
				prefab,
				new Vector3(Random.Range(-8.0f,8.0f),Random.Range(-4.0f,4.0f),-2.0f),
				Quaternion.Euler(new Vector3(90.0f,0,0))
			);
		}
	}
}
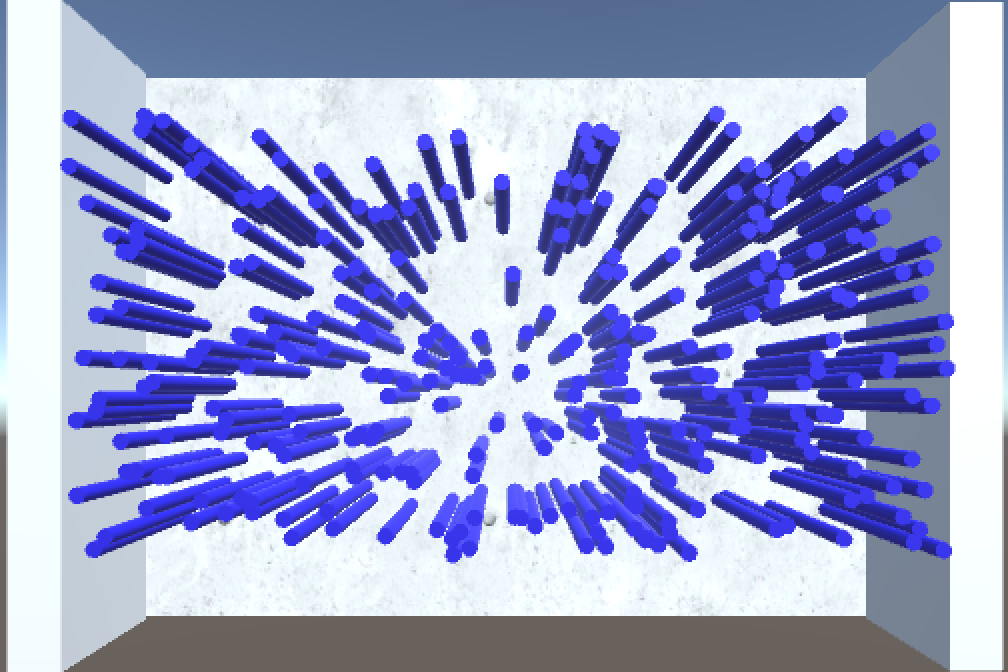
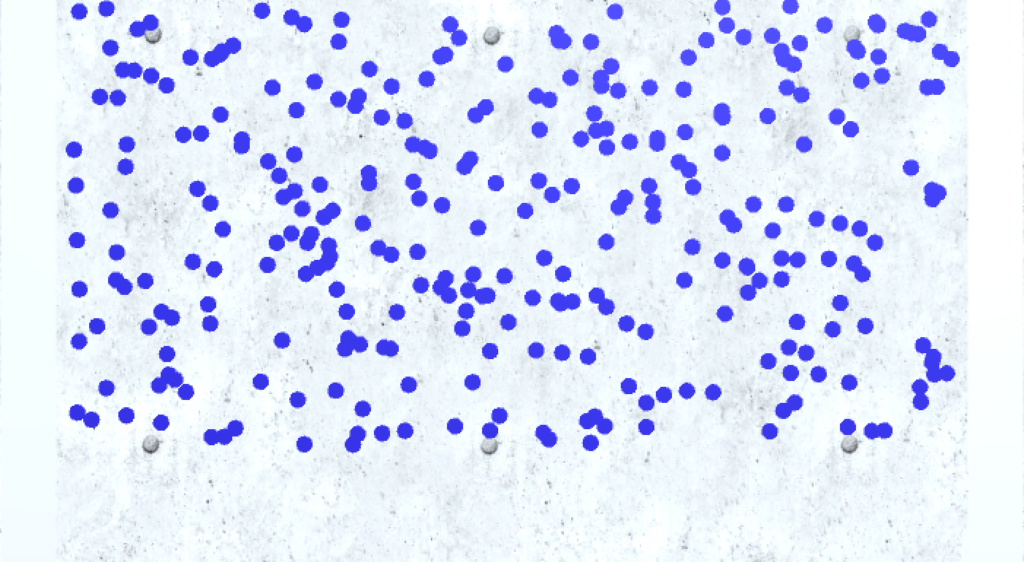
5.インスペクターからCylinderプレファブを登録し、実行してみよう。
5.Directionnal LightのShadowType をNo Shadowsにする
6.カメラの設定をしよう。ProjectionをOrthographicにしてパースを無くし、Sizeで画面を調節する。
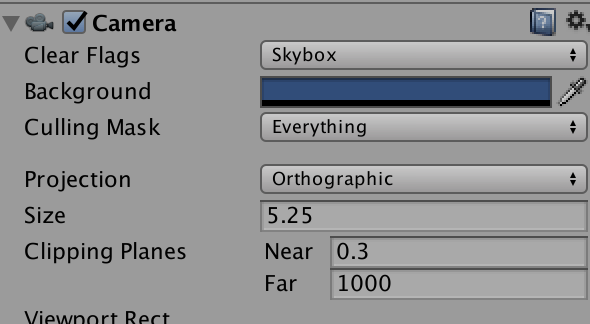
設定後
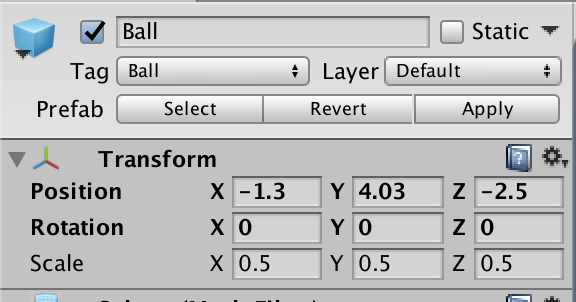
7.SphereからBallを作成する。transformを以下のように設定した後,Ballタグを付与し、Regidbodyをつける。その後適当に表面材質を設定する。
8.BallにBallController.csを付与する。Sylinderに堰き止められて停止してしまったら、そのSylinderを消去する動きをつけている。magnitudeで速度ベクトルの大きさを求められる。
using System.Collections;
using System.Collections.Generic;
using UnityEngine;

public class BallController : MonoBehaviour {

	Rigidbody rb;

	// Use this for initialization
	void Start () {
		rb = GetComponent<Rigidbody> ();
	}

	void OnCollisionStay(Collision coll){
		if (coll.gameObject.tag == "Cylinder") {
			if (rb.velocity.magnitude < 0.005) {
				Destroy (coll.gameObject);
			}

		}
	}

}
8.CreateEmptyからBallGeneratorを作成し、BallGenerator.csを以下のように作成する。
インスペクターからballプレファブを登録。100フレームごとにボールをX軸ランダムに生成する処理だ。
using System.Collections;
using System.Collections.Generic;
using UnityEngine;

public class BallGenerator : MonoBehaviour {
	public GameObject prefab;

	void Update () {
		if (Time.frameCount % 100 == 0) {
			Instantiate (
				prefab,
				new Vector3(Random.Range(-7.0f,7.0f),4.5f,-2.5f),
				Quaternion.identity

			);
		}

	}
}
9.CubeからPlayerを作成する。下図のようにtransformを設定し、表面材質を設定し、Playerタグをつける。
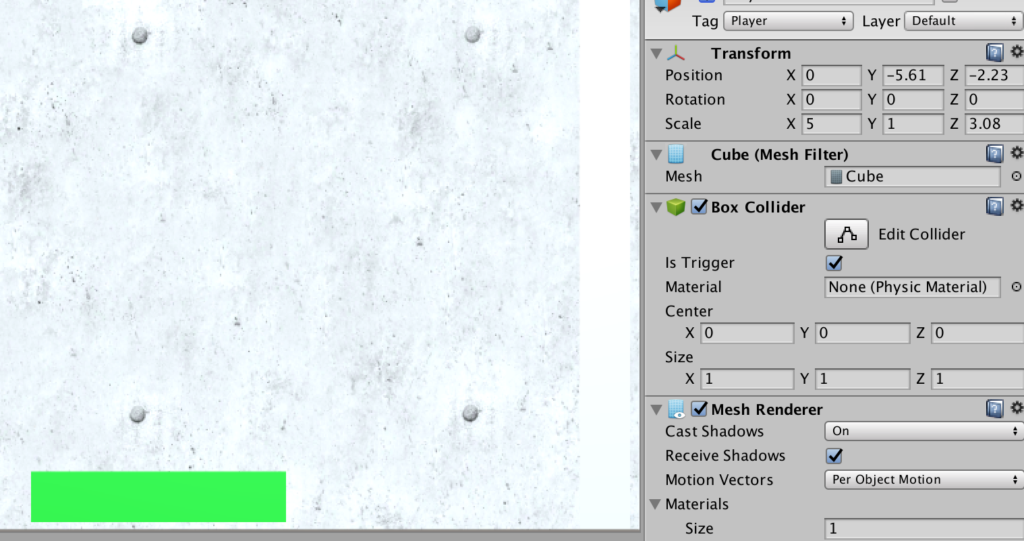
10.PlayerのコライダーのisTriggerにチェックを入れる。
11.PlayerにPlayerController.csを付与する。pubicでGUIStyleを宣言するとインスペクターからフォントサイズなどの設定ができるようになる。
using System.Collections;
using System.Collections.Generic;
using UnityEngine;

public class PlayerController : MonoBehaviour {
	public GUIStyle style;
	int score=0;

	// Update is called once per frame
	void Update () {
		float x = Input.GetAxis ("Horizontal");
		Vector3 vec = transform.position;
		vec.x += x * 0.5f;
		if (vec.x > 6.0f) {
			vec.x = 6.0f;
		}
		if (vec.x < -6.0f) {
			vec.x = -6.0f;
		}
		transform.position = vec;

	}
	void OnTriggerEnter(Collider coll){
		if (coll.gameObject.tag == "Ball") {
			Destroy (coll.gameObject);
			score++;

		}

	}
	void OnGUI(){
		GUI.Label (new Rect (10, 10, 300, 50), score + "", style);

	}

}
12.最後にGameOver判定をするデスゾーンを作成しよう。CreateEmptyからDeathzoneを作成し、下図のようにトランスフォームを設定をする。設定が終わったらAddComponetよりphysics->Box Colliderを付与する。
そしてisTriggerにチェックを入れる。
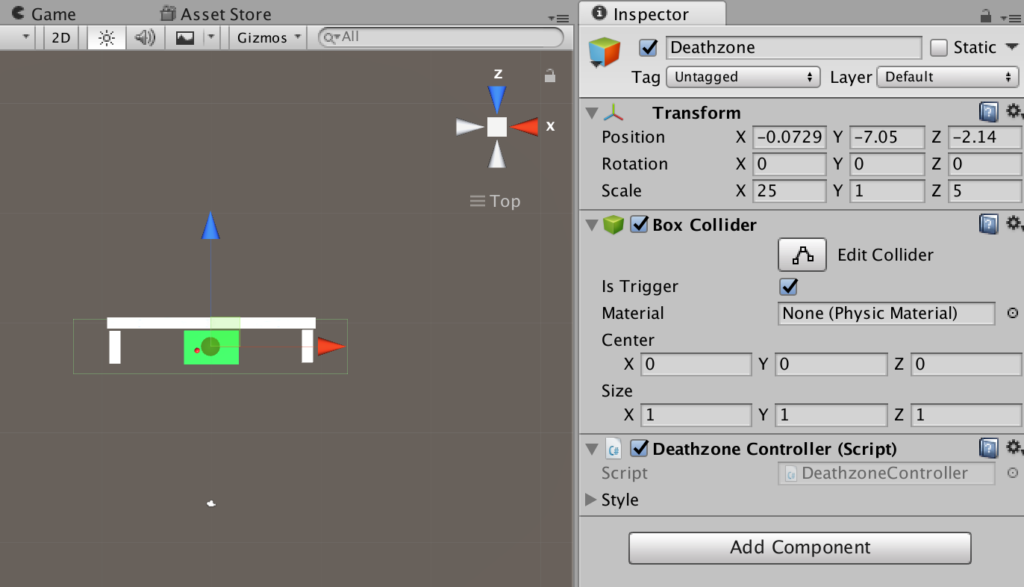
13.DeathzoneにDeathzoneController.csを付与する。一つでも捕まえ損ねるとゲームオーバーとなり処理を停止する。
using System.Collections;
using System.Collections.Generic;
using UnityEngine;

public class DeathzoneController : MonoBehaviour {
	public GUIStyle style;
	string str="";
	bool isPlay=true;

	void OnTriggerEnter(Collider coll){
		str = "GameOver";

		//全ての動き停止
		Time.timeScale = 0f;
		//Update関数にも終了を報告する。
		isPlay = false;

	}
	public bool GetIsPlay(){
		return isPlay;
	}
	void OnGUI(){
		GUI.Label (new Rect (Screen.width / 2 - 160, Screen.height / 2 - 25, 320, 50), str, style);

	}
}
14.BallGenerator.csでボールの生成を止めるように以下のように変更する。
using System.Collections;
using System.Collections.Generic;
using UnityEngine;

public class BallGenerator : MonoBehaviour {
	public GameObject prefab;
	public DeathzoneController dc;

	void Update () {
		if (Time.frameCount % 100 == 0 && dc.GetIsPlay()) {
			Instantiate (
				prefab,
				new Vector3(Random.Range(-7.0f,7.0f),4.5f,-2.5f),
				Quaternion.identity

			);
		}

	}
}
[完成版]
以下からパッケージをダウンロードできる。
コメント